Order and cancellation of VPN account

Information about ordering and cancellation of VPN

Inviting members to a team or channel in Teams

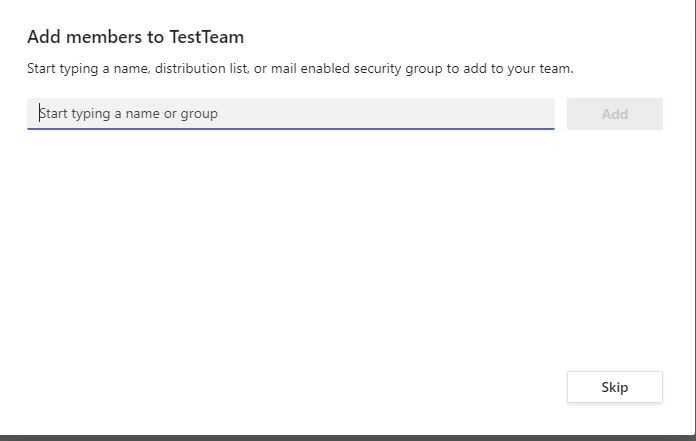
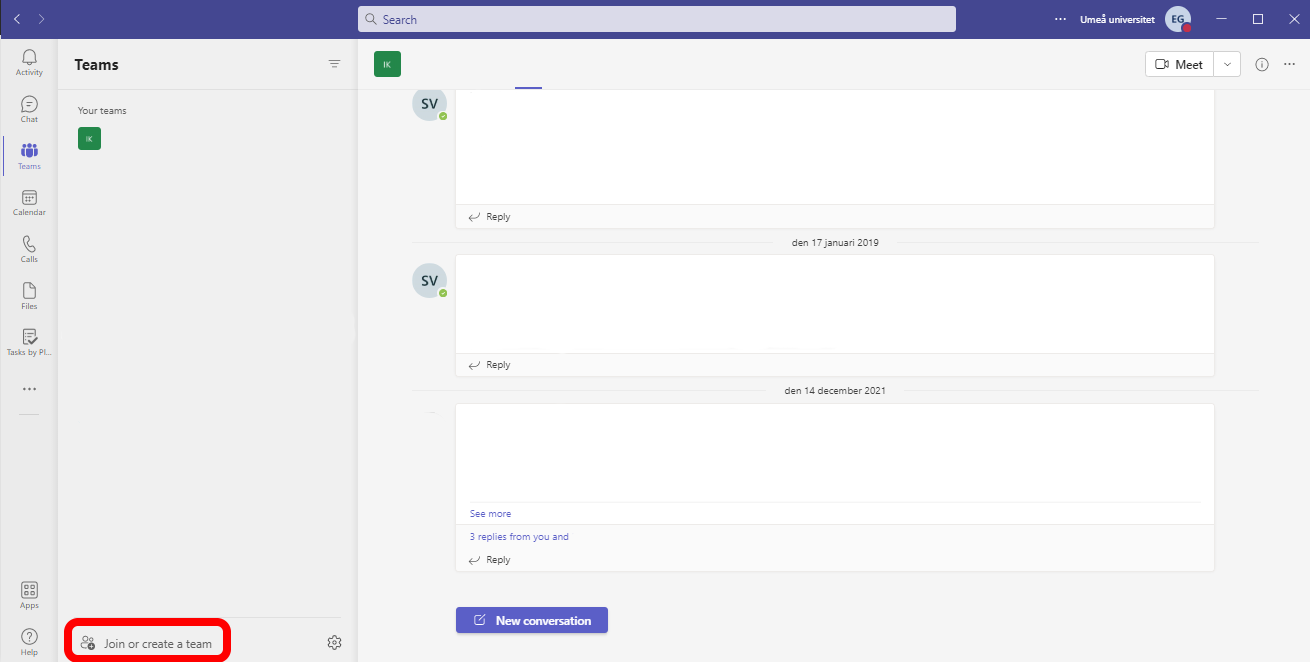
In this manual we describe how to invite members to your team using different methods. Please note that it is possible to invite both internal and external members at the same time. We also describe how an external can join a team.

Inviting an internal member

  1. Find the team that members will be invited to.
  2. Choose the 3 dots to the right of the Team name.
  3. Click Add member.
  4. Search for and choose the persons name from the list and then click on Add.  If you wish to add more than one member at the same time, just keep typing in the names.
  5. When you have chosen your members you must give them rights and permissions. Click on them individually and choose: Owner or Member.

Remember that all students are also in our system. To be sure that you invite the right person, use the Umu-id or email address.

Inviting external members

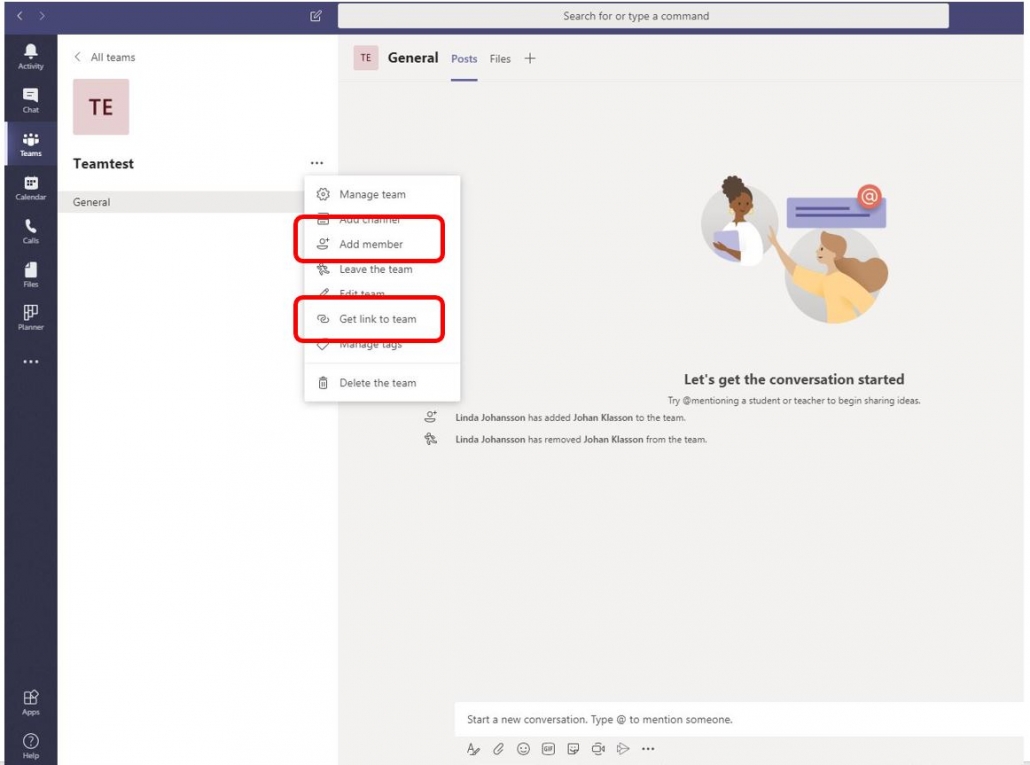
There are two ways in which to invite external members.  Alternative 1 is preferable.

Alternative 1:

  1. Choose the 3 dots to the right of the Team name and then choose  Add member.
  2. Choose Add member.  Write in the persons email address in the window and then choose  Add.  The person will automatically be added as a Guest.

Alternative 2:

  1. Choose the 3 dots to the right of the Team name.
  2. Choose ”Get link to team” > Send to the external person.

Read more on the different types of permissions in Teams

Connect as an external

If you, as an external person are invited to a team in an UMU environment, it is easiest to open an incognnito window and open the invitation link from there. This is to avoid conflicts if you already work with Teams in your own organization.

When you’re asked to sign in, you can do so using your UMU-email address or you UMU-id (umu-id@ad.umu.se).

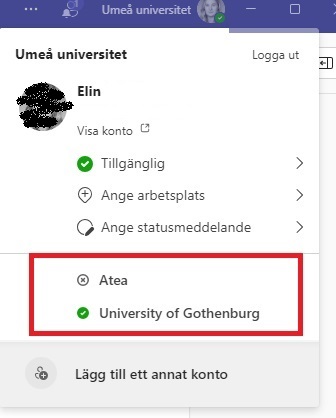
You wont see the team among your other teams in your organization’s environment. You will find the team in your profile i Teams, and will then need to log into UMU’s environment.
Image showing how to se your external teams

Creating a channel in Teams

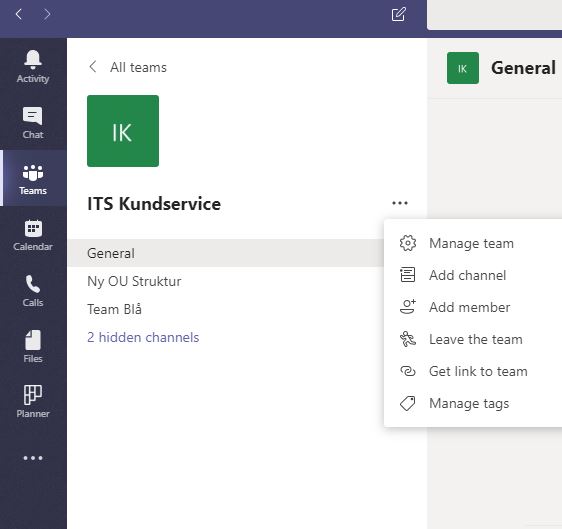
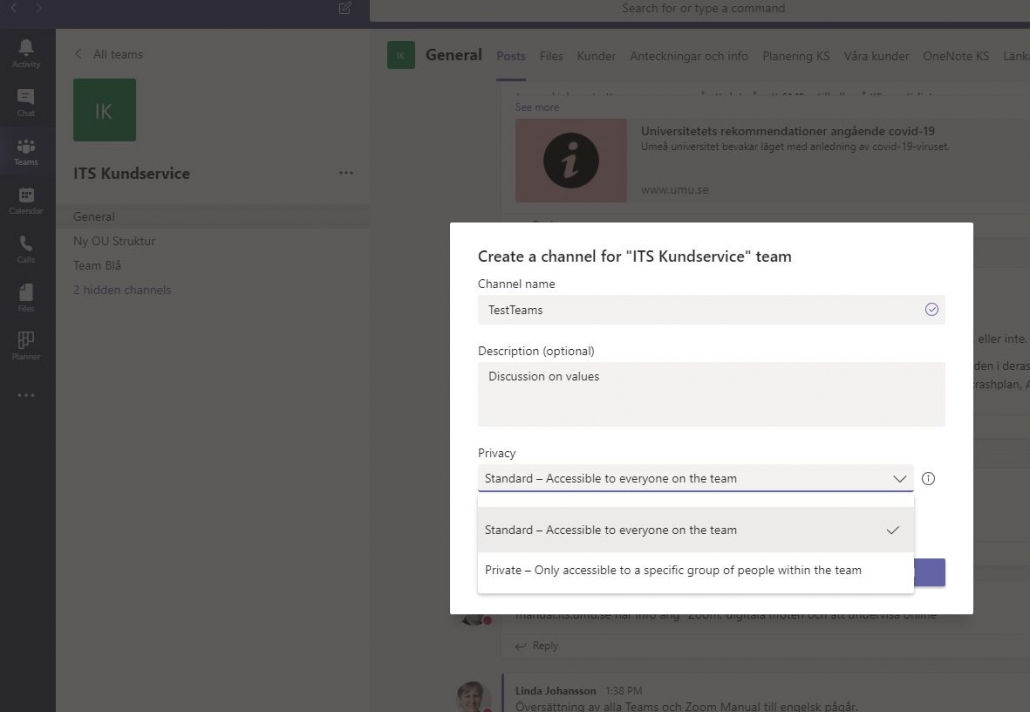
In this manual we will show you how to create a channel in Teams.

  1. Go in to the team you wish to create a channel in.
  2. Choose the 3 dots to the right of the name.
  3. Choose Add channel
    Note that your Teams can look different, especially in colour and layout
  4. Choose a name and description for your channel. You can also choose if the channel should be available to all team members or only a few.
  5. Click on Add. You have now successfully added a channel to your team.

Tips for a successful team in Teams

Create a good base structure

  • What is the main reason for the team? 
  • What does the group need? 
  • Which channels will you have?  ….to start with and why?

Choosing the correct rights and permissions

  • Decide which rights and permissions each member will have with regards to channels, messages and tabs.
  • Always create at least two (2) “owners” of a team.

Understanding channels

  • Discuss the proposed channels with members of your team.
  • Create a clear and meaningful name.
  • Describe the channel and what it shall be used for. 

Communicate clearly within the team

  • Use titles that have a clear meaning to make it easier to understand what they are about 
  • Use the @ to to notify a specific person.  Otherwise the whole team will get the notification of your post. 
  • To answer a post click on “Answer” so that you do not start a whole new conversation.  This way all the threads hang together as well.Click on the A at the bottom of the screen if you wish to change formatting of your post.

Moving Common Files

  • Create a folder for respective files 
  • Upload shared files to the team and remove them from your existing folders so you don’t have multiple documents in multiple places
  • Decide together that from a certain date ALL files will be put into Teams and nowhere else (to prevent multiple copies of documents)
  • If you work a lot with specific files, synchronize your teams files in explorer. That way you can directly access them from your computer.

Notifications in Teams

  • Set up your personal notifications for the entire application, how you want to be notified when someone sends a message to you, etc.
  • Set up channel notifications for the teams/channels you are active in and want to know when someone has updated.

Digital meetings

  • Just as for physical meetings, it is a good idea to prepare an agenda for the meeting.
  • If there are many participants in the meeting, a recommendation is to mute the microphone when you are not speaking. That way, you will avoid any disturbing background noise. When you need to speak, unmute your microphone. If there are only a few participants in the meeting, it will usually be a more active meeting if everyone has their microphones turned on the whole meeting.
  • The meeting will also be more active if all participants have their cameras on. However, if someone has a slow internet connection it may be a good idea to only use the microphone.
  • All participants can use the chat to share documents and links with each other during the meeting. When the meeting is over, the chat is saved, and you can go back to see what was written there.
  • You can share an entire screen, a window, a PowerPoint file, or a Whiteboard with the meeting participants.

Create a “team” in Teams

  1.   Open Teams.  You will find Teams as an app in your computer, or via att log in to Office 365 in your web browser.   Log in with your Umu-id. 
    Log in to Office 365
  2.  In the menu choose  ”Teams
  3. From the menu on the left hand side choose “Teams”
  4. To Join a team or create a team click on  Join or create team (Bottom left hand corner)
    Note that your teams can look a little different in colour and theme


  5. There are four different types of themes.  If the goal is to create a workplace for a workgroup or project you can choose “Other”.
    More information on the types of Teams
     

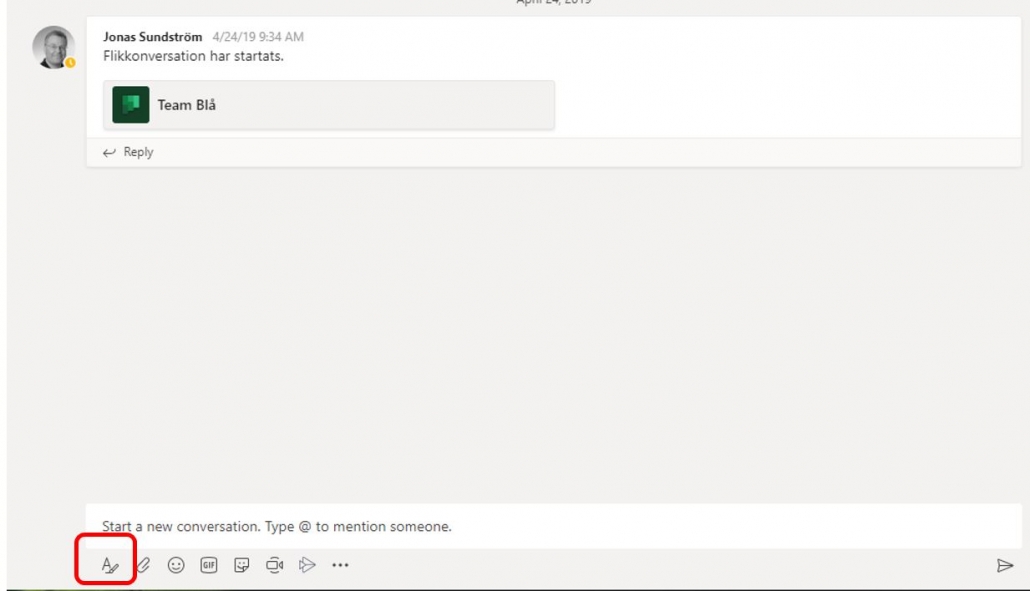
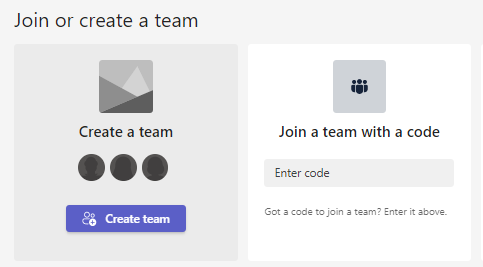
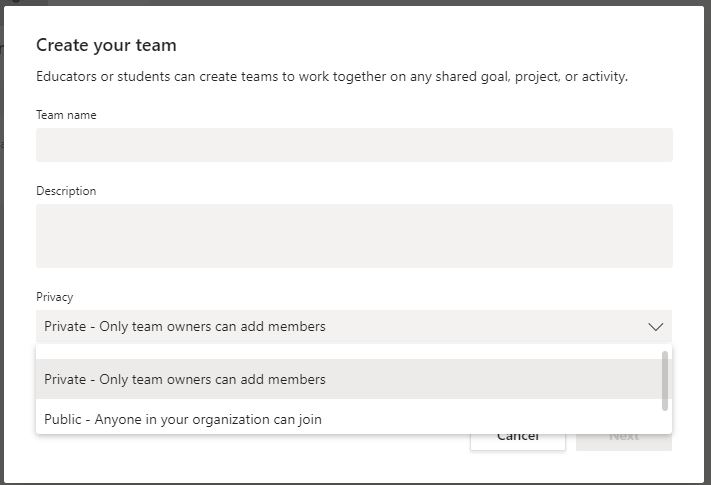
    Once you have chosen your team type it is time to give your team a Name and a Description (you can change either or both afterwards).  You can also choose if your new Team will be a Private team or a Public team.   This team will be the center for your collaboration.  In every team you can later create different channels for more detailed work.

    Creating a channel in Teams (swedish)


  6. The last step in creating your team is to invite members.  In the box you can write in the name of the person or people from within your organisation (one at a time).  Once you have your list click on “Add”.   You can then decide the rights and permissions for each member.  owner or Private.

    More on rights and permissions   If you choose to invite external members to your team you must type in their email address.  They will then receive an invitation with which they can join as a guest.

  7. Your team is now ready for you to work in.

Download Matlab

  1. To download Matlab, login to your account at the MathWorks webpage http://se.mathworks.com
  2. Go to ‘My Account’
  3.  Go to ‘Download Products’
  4.  Choose the main option (Newest version)
  5. Select your platform
  6. Save the installer (for example matlab_R2015a_win64.exe)
  7. Run installer, Follow installation instructions
  8. When prompted to login, login with your MathWorks account

Create an account MathWorks

  1. Go to MathWorks homepage http://se.mathworks.com
  2. Create an account using your umu.se email address
  3. MathWorks will send you a verification email, click the link in the email to verify
  4. When you have clicked the email link you will be taken to a registration page at the MathWorks homepage. Fill in your details (UserID is optional and not nessecary for UmU).
    Activation Key: 17012-57809-58605-43730-43770