Create conversations in Microsoft Lists

In this guide we describe how to start conversations in Lists, through Teams. In that way you can create threads that are connected to specific lists.

Start conversations in Lists through Teams

  1. Go to the Teams channel the list you want to start a conversation about exists.
  2. Choose the row in the list you want to start conversation about, then click on the three dots and choose Open, or click on Comment directly in the upper menu bar.
    Image showing how to open a list in Teams
  3. In this view you find more information about the row in the list, choose Conversation in the menu bar to start a conversation.
    Image showing how to open a conversation in Teams
  4. The chat function is now inserted to the right. Here you can write messages and tag persons you want to mention.
    Image showing how to start a conversation  in a list
  5. When you start a conversation, it is also showing in the main channel and can be seen by the members in the channel.
    Image showing how it looks  like when you have send a message in Lists
  6. In the main channel, others can reply in the conversation, by clicking Reply under the post.
    Image showing ythe published conversation in the main channel

Create a board view in Microsoft Lists

Lists is a tool in Microsoft 365 where you can create, share, and track lists. In this manual we describe how you create a board view.

Observe that the appearance can differ whether you are using Mac or Windows.

Create board view

  1. Go to your chosen list in Microsoft Lists you want to create a board view in.
  2. Choose All objects in the menu bar and then Create new view.
    Image showing how to choose "All items" i Microsoft lists
  3. Now you see the window where you can edit and create you new view:
    1. Add the name you want for your board view.
    2. Then choose Board
    3. Choose how you want to organize your board by clicking the arrow to the right in this field. If you don’t already have any completed columns, it will automatically create a column that is named choice1. If you have completed columns, choose the column you want to organize you board view by (Example: by location, status, or date). Your board view will then be sorted and structured by how you have organized your board.
    4. If you want your list to be public for others, you tic this box. If you want it to be private, you keep this box empty. If you choose to make it private, you are the only one who can see and edit the board.
    5. When you are ready, click Create.
    Image showing how to create and edit your board view
  4. Now your Board view is showing, and here you can Add new buckets and manage your current buckets. You can place your objects to the bucket they belong to and add more object by clicking the Plus-sign in the right corner of each bucket.
    Image showing your board view

Import files to Microsoft Forms

Microsoft Forms is a tool that can be used if you want to create a form or a test. In this guide we describe how to import files with already completed question to Forms.

    1. To open Forms, use this link: office.com, or go to the office portal (o365.umu.se). If you choose the latter option, go to All my forms further down on the page.Picture that bescribes how it looks when you go to "All my forms"
    2. Choose Quick import to import your file.
      Image that shows how it looks when you find "Quick import"
    3. To import the file, choose Upload from this device. Observe that the limit for the file size is 10MB. Now yoy can also click See import guidance to see how to structure your Word-document, or PDF before you upload it.
      Image that shows how it looks when you are about to upload you file
    4. Then pick the file you want to import.
    5. Choose whether you want to create a Test or a Form.
      Image that shows how it looks when you decide if you want to create a form or a test
    6. When the file has converted, you choose if you want to Import another file, or Start reviewing the form/test.
      Image that shows how it looks like when your file has been converted
    7. Now you can edit your imported questions, to make sure they have the correct layout. You can also delete or add questions.
      Image that shows how iut looks like when you can edit your uploaded form

Observe

With this function you can only create question with multiple alternatives, and questions with open text (for example fill in an empty space). For more advanced types of questions you must add them directly in Forms.

Download and install Microsoft 365

Information on how to download and install the Microsoft 365 desktop suite.

Outlook 365 email forwarding

Guides users on how to forward emails from Outlook 365.

Email for students FAQ

An FAQ about the student email.

Delete groups in Microsoft 365

Delete groups in the tool 

You can delete groups in the respective tools where the group is located, such as Planner, SharePoint, and Teams. Note that if you delete a group, you delete everything that belongs to the group. For example, if you delete a group in Planner, you delete the SharePoint site and possibly the Team that belongs to the group. 

Delete group in Planner

  1. Go to Hubben – Planner (office.com), it lists all planners you have authorization to. 
  2. To delete, go under the three dots and select Plan settings.
  3. At the bottom of the Plan Settings dialog window, you can find the button to delete the group.

Delete group in SharePoint

  1. It’s not easy to find all of your SharePoint sites. That’s why you need to search for them, and you can do so with the following link that includes a search query: SharePoint
  2. Select the site you want to administrate. If you are an owner, then under the gear you will receive website information. At the bottom of that window is the Delete option.

Skärmdump site information Sharepoint

Delete group in Teams 

  1. Go to your Teams client and select Team on the menu to the left.
  2. In the listing of teams, you can click on the three dots of the desired team. If you are the owner, you have the option of clicking on Delete team at the bottom of the menu.

Delete one specific team in Teams

Administrate groups through Outlook (Office 365)

If you’ve moved your email to Office 365, you can easily administer the groups you belong to or own through Outlook.

  1. Open Outlook and go to your email box.
  2. Select Groups on the menu to the left.
  3. It lists the groups that you have permission to and that are configured to be visible in Outlook.
  4. Select Group, then open Group Settings in the top menu. In the menu presented, you can administer your group.

Skärmdump som visar Gruppinställningar i Outlook

Add and remove members from a SharePoint teamsite

In this manual, we’ll show you how to add and remove members from a SharePoint team site. Note that you must be the owner of the SharePoint team site to add and remove members.

  1. Go to the SharePoint team site you want to add or remove members.
  2. Click on members in the right corner below your profile.
    add or remove members from a sharepoint group - click on members
  3. Click Add members to add new members to the SharePoint group. (A new box comes up, type in the email address of the person you want to invite).
  4. Click on the Arrow below the person you want to remove, and then select Remove from Group.
    view on where to add or remove members from a sharepoint group

Prepare and create Breakout rooms before a Teams meeting

In this manual, we describe how you as a meeting organizer use breakout rooms in Teams to create meaningful discussions and exchange of ideas. **Observe** that to use Breakout rooms, you need to use the Desktop application for Teams.


We recommend that you prepare your Breakout rooms before the Teams meeting. It is only the meeting organizer (the person sending out the booking) who can do this. (You can create your Breakout rooms directly in the Teams meeting – see this manual). To prepare the Breaout rooms before the meeting, follow these steps:

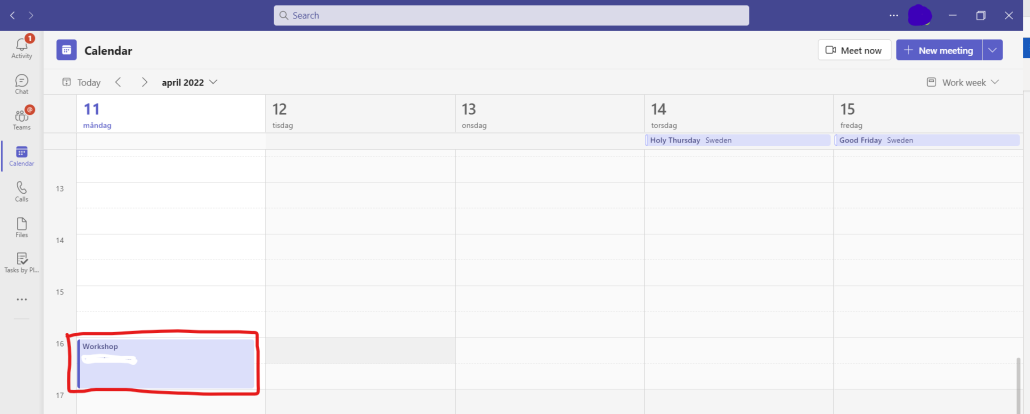
  1. Go to the Teams calendar and double-click the meeting booking that you want to create group rooms within.
    eams calendar and double-click the meeting booking that you want to create group rooms within.
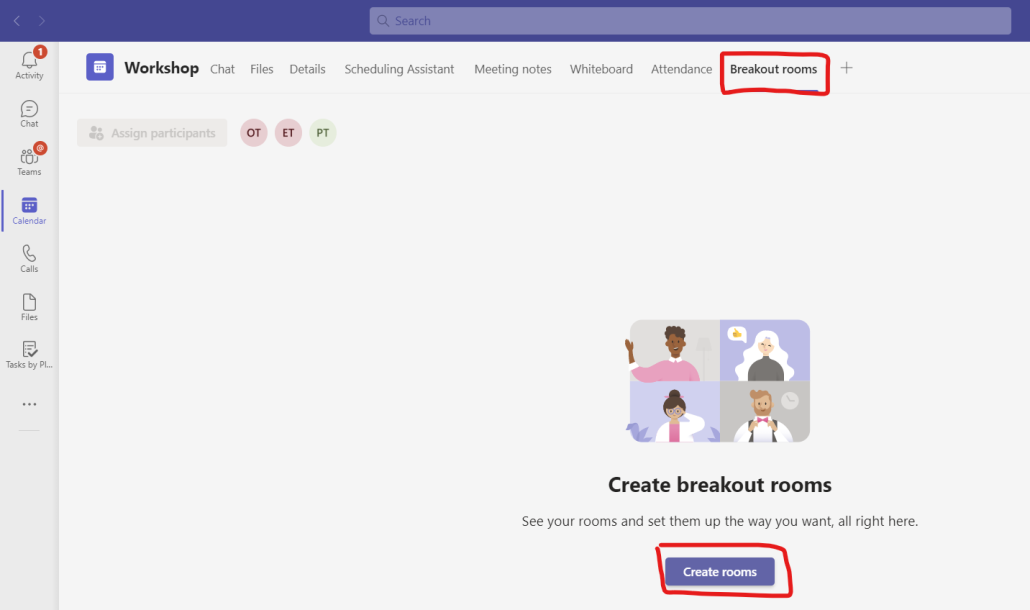
  2. Click Breakout rooms. (If you don’t see a Breakout rooms, click more and select Breakout room)
  3. Click on Create room
    Click Breakout rooms and create rooms
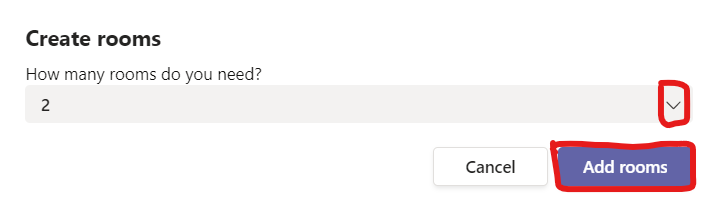
  4. Click the Arrow and select how many rooms you want and than click Add Rooms. (You can change the number of rooms later, don’t worry).
    Click the Arrow and select how many rooms you want and than click Add Rooms.
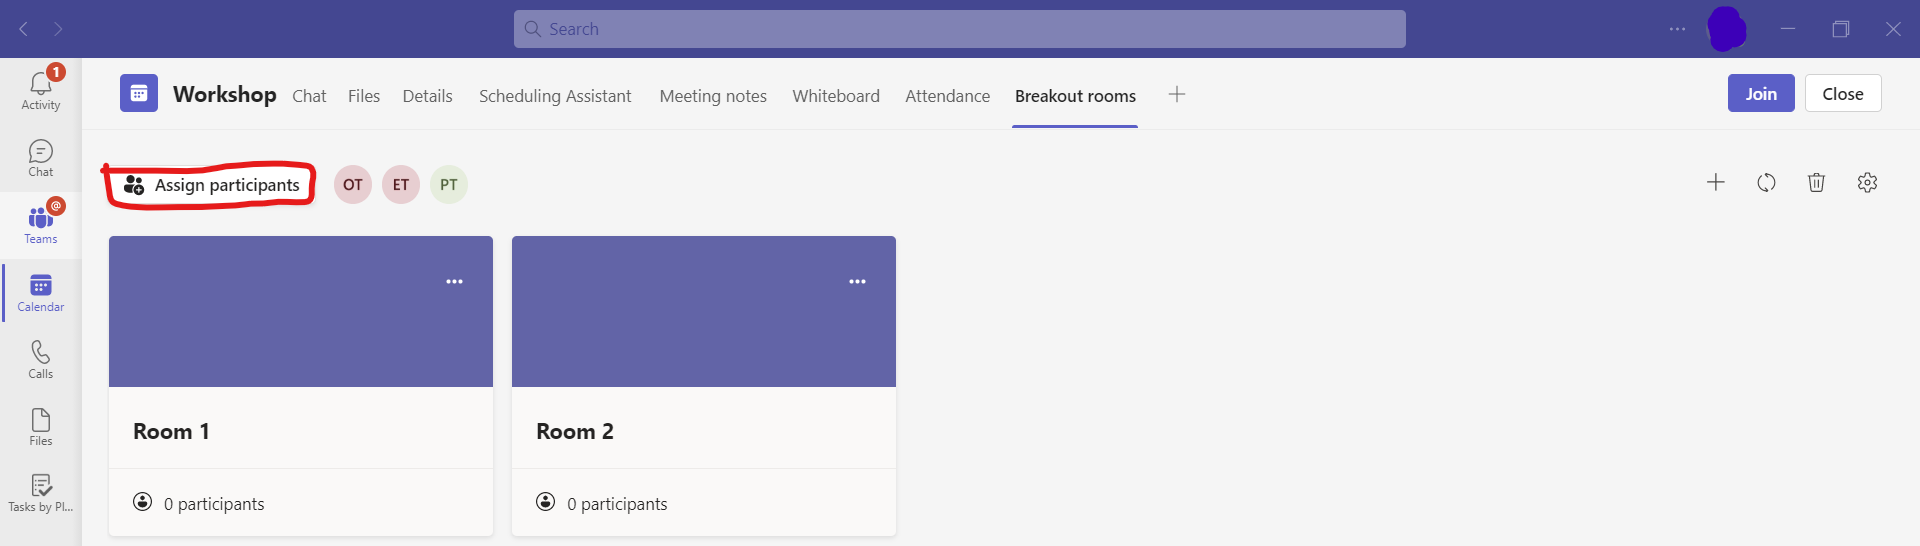
  5. Now it is time to assign participants in the rooms you’ve created. Click Assign Attendees.
    assign participants in the rooms you've created. Click Assign Attendees.
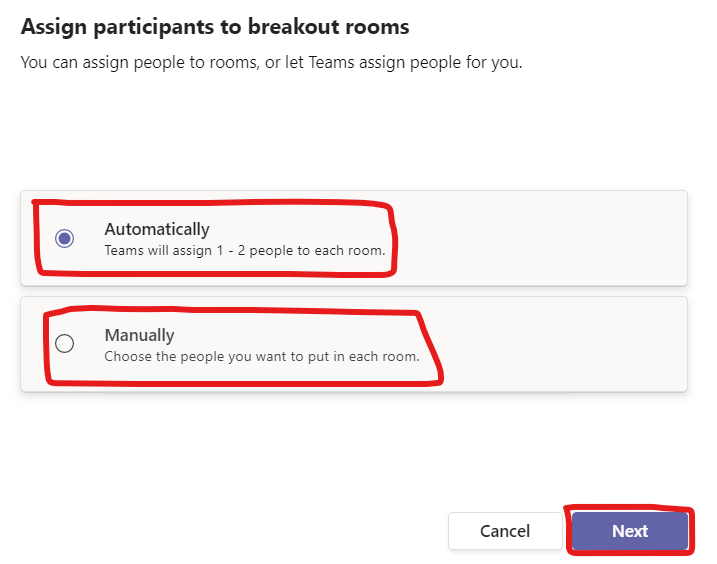
  6. Select Automatically to automaticly assign particpants to the number of rooms (in this case, 2 rooms) you’ve created.
  7. Select Manually to choose which room the participants should be in.
  8. Click Next
    Select Automatic to automatically or manually assigning atendees
  9. If you selected automatically go to point 12.
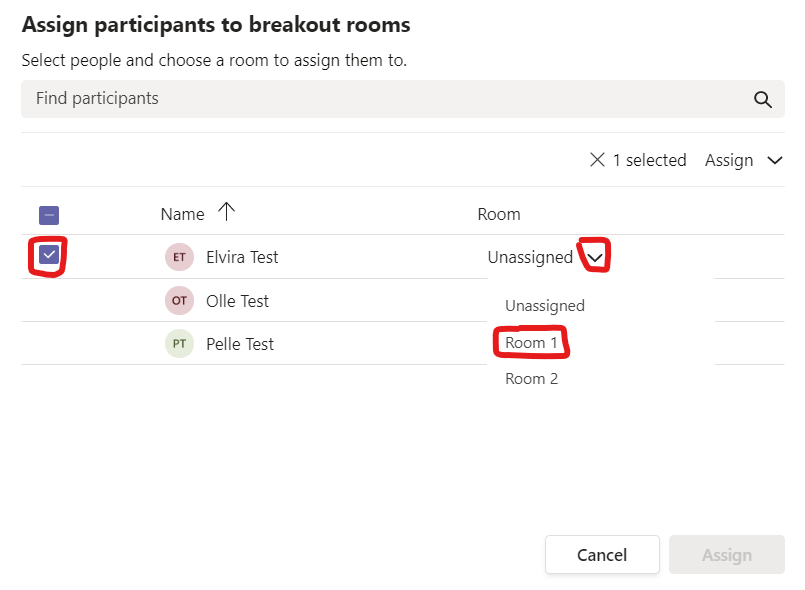
  10. If you chose manually, then it is now time to choose which room the people should be in. All people invited to the meeting are gathered in a list. Select the check box next to the person, and then click the Arrow, and then select which room.
    Assign participants to break outs
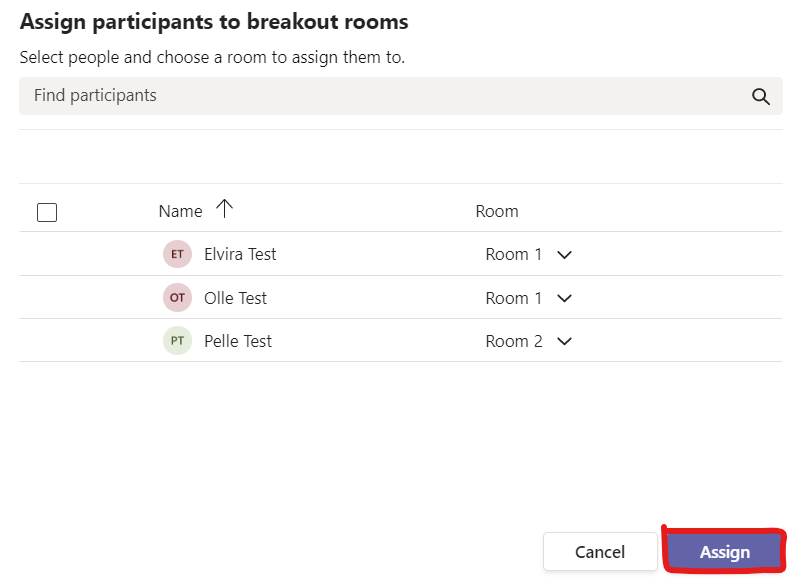
  11. Continue the same way with the other people, and then click Assign. It might look like this:
    Assign participants to break outs, select assign when ready
  12. Now are your rooms ready to use. However, before we will show you how to start the rooms during the Teams meeting, here are some more tips on how to make the rooms better.

Other smart settings before the meeting starts

After you have assigned people you can set more settings, change the number or remove rooms, and rename the rooms.
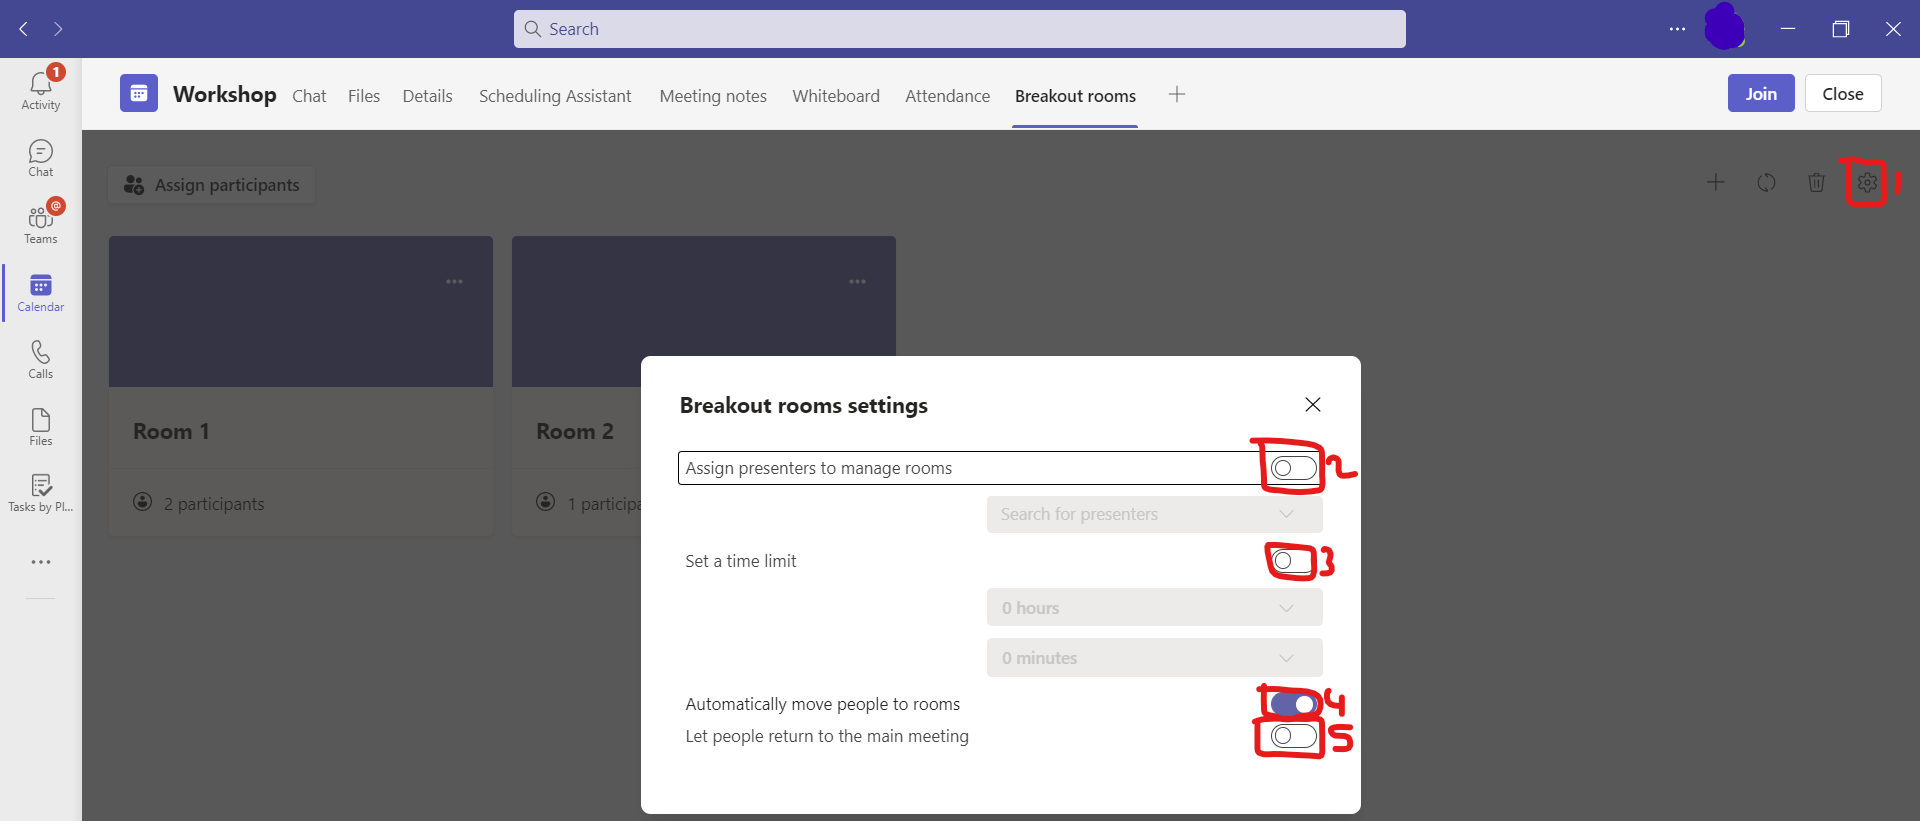
Settings

  1. Click the settings-icon
  2. Click here to assign presenters in the meeting who can help you start, add, or delete people in the breakout rooms during the teams meeting. (A list comes up, type the name of the person you want help from).
  3. Click here to set a specific time limit on the group rooms. (You can select the time in the list below).
  4. Click here to move people automatically to rooms when you click start room in the teams meeting (We recommend that you have this turned on. This means that the people in the rooms are automatically sent out to their rooms when you click “Open” to start the rooms during the teams meeting).
  5. Click here to allow the others to return to the main meeting. (For example, if they want to ask you questions in the main meeting room).Breakout rooms settings view

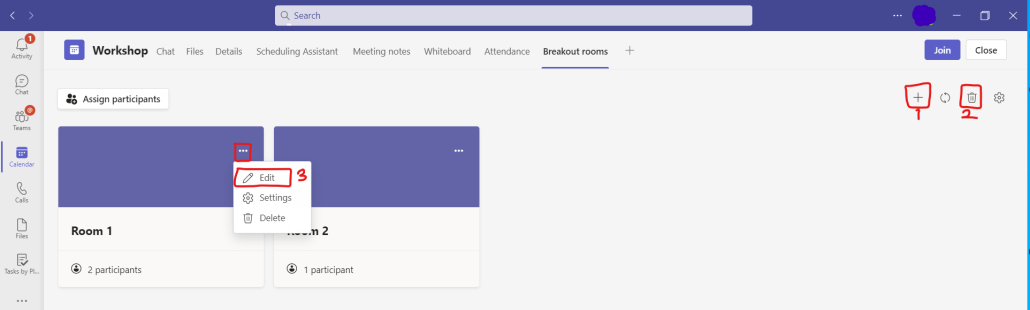
Add more, remove and renamne rooms

  1. Click here to add more rooms
  2. Click here to remove rooms
  3. Click on three dots and edit to rename the room
    Add more, remove and rename rooms

During the Teems meeting

In the Teams meeting, it’s now time to start the rooms. This only takes a few seconds to do since you have already prepared the rooms.

  1. Click on Room-icon. (**Note** If there are people who joined the meeting after you created the rooms, the people will appear above the Assign Attendees button. Then click Assign Attendees and choose which room that person will be in).
  2. Click Open. (The rooms will then open and it will take about 10 seconds before everyone is sent out to their rooms).
    Start breakout rooms during teams meeting
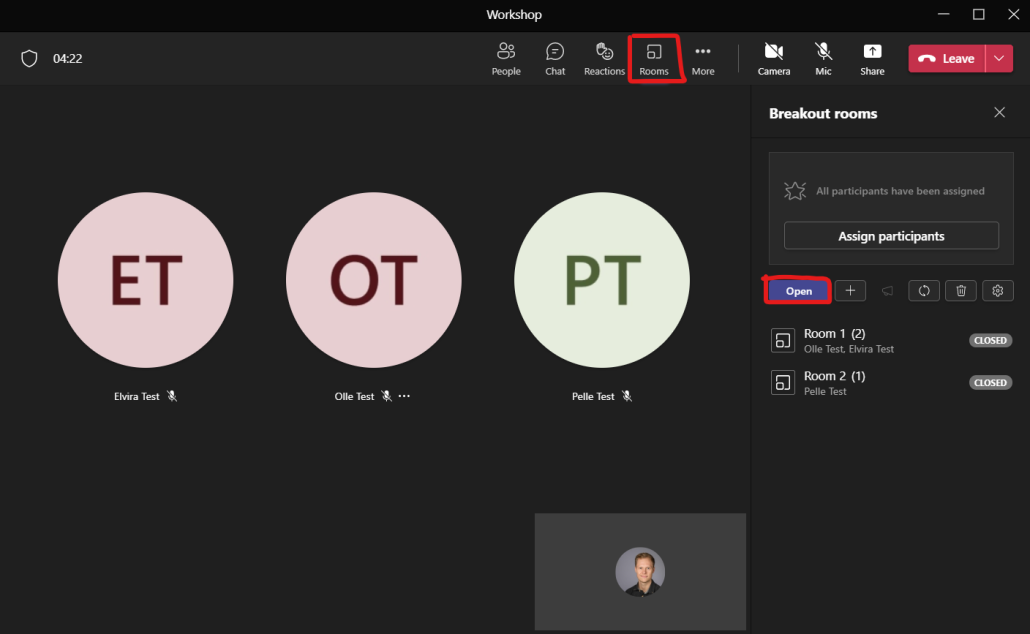
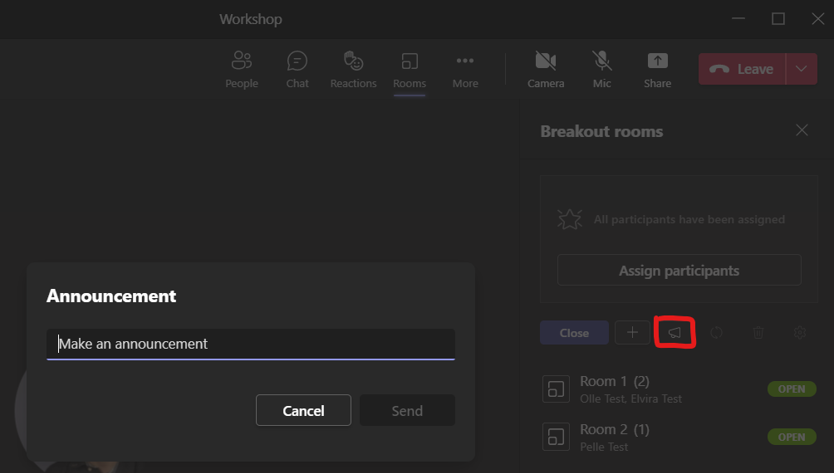
  3. As a meeting organizer – you who are the owner of the meeting and started the Breakout rooms will stay in the main meeting and the people you have chosen will be sent out into the rooms. To send a message to everyone in the rooms click on the trumpet icon and write your message. For example, “5 minutes left.”.
    make an announcement to the other people in the breakout rooms
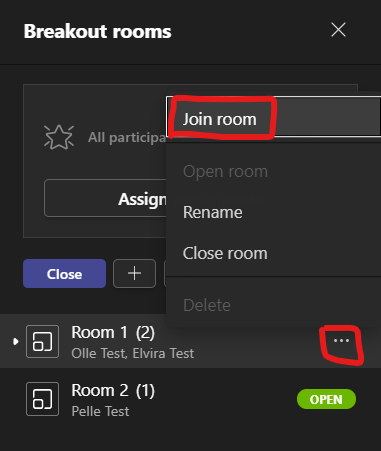
  4. You can also assist the people in the rooms or hear how they are doing by joining a specific room. Select the room you want to join and click three dots and Connect to Room.
    join specific breakout room as meeting organizer
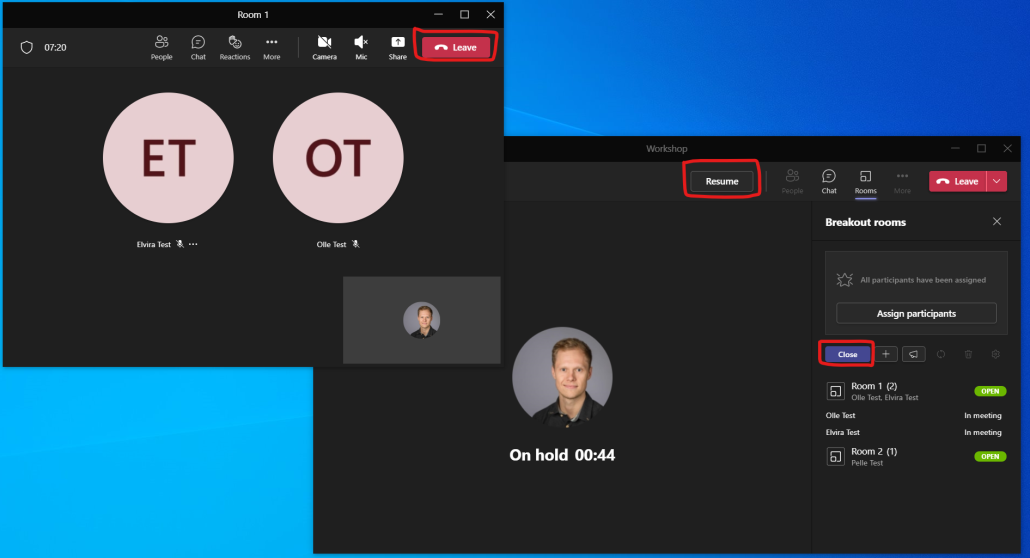
  5. It will then look like this. You will have two teams meetings running at the same time. Room 1 (the left) is active and the main meeting (the right) becomes On hold.
  6. Click Leave under Room 1 to leave the Breakout room.
  7. Click Resume on the main meeting to start the main meeting again.
  8. Click Close to close all rooms. (It takes about 10 seconds for everyone to return to the main meeting).
    Navigation between main teams room and breakout room as a meeting organizer