Create files and maps in SharePoint

This manual describes how you create new documents, files and maps in a current SharePoint group website.

  1. Open your browser and go to www.m365.umu.se.
  2. Search for SharePoint among all the applications in the panel to the left. Click on More applications if you don’t see the app.
  3. Click on SharePoint.
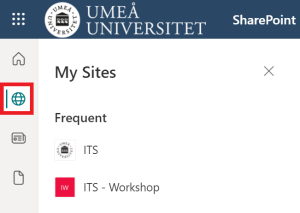
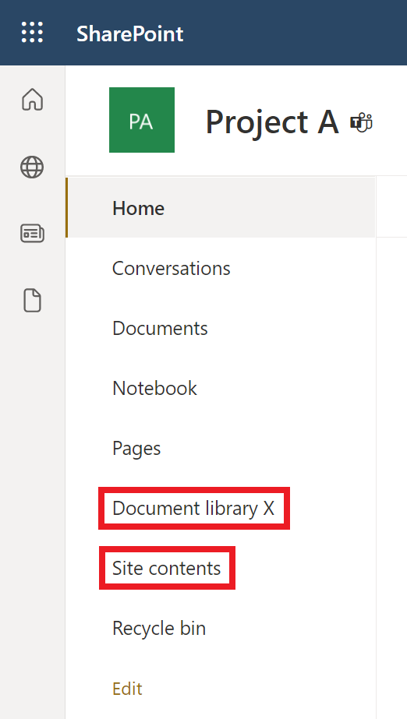
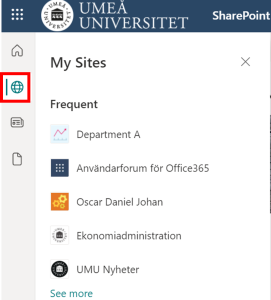
  4. Click on the globe, My Applications, in the menu to the left. In the list that pops up you’ll se all of your group websites. Click on the group website that you want to create maps and files in.
    SharePont - choose sharepoint website
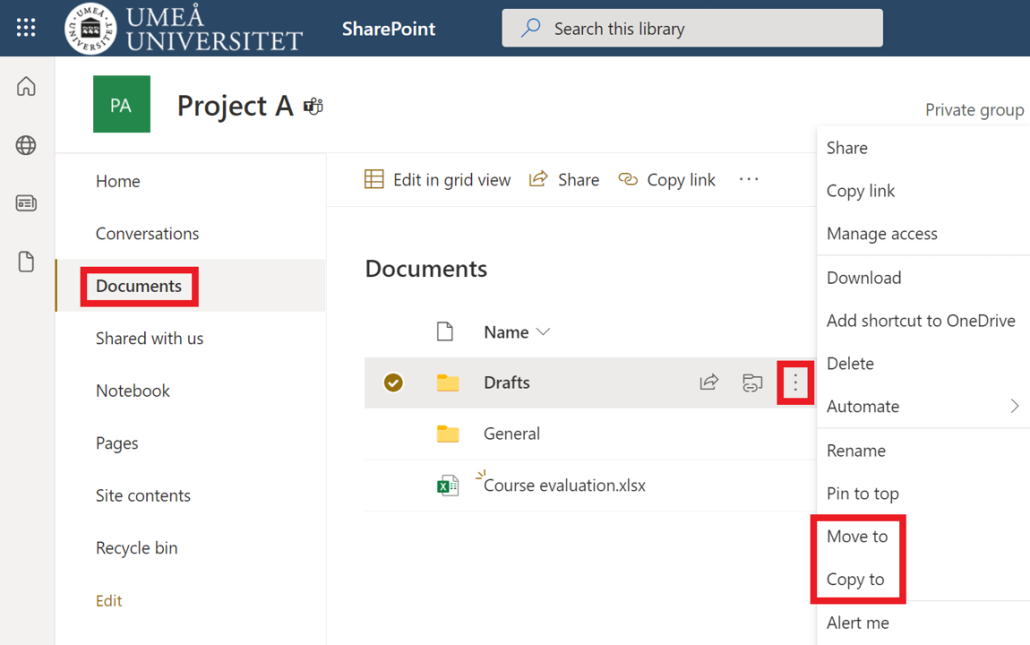
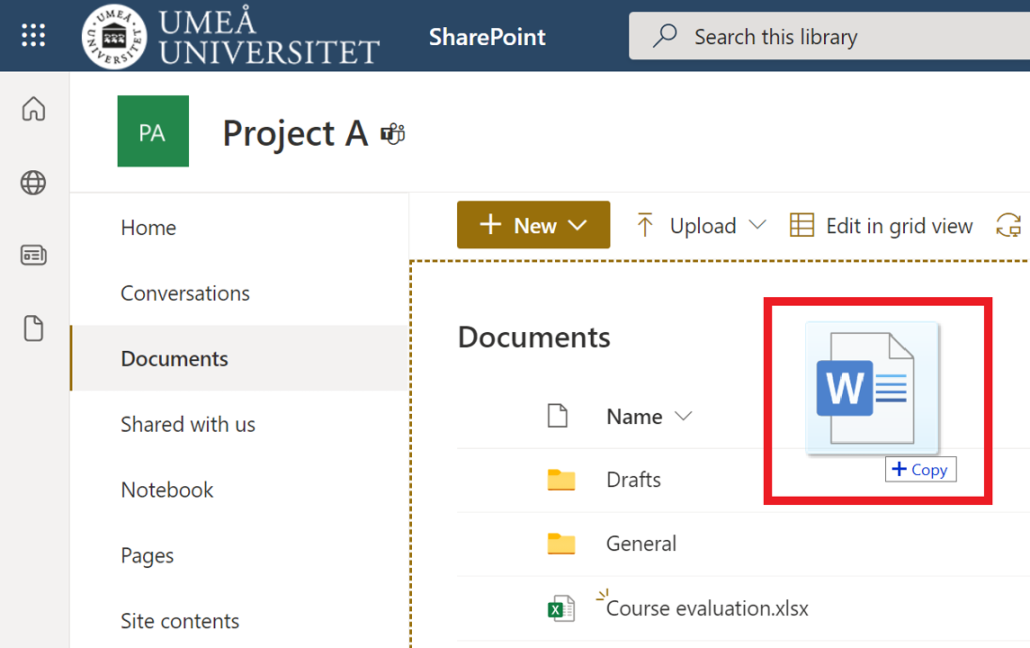
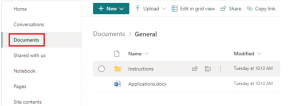
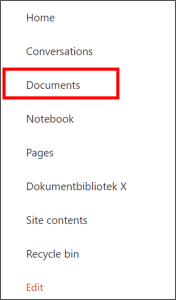
  5. When you’re in the group website that you’ve chosen, click on Documents in the menu to the left.
    create files and maps in sharepoint - choose document tab in left menue
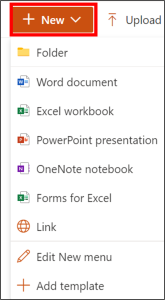
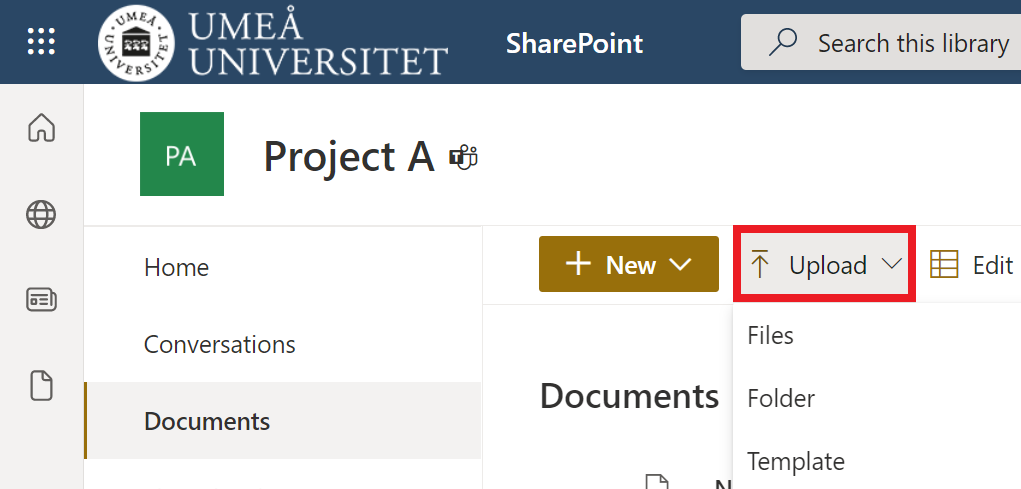
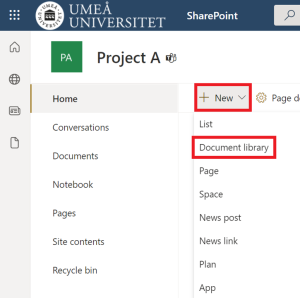
  6. Click on the button New to create a new map or file.

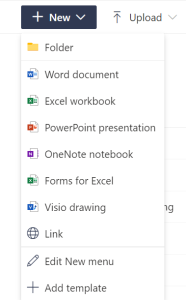
  1. Here you can choose what kind of file you want to create (for example Word, Excel or PowerPoint) or if you want to create a map.
    create files and maps in sharepoint - click on new and chose files or filer to create

Move or copy files in SharePoint

In this manual, we decribe how to move and copy files within and between SharePoint websites. 

  1. Open the SharePoint website and select Documents in the left menu.
  2. Hover the pointer on the file/folder you want to move or copy to see a hidden menu.
  3. Select the three dots.
  4. Select Move to if you want to move the file to another place (the file will be deleted from existing place).
  5. Select Copy to if you want to move and copy the file to another place. (the file will remain on the existing place).
    Move or copy files in SharePoint
  6. A menu will open to the left of the screen, select where you want to move or copy the file/folder to and then click Move here.
    Move or copy files in SharePoint - select place

Upload files and folders in SharePoint

In this manual, we decribe how to upload files and folders in SharePoint document library. If you want to create a new document library see: Create a document library in SharePoint

  1. Open the SharePoint document library you want to upload files to.
  2. Select Upload.
  3. Select if you want to upload a file, folder, or template.
    upload files in sharepoint - upload - select files folder template
  4. Your File Explorer (Windows) or Finder (Apple) will open.
  5. Select a file or folder to upload.

Drag files to SharePoint

  1. Open a SharePoint document library you want to drag files to.
  2. Open your File Explorer (Windows) or Finder (Apple).
  3. Choose a file from your computer.
  4. Drag it from your File Explorer/Finder and drop it in SharePoint document library.
    drag and drop files in sharepoint

Create a document library in SharePoint

In this manual, we show how to create a document library in an existing SharePoint groupwebsite.

  1. Go to www.m365.umu.se and sign in with your Umu-ID.
  2. Select SharePoint in the left menu, if you cannot find it, select All applications and then SharePoint.
  3. Select the globe in the left menu to see your websites.
  4. Select the site where you want to create a document library.
    Create a document libearty in sharepoint - the globe - choose site
  5. Select New in the upper menu, and then select Document library.
    Create a document library in SharePoint - select document liberary
  6. A menu to the left of the screen will open.
  7. Enter a name and a description.
  8. Select Show in site navigation if you want the document library in the left menu of the site.
  9. When you are done, select Create.
    create document liberary name and decription
  10. If you chose to show the document library in the site navigation, you will see it in the left menu. Otherwise, you will find it by selecting Site content.
    Create a document library in SharePoint - new liberary show in menue or site contents


Change settings for shared files in Microsoft 365

To share files/folders, change settings for sharing or stop sharing files/folders in Microsoft 365 you can use m365.umu.se. There you can choose if you want to share files/folders from SharePoint (i.e., Teams) or OneDrive. This manual shows you how to do it in SharePoint, but the same settings work for OneDrive as well. 

  1. Open m365.umu.se and sign in using your Umu-id.
  2. Click on the icon for SharePoint in the left menu.
  3. Select the SharePoint team where the files/folders you want to change settings for are located.
  4. Select Documents in the left menu to view all existing folders and documents on the. SharePoint team. A channel in Teams is viewed as a folder in SharePoint.
  5. Go to the folder or file you want to change settings for.
  6. Place the pointer on the file/folder to view a hidden menu.
  7. Click on the three dots and then Manage access.
  8. Click on the three dots to change your settings.
  9. You can choose if the ones who have access should be able to only read or be able to edit. Click on the area in the picture below. (Note that this setting affects all the people you have shared the file/folder with)
  10. Select Save when you’re done.
  11. You will now receive a control question. If you’re certain that you want to change the settings, select Change it, otherwise select Cancel. Done!

Stop share files in Microsoft 365

To share files or folders, change settings for sharing or to stop share files you use o365.umu.se. There you can choose if you want to stop sharing files or folders from SharePoint (i.e., Teams) or OneDrive. This manual shows you how to stop share files/folders in SharePoint, but the same settings works for OneDrive as well. 

  1. Open m365.umu.se and sign in using your Umu-id.
  2. Click on the icon for SharePoint in the left menu.
  3. Select the SharePoint team where the files/folders you want to stop share are located.
  4. Select Documents in the left menu to view all existing folders and documents in the Sharepoint team. A channel in Teams is viewed as a folder in SharePoint.
  5. Go to the folder or file that you want to stop share.
  6. Place the pointer on the file/folder to view a hidden menu.
  7. Click on the three dots and then Manage access.
  8. Below Manage access you can see a list of the people you have shared the file with. Click somewhere in the area shown in the picture below.
  9. To stop share with one or several people, click on the X next to the name.
  10. When you click on X you will receive a control question. If you’re certain that you want to remove the access from the ones you’ve chosen, click Remove, otherwise select Cancel.
  11. The access is now removed, and you have stopped sharing your files/folders.

Move files between channels or teams in Teams/Sharepoint

This manual will show you how you move individual files in Teams, how to move multiple files or folders and how to move files from a private channel.

Move individual file directly in teams:

  1. Find the file you want to move.
  2. Click on the three dots and select Move.
  3. A new window will appear where you can choose where you want to move your file. By clicking on the arrow you can browse folders, channels or select another team that you have access to.
  4. Select Move. Done!

Move multiple files or folders:

You need to use SharePoint when you move multiple files och folders.

  1. Go to the team where the files you want to move are located. Select Files.
  2. At the top right, click Open in SharePoint.
  3. Select the files of folders you want to move.
  4. Select Move to.
  5. Now a new window will appear to the right. There you can choose where you want to move your files or folders. If you want to move the folders to another channel in the team – click on Current library and select the folder you want to move them to. If you want to move the folders to another team – choose the team you want to move them to.
  6. Done!

Move files from a private channel:

You need to use SharePoint when you move from a private channel.

  1. Go to the private channel where the files you want to move are located. Select Files.
  2. At the top right, click Open in SharePoint.
  3. Select the files you want to move, click on the three dots and select Move to.
  4. If you want to move the files to another team, then select that team. If you want to move the files to another channel in the current team, then select the current team (in this case Project A) and click on the channel you want to move the files to. Note that you should not select “Current library” as it means the private channel.

  5. Select Move here. And you’re done!

Add permission to external guests in SharePoint

In this manual we describe how to invite external users from other organizations to a SharePoint site.

If you already have a team connected to your Sharepoint site, you can invite a member to a team or channel.
If you don’t have a team connected to your SharePoint site, you can add a team to your SharePoint site.

  1.  Go to the homepage of the SharePoint site and select the settings icon in the upper right corner. Then select Site permission.
  2. Select Advanced permissions settings.
  3. You have now accessed the advanced permission interface. Here you can add external users from other organizations by selecting Grant permissions. Keep in mind that the external user will be able to access the entire SharePoint site.
  4. Enter the external users email address. You can also enter multiple email addresses.
  5. Select Share. The people you have invited will now receive an email with the link to the SharePoint site.