
Install eduroam on Windows
On Windows you can install the certificates required for connecting to eduroam with a small application called Cisco Network Setup Assistant.
This guide will help you through the process on how to connect to a temporary network, download the application and use it to install the certificates, and finally connect to the network.
You are required to be at Umeå University’s campus and have access to Umu wifi to be able to complete this guide.
If you are not at campus we suggest you look at the Install eduroam manually guide.
NOTE: This manual is written with the help of a Windows PC running Windows 11 using the 22H2 update and the Edge browser but it should work for earlier versions of Windows 11 and Windows 10 and other browsers but some of the images might not look the same for you if you are using a different version of Windows or another browser. Also note that Window 8.1 and earlier is not compatible with this guide.
Step 1 - Connect to the temporary network Umu wifi
Step 1 – Connect to the temporary network Umu wifi
Umu wifi is a temporary network for this purpose and should only be used at this time when installing eduroam with Cisco Network Setup Assistant.
To get started you need to be on Campus where the network Umu wifi is available.
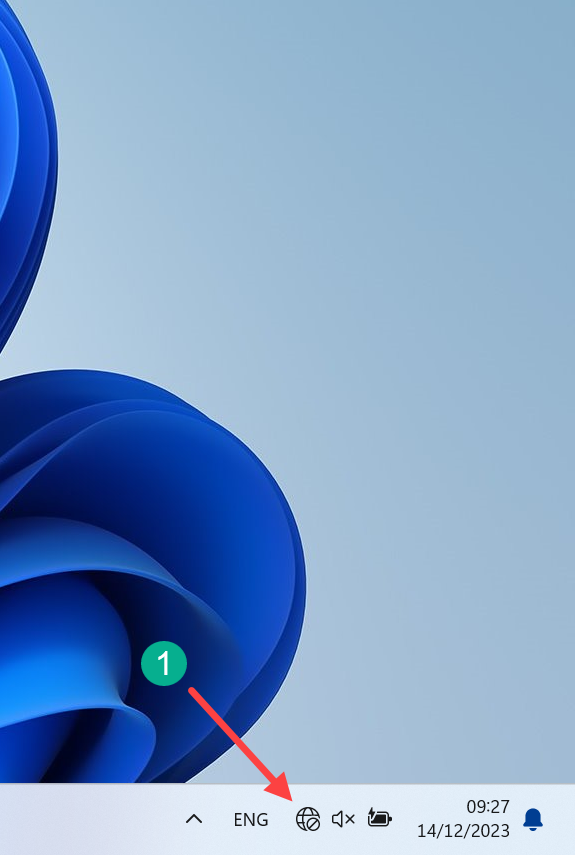
Click on the Globe next to the clock in the taskbar (1).
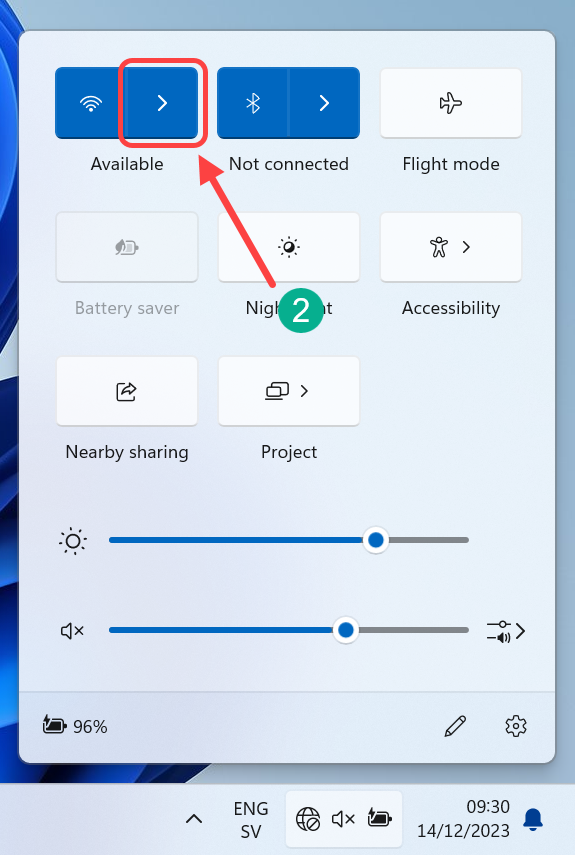
Click on the arrow to show available networks (2).
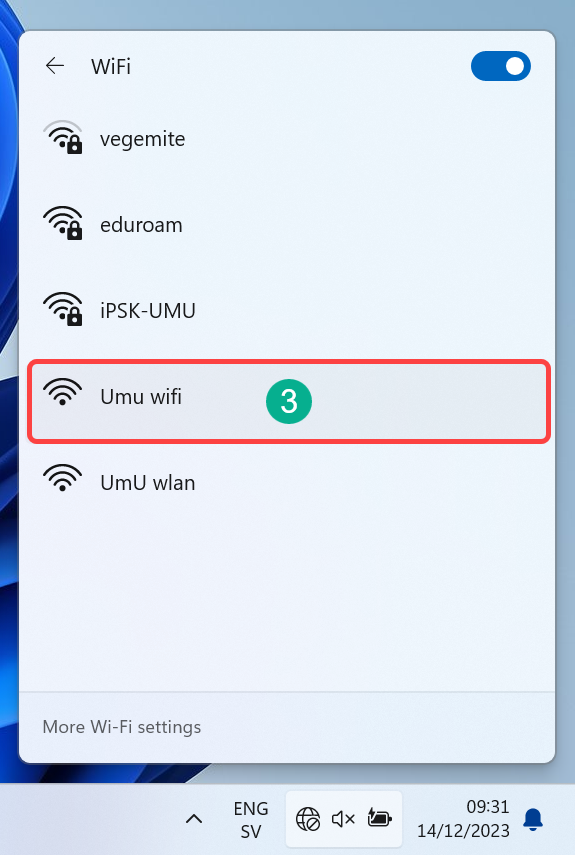
Click on Umu wifi (3).
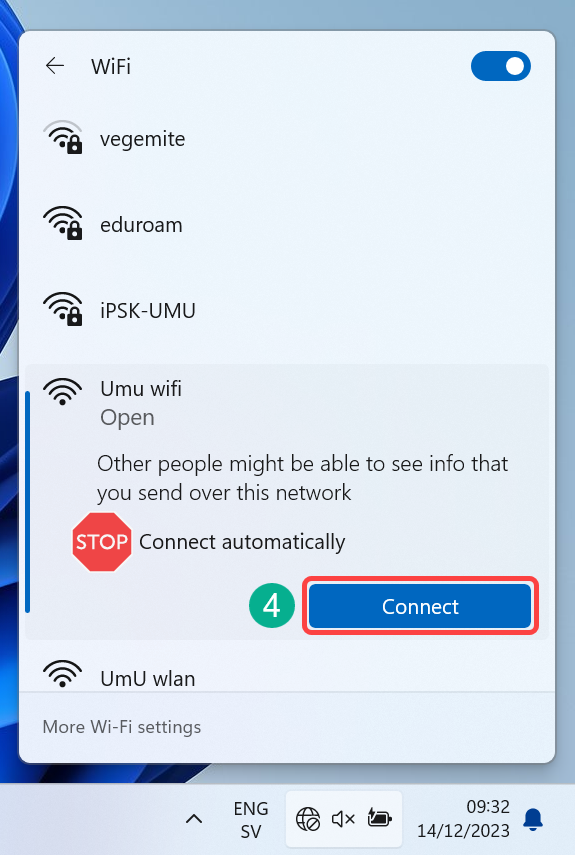
Click Connect (4).
You should NOT click the Connect automatically checkbox.
Your default browser should automatically open and you can go to Step 2.
Step 2 - Sign in
Step 2 – Sign in
After connecting to Umu wifi your default browser should open, in this manual Edge is used, and a sign in form should be shown.
Here you sign in with your Umu-id (1) and Password (2) and then click Logga in (3).

You can now go to Step 3.
Step 3 - Download Cisco Network Setup Assistant
Step 3 – Download Cisco Network Setup Assistant
After you have logged in you will see the Get edurom portal and we can download the application.
Make sure that Windows is show under Select your Device (1) and then click Start (2).
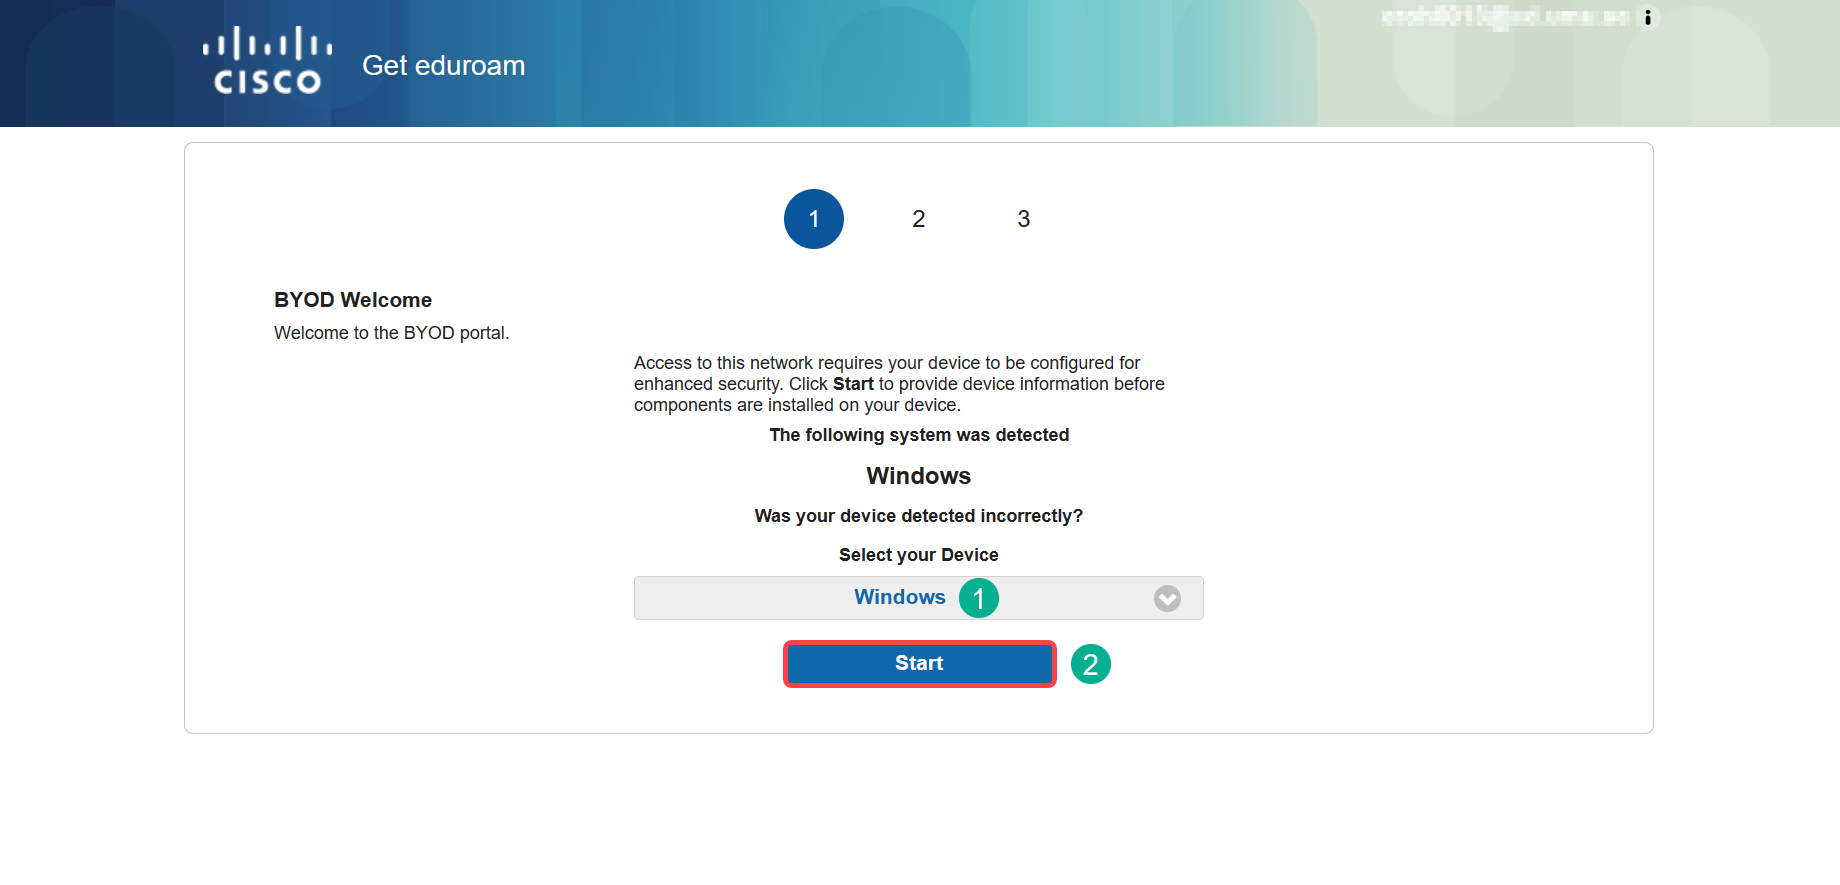
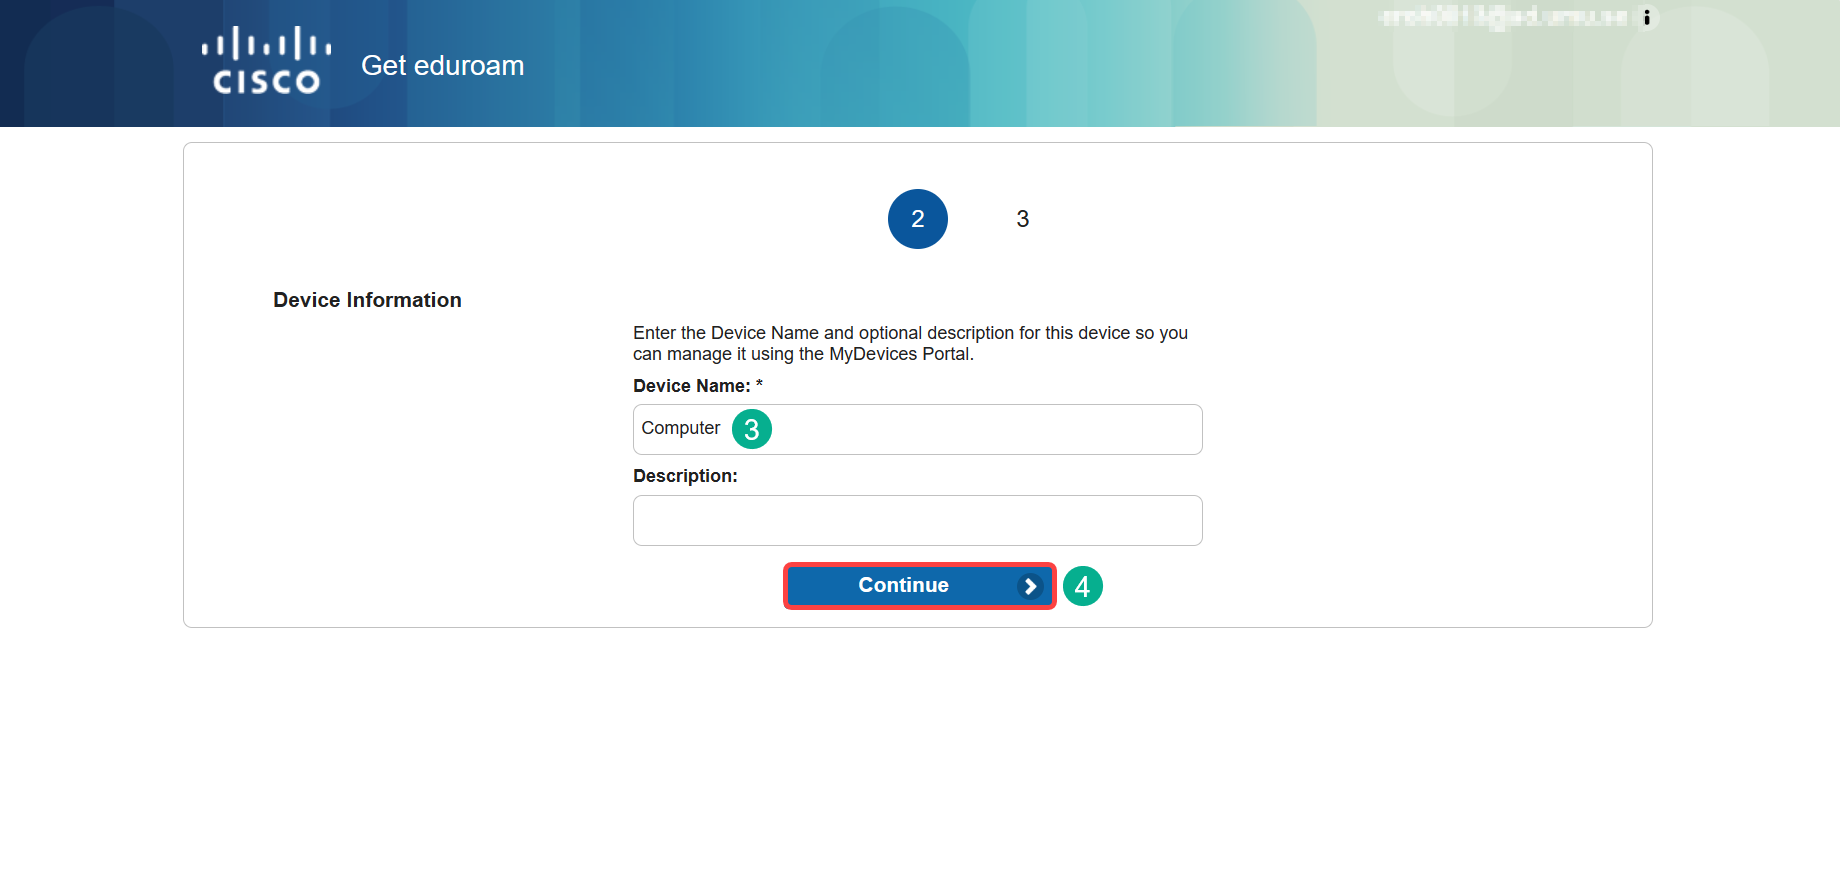
Give it a random Device Name (3), this is required. Description can be skipped. Click Continue (4).
The Cisco Network Setup Assistant application will now automatically download and you will most like get a warning. The application is safe so click on Keep (5).
NOTE: Other browsers may behave different so make sure you keep the downloaded file.
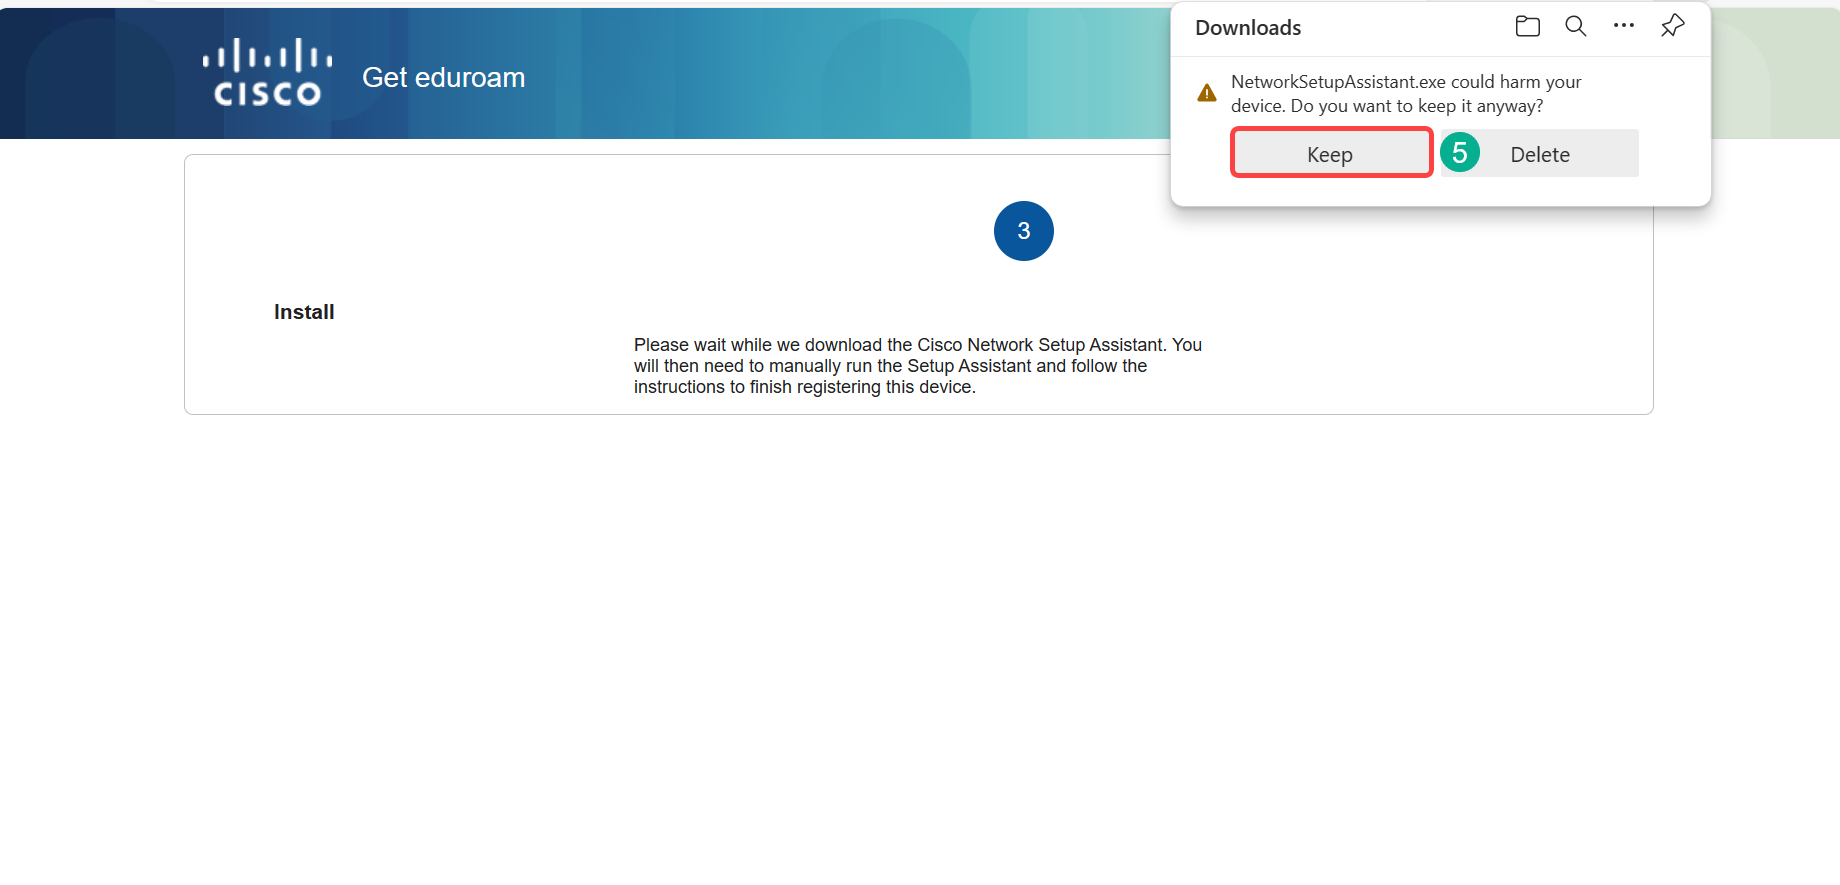
In this case we can run the application from the browser so click on it (6) and it should open and you can go to Step 4.
NOTE: In some cases you might need to open the application from Windows Explorer and it should be found in the Downloads folder.

Step 4 - Install Cisco Network Setup Assistant
Step 4 – Install Cisco Network Setup Assistant
After you have started the application you will most likely get a warning from SmartScreen since you are not connected to the internet. This is OK and just click on Run (1). You will also most likely get a warning from User Account Control that is making sure you are an administrator on the computer your are installing on, click on Yes.

The Cisco Network Setup Assistant will finally start and guide you through the process of installing the certificates. Click Start (2).

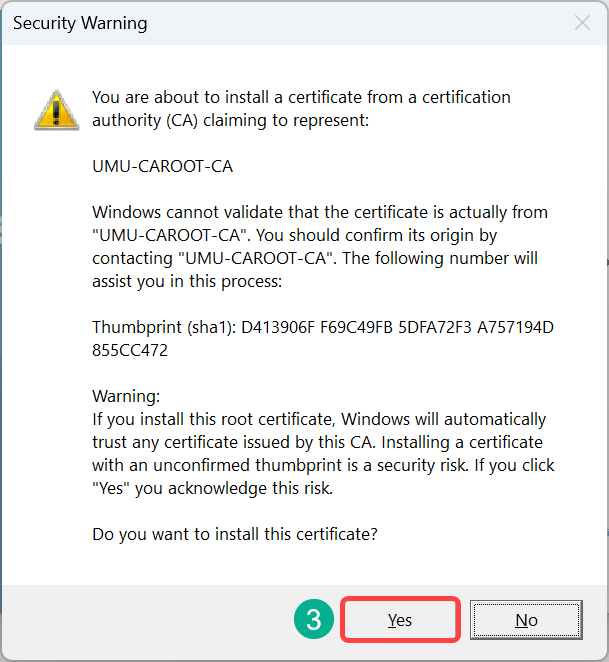
A Security Warning regarding the root certificate will be shown, click on Yes (3).
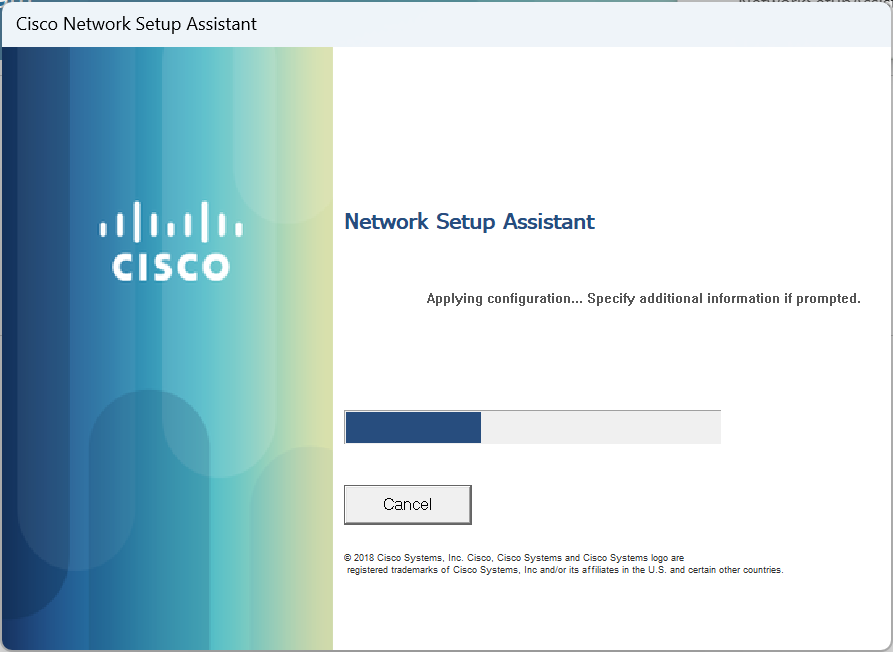
Let the application finish.
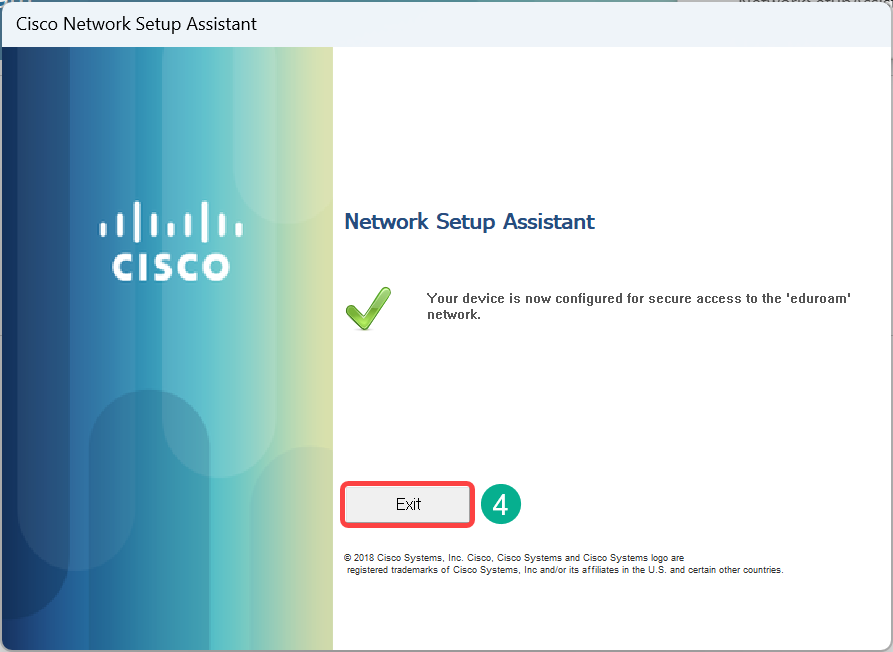
When done you will see a big friendly green checkmark and you can click on Exit (4) and go to Step 5.
Step 5 - Connect to eduroam
Step 5 – Connect to eduroam
If your Windows computer behaves as expected you should actually be automatically connected to eduroam after the process in Step 4.
You can verify this by looking at the now Wifi symbol (instead of the Globe) next to the Clock in the taskbar. If you hover over the Wifi symbol it should say eduroam and Internet access, see screen shot below.

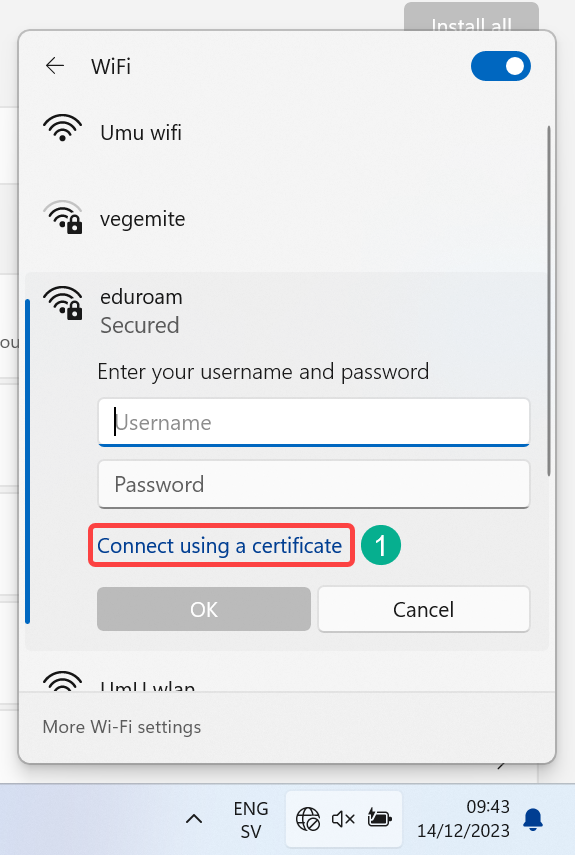
If you however is not connected automatically you need to open the list of available networks and connect to eduroam. Click on Connect using a certificate (1).
Now you can click Connect (2).
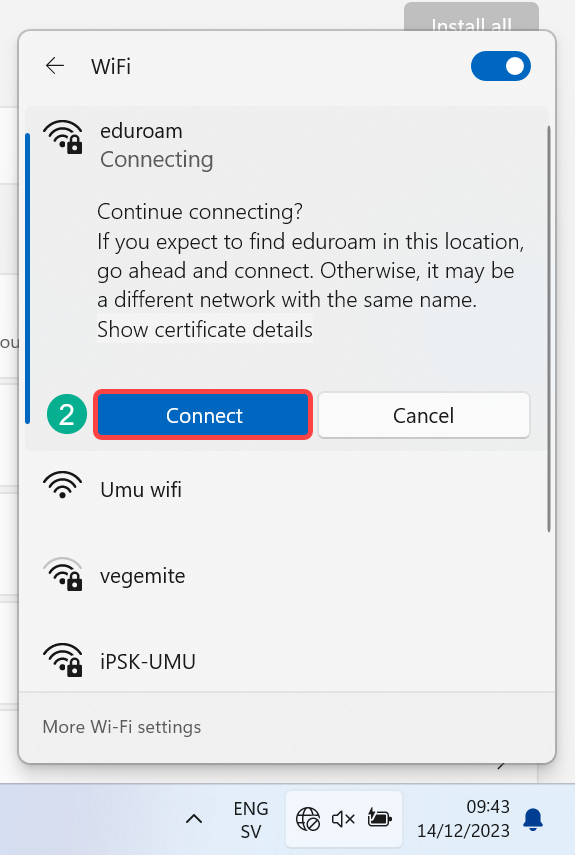
Some times you need to manually choose the certificate to use. If this happens, in the drop down list pick the one that is formatted Umu-id@ad.umu.se or Umu-id@umu.se (Umu-id is for example abcd0123 or abcdef01).
If you still need assistance contact ITS Servicedesk, se the big button below.