
Create a scientific poster in the graphic design tool
This manual presents what settings the scientific poster template offers in the graphic design tool.
- Open the document template “Vetenskaplig poster / Scientific poster” in the tool. Go to the graphic design log-in page.
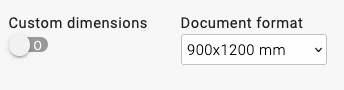
- First, choose the size of the poster. You can choose among the predefined formats or customise the size.
- Select a logo by choosing English or Swedish, depending on which language you are writing in.

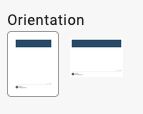
- Your next choice is “Orientation”. Choose between portrait or landscape format.
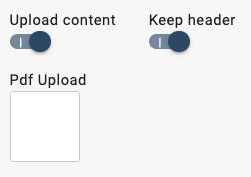
- The template allows you to download and use your own content at the same time as it allows you to follow Umeå University’s visual identity by placing the logo in the right place. You can choose to use the template’s standard header. Click the white box to upload a print-optimised PDF with high-resolution images. Please bear in mind that creating a PDF of that quality requires a certain level of proficiency.
- In the next step, you can enter text for the page header (which is the blue box at the top of the page seen in the preview to the right of the screen). This box holds the headline, subtitle, authors and any potential footnote.
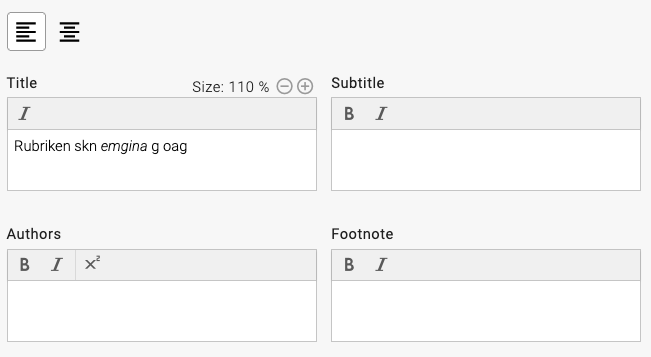
- Start by choosing alignment as left or centre. (You can always go back and change this setting later depending on what looks best.)
- Enter the headline, which is automatically bold, but you may choose to italicise your headline. You can change the size of the headline using the plus and minus buttons above the text field.
- The subtitle can either be made bold and/or be italicised.
- Text in the Authors field can be made bold and/or italicised. You can also add a footnote to the authors.
- Footnotes are intended for organisational affiliation such as a department. Organisational names are often long, so use one footnote for each department and add that number to all names affiliated to the corresponding organisation.
Example: Name Surname1,2, Name Surname2
Footnote: 1. Department of Social Sciences, Umeå University, 2. Department of Natural Sciences, Luleå University of Technology
- The next field should contain your preamble, which is an introductory text. Try to keep the text short. This text will be slightly bigger in font than the main text. This text can also be made bold and/or be italicised.
- Your next choice is if you want to use a large image for your poster. There are three positionings to choose from under “Placement”. Remember to give credit to the photographer or illustrator under Caption & source. Learn how to insert an image.
- After this step, you can add your main content to the page. A text field is standard and is ready to be filled with text. If you overfill the text field, text will flow onto the next column.
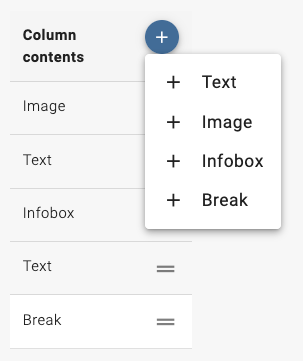
The blue plus sign contains further modules you can add and fill with content. Any module you add is listed underneath. By dragging the module by the two lines, you can rearrange the order of the modules. These modules are available:- Text: To insert a fact box or add an image in the right place of the text, it may be necessary to distribute your text into several text modules. You can choose between two fonts for your main text. The text modules allow you to choose between two headline sizes, and italics is available for both.
Standard format for main text is “Normal” but you can choose italics and/or bold. You can also add ordered and unordered lists to the text. - Image: Here, you can insert an image to the width of one column. Remember to specify the source or name of photographer/illustrator in the Caption & source field. Learn how to insert an image.
- Infobox: In the infobox module, you can highlight particularly important text by placing it in a box with a coloured background. You can choose between four colours from the visual identity. There are two fonts to choose between if you wish to make it stand out more from the main text. You have the same opportunities to format text as in the text module.
- Break: You can actively choose to break a column allowing the text to flood into the next column using the break module.
- Text: To insert a fact box or add an image in the right place of the text, it may be necessary to distribute your text into several text modules. You can choose between two fonts for your main text. The text modules allow you to choose between two headline sizes, and italics is available for both.
- In the next step, you can specify your department and address. This can either be placed in the footer or in the right-hand column, depending on where there is most space.
- There is also a function to upload and position collaborator logos (up to four). If you have the need for more logos, you can create a joint image including all logos and upload them as one logo. If they will still not fit, you can consider placing them in one column as one image.
- This is the entire form. Be sure to save your work regularly. If you plan to send your poster to a printing office, you need to close the document. In the next view, you can place the document in the media basket. The media basket gives you a few options to choose from:
- Paper: This has the fastest delivery time, but is fragile.
- Laminated paper: By laminating the paper, it is given a protective layer.
- Textile: If you plan to travel with your poster, textile is a good choice. You can easily fold the poster and pack it in a suitcase. Once you arrive, you can carefully iron it or hang it in a bathroom to let the moisture smooth the creases. Please note that all delivery times specified apply to collection at Infocenter on Campus Umeå. You will receive a message when the poster is ready for pick-up. If you wish the poster to be delivered elsewhere, you need to account for an additional 1–2 working days for delivery.