Add/remove members in a shared mailbox in Outlook (webmail)

If you own a shared mailbox, you should regularly check the members in the group. This is because members are not automatically removed from the group when someone, for example, changes departments or leaves the university. Here are instructions on how to add or remove members from a shared mailbox.

Manage via the Portal

  1. Go to the portal: Distribution groups – Outlook Web App (office365.com)
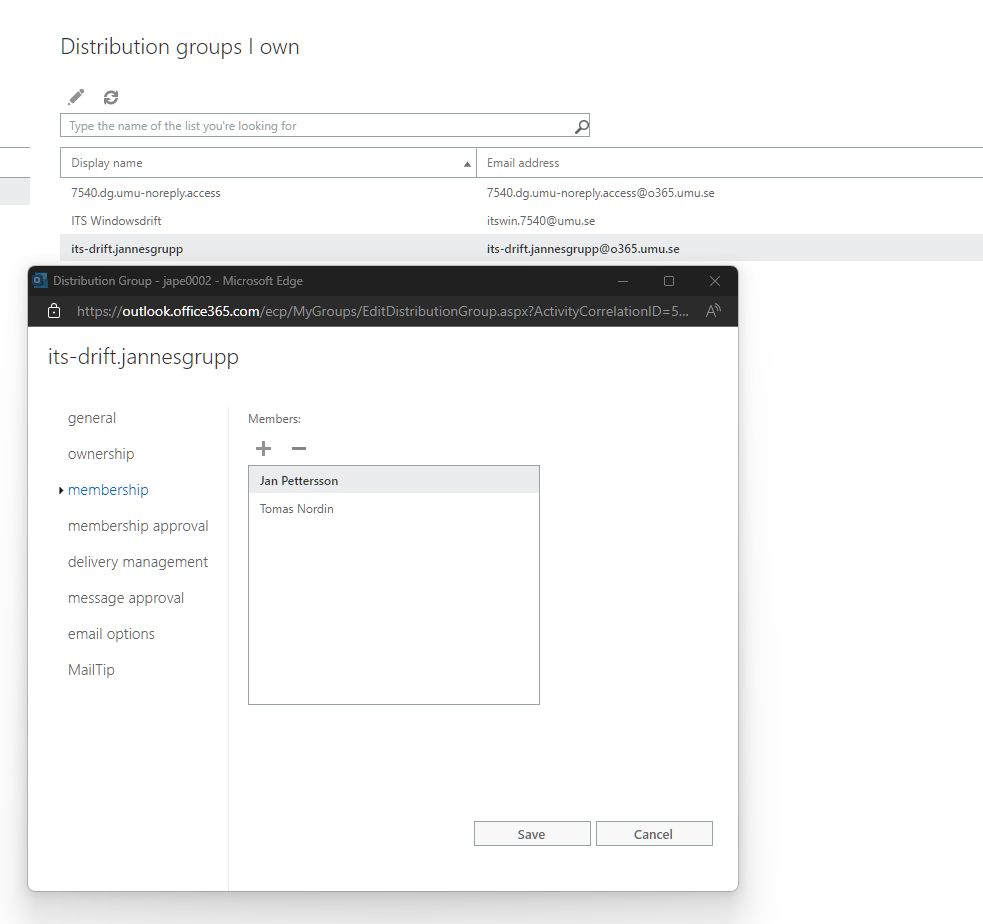
  2. Under Distribution groups I own, click on the group you want to manage, the group that manages access is named orgnr.dg.lådnamn.access. Then select Membership.
  3. From this view, you can remove and add members to the shared mailbox, click on the person’s name and then + or -. Save.

Manage via Email

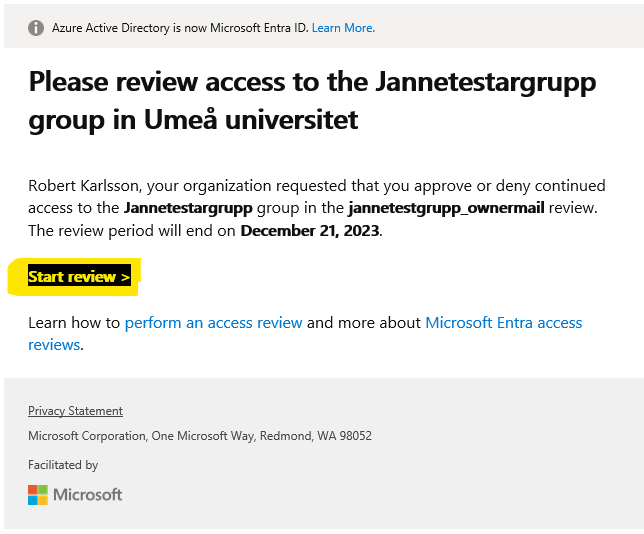
As the owner of a shared mailbox, you will periodically receive an email asking you to review the members in the group. In the email, click on Start review.

From this view, you can check a member and then Approve or Deny the member.

Book a group study room in TimeEdit

To login and book you need a Umu-ID and you need to be registered to a course at Umeå University.

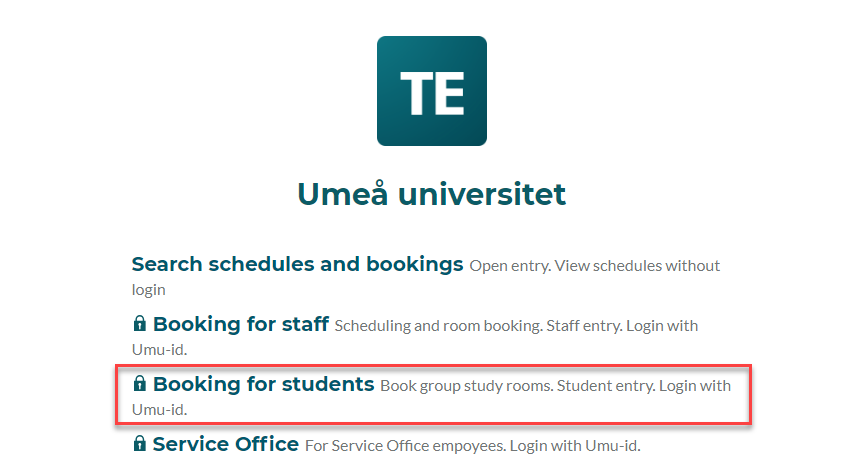
Login via https://cloud.timeedit.net/umu/web/ and select Booking for students.
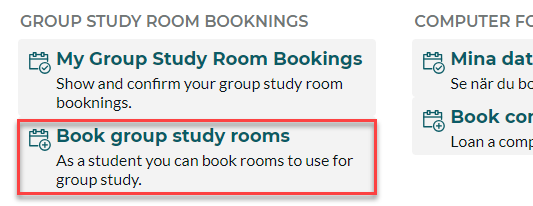
Then select Book group study rooms.
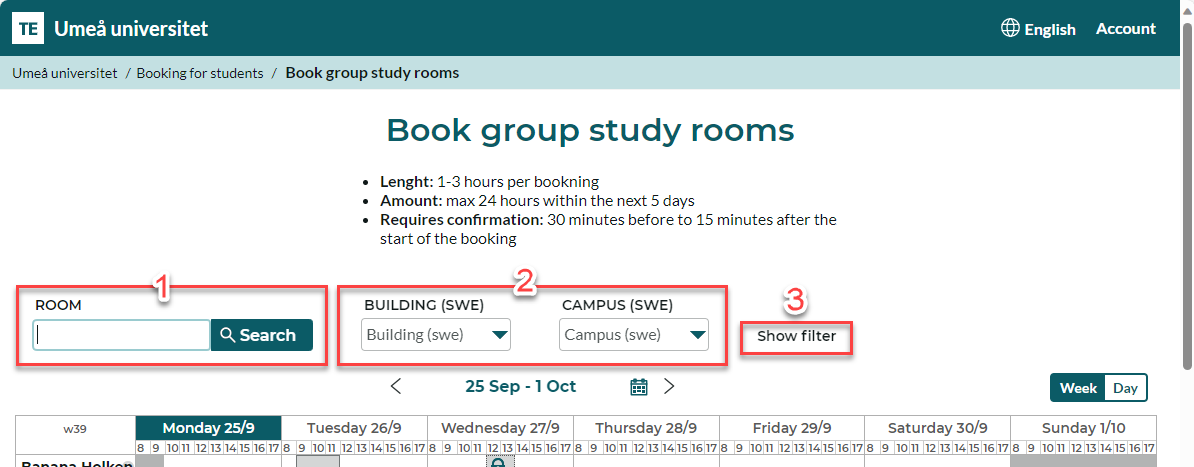
Start by filtering rooms. You can use free text search (1), filter (2) by Campus or Building. Click show filter (3) for additional filters if needed.
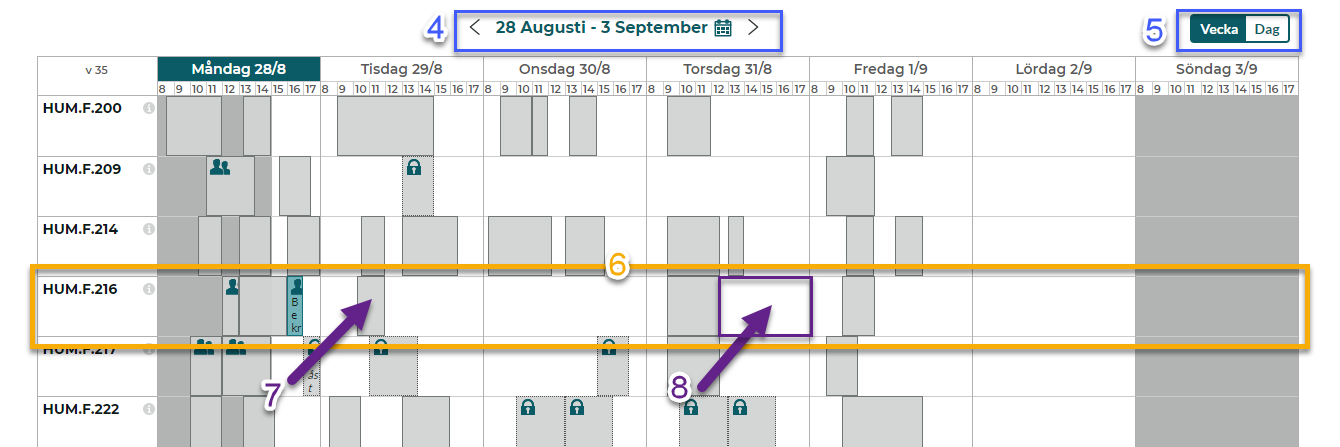
Under the search section and above the calendar is the date selector (4). The date range used in the calender is also displayed here. You can page backwards and forwards with the arrows. Click on the date to open the date selector. To the left you find buttins to switch between week or day view (5). You can also switch to day view by clicking a date in the week view.

Each row (6) in the Booking calendar represents a room and shows the availability for the room. A grey field (7) means that the room is occupied while white (8) means that it is available for bookning.
In the day view move the mouse cursor over the room and time you want to book. I green booking indicator is shown. Click to select the room and time. On mobile you can touch the screen where you want the bookning.

After you have clicked to select the room and time a bookning window opens. Here you can adjust the start and end times.
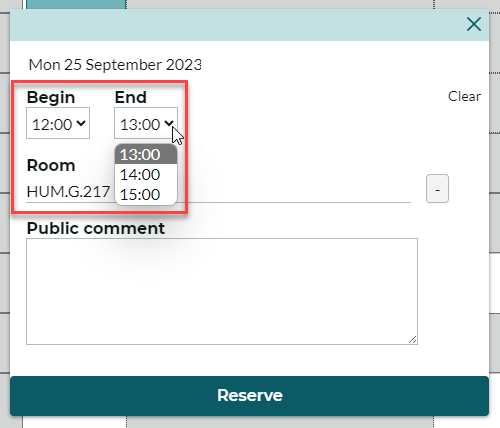
Select Reserve to complete the bookning.
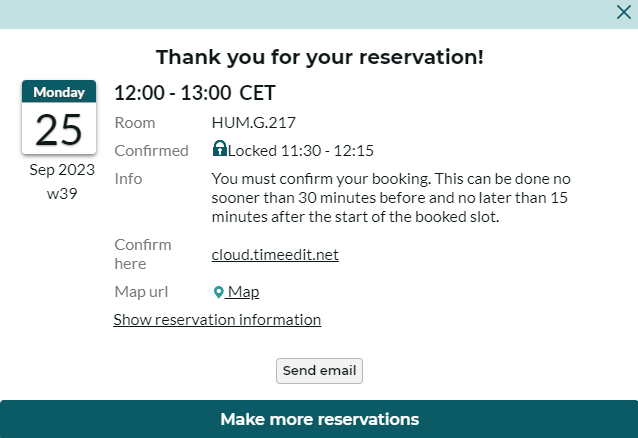
Your bookning is now made and information about the bookning is displayed. By the text Confirmed you see when the bookning needs to be confirmed if you want to keep it. You can also send info about the bookning by email.

Create a scientific poster in the graphic design tool

This manual presents what settings the scientific poster template offers in the graphic design tool.

  1. Open the document template “Vetenskaplig poster / Scientific poster” in the tool. Go to the graphic design log-in page.
  2. First, choose the size of the poster. You can choose among the predefined formats or customise the size.
    Document format
  3. Select a logo by choosing English or Swedish, depending on which language you are writing in.
    logotype language
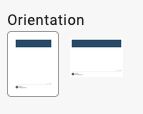
  4. Your next choice is “Orientation”. Choose between portrait or landscape format.
    Orientation
  5. The template allows you to download and use your own content at the same time as it allows you to follow Umeå University’s visual identity by placing the logo in the right place. You can choose to use the template’s standard header. Click the white box to upload a print-optimised PDF with high-resolution images. Please bear in mind that creating a PDF of that quality requires a certain level of proficiency.
  6. In the next step, you can enter text for the page header (which is the blue box at the top of the page seen in the preview to the right of the screen). This box holds the headline, subtitle, authors and any potential footnote.
    the page header

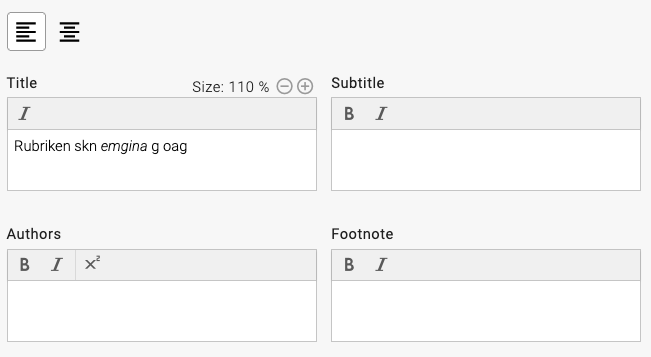
    1. Start by choosing alignment as left or centre. (You can always go back and change this setting later depending on what looks best.)
    2. Enter the headline, which is automatically bold, but you may choose to italicise your headline. You can change the size of the headline using the plus and minus buttons above the text field.
    3. The subtitle can either be made bold and/or be italicised.
    4. Text in the Authors field can be made bold and/or italicised. You can also add a footnote to the authors.
    5. Footnotes are intended for organisational affiliation such as a department. Organisational names are often long, so use one footnote for each department and add that number to all names affiliated to the corresponding organisation.
      Example: Name Surname1,2, Name Surname2
      Footnote: 1. Department of Social Sciences, Umeå University, 2. Department of Natural Sciences, Luleå University of Technology
  7. The next field should contain your preamble, which is an introductory text. Try to keep the text short. This text will be slightly bigger in font than the main text. This text can also be made bold and/or be italicised.
  8. Your next choice is if you want to use a large image for your poster. There are three positionings to choose from under “Placement”. Remember to give credit to the photographer or illustrator under Caption & source. Learn how to insert an image.
  9. After this step, you can add your main content to the page. A text field is standard and is ready to be filled with text. If you overfill the text field, text will flow onto the next column.

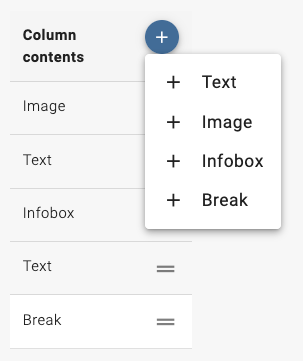
    The blue plus sign contains further modules you can add and fill with content. Any module you add is listed underneath. By dragging the module by the two lines, you can rearrange the order of the modules. These modules are available:

    1. Text: To insert a fact box or add an image in the right place of the text, it may be necessary to distribute your text into several text modules. You can choose between two fonts for your main text. The text modules allow you to choose between two headline sizes, and italics is available for both.
      Standard format for main text is “Normal” but you can choose italics and/or bold. You can also add ordered and unordered lists to the text.
    2. Image: Here, you can insert an image to the width of one column. Remember to specify the source or name of photographer/illustrator in the Caption & source field. Learn how to insert an image.
    3. Infobox: In the infobox module, you can highlight particularly important text by placing it in a box with a coloured background. You can choose between four colours from the visual identity. There are two fonts to choose between if you wish to make it stand out more from the main text. You have the same opportunities to format text as in the text module.
    4. Break: You can actively choose to break a column allowing the text to flood into the next column using the break module.
  1. In the next step, you can specify your department and address. This can either be placed in the footer or in the right-hand column, depending on where there is most space.
  2. There is also a function to upload and position collaborator logos (up to four). If you have the need for more logos, you can create a joint image including all logos and upload them as one logo. If they will still not fit, you can consider placing them in one column as one image.
  3. This is the entire form. Be sure to save your work regularly. If you plan to send your poster to a printing office, you need to close the document. In the next view, you can place the document in the media basket. The media basket gives you a few options to choose from:
    • Paper: This has the fastest delivery time, but is fragile.
    • Laminated paper: By laminating the paper, it is given a protective layer.
    • Textile: If you plan to travel with your poster, textile is a good choice. You can easily fold the poster and pack it in a suitcase. Once you arrive, you can carefully iron it or hang it in a bathroom to let the moisture smooth the creases. Please note that all delivery times specified apply to collection at Infocenter on Campus Umeå. You will receive a message when the poster is ready for pick-up. If you wish the poster to be delivered elsewhere, you need to account for an additional 1–2 working days for delivery.

Doctoral thesis cover in the graphic design tool

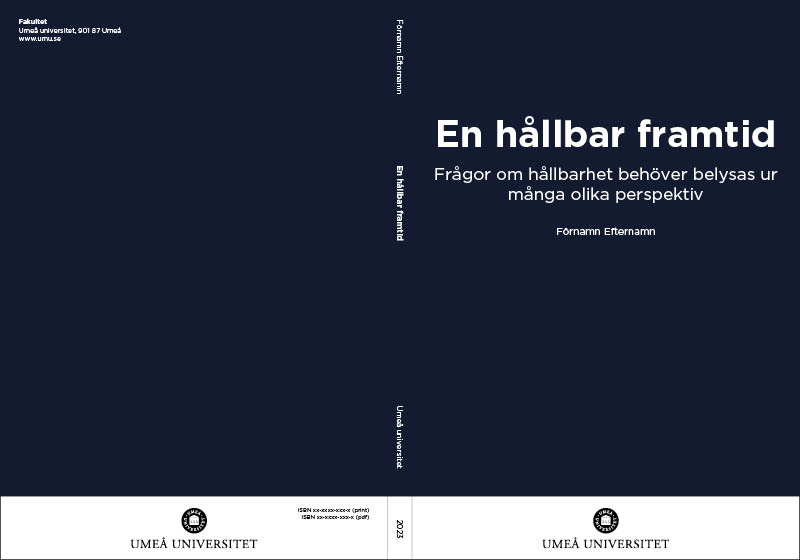
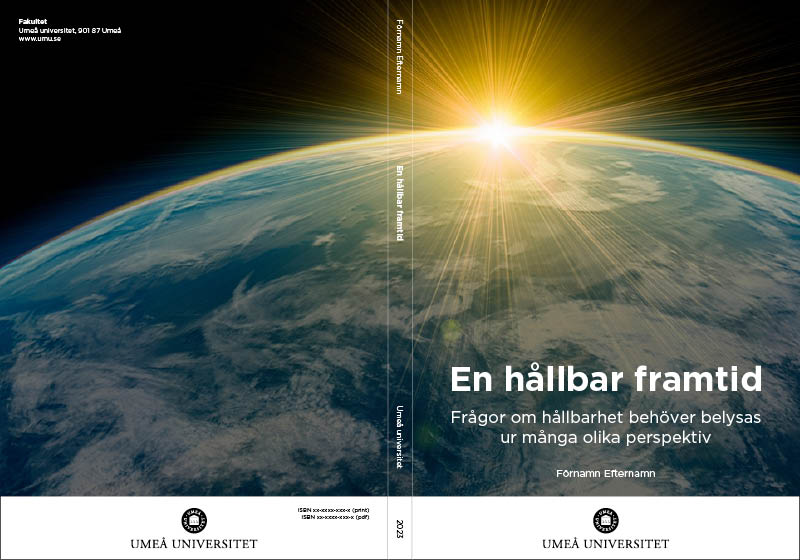
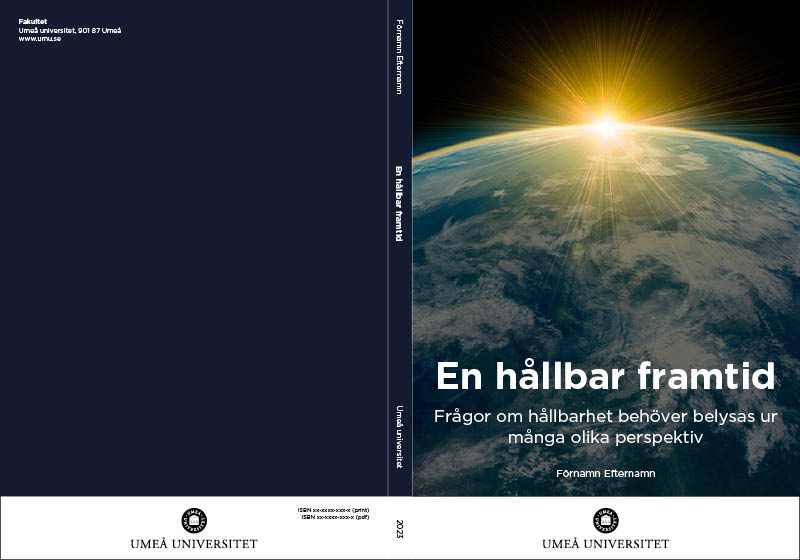
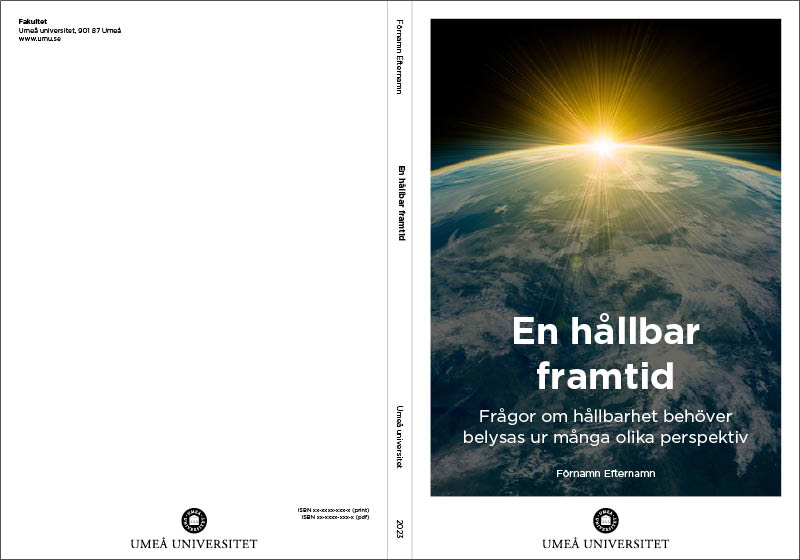
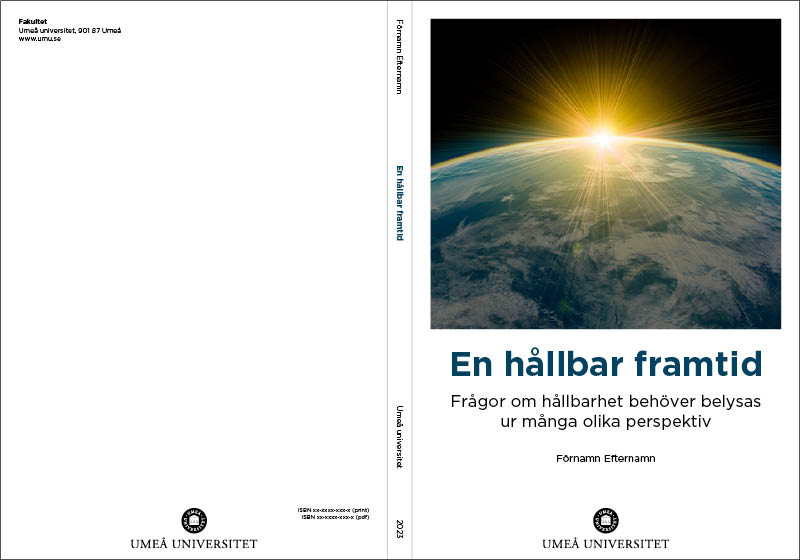
Here you can see a few examples of layouts you can choose between for your doctoral thesis covers.

Layout:

Background colour on front and back

Doctoral thesis cover in the graphic design tool

Image on front and back

Image on front and background colour on back

Image with white frame on front

Small image on front

Doctoral thesis cover in the graphic design tool

Use Umu-print via Mobility Print for phone or tablet

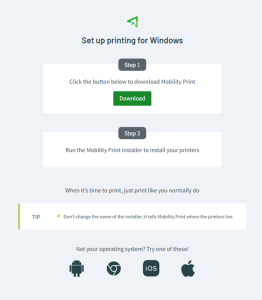
  1. Make sure you are connected to UMU’s network either via eduroam or Umu-WLAN. Then go to this link with the device you want to install the application on: http://130.239.126.165:9163/setup, the page will automatically recognize the operating system used.(If it is not the correct operating system, you can select which one you want to install in the tab at the bottom of the page):
  2. Depending on the operating system, you will be redirected to Google Play or the Appstore. For computers, the page will download either a .dmg or an .exe file depending on whether you are using iOS or windows.
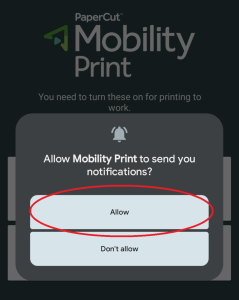
  3. Make sure you have notifications allowed for mobility print – these are needed to be able to log into the service when you want to make a print.
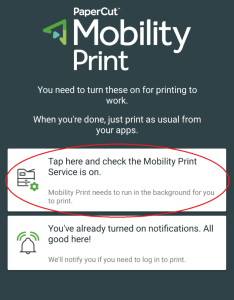
  4. For Android it is recommended to turn off the “Default Print service”, this can be done by pressing the top box in the application “Tap here and check the Mobility Print Service is on”. 5. Check that “Umu-print” is the selected printer and then press “Print”. The document will be sent to the printer queue and you can now print as usual on an umu-print connected printer by logging in to the printer with the CAS ID and password.

How to use a template in the graphic design tool

This page provides information on how to use templates in the graphic design tool. This example uses the A4 sheet template, “A4-blad”.

General settings

  1. Choose the A4-blad template under document templates on the start page of the graphic design tool.
  2. Once you have opened the template, you will find a form on the left-hand side next to the preview pane.
    1. Under “Layout”, you can choose to use a colour plate or an image.
      Layout
    2. “Document language” means that you choose what language setting the document should have. Based upon your choice, the logo will switch between English or Swedish. If you choose “Swedish”, you can select the Ume Sami logo.
  3. By clicking “Colour plate”, you can choose the colour of the headline background and fact box.
  4. As background colour, you can choose between the paper colour or the University’s light beige colour.
  5. If you wish to have a double-sided A4, select “2 pages”.
    2 pages – Grafiskt mallverktyg

Select image

If you have chosen an image layout, the image settings will appear next. Find more details on selecting an image.

  1. Click the box under “Image” to select an image. You can choose to search for an image in the University’s image database, Mediabanken, or download your own image. Always check that you have the right to use the image. Go to Mediabanken to find information about right to use. Search for the image’s ID number in Mediabanken if you know what image you wish to use.
  2. To select which part of the image should be visible, use the grid under “Position”. You can also zoom in on the image and alter the height of the image.
  3. Always give credit to the photographer or illustrator under “Author”.

Add text

  1. Next up is adding text in the text boxes. The text boxes allow you to:
    1. emphasise text using bold or italics;
    2. create ordered and unordered lists;
    3. use subheadings.
  2. This template (A4-blad) also allows you to alter the size of the heading.
  3. If you add content under “Fact box”, a fact box will appear on the page. You can select the positioning of the fact box in relation to the main text through the grid. The border colour of the fact box is determined by the colour set under “Colour plate” at the top of the form.

Further settings

  1. The next part of the form is intended to be used to present lecturers, authors or similar. You can add an image in a circle accompanied by a headline and a short text.
  2. Click “QR code” if you wish to use a QR code to guide viewers to further reading, or to a registration page for an event, for instance. Paste a functioning web address in the field “Generate QR code, enter web address”. Write a descriptive text of where the link in the QR code leads to.

Download, print or order press

  1. Save the page by clicking “Save” and choose Umeå University. Name the document so you know which one it is. Specifying the template format in the name could be a good idea. Click “Close”.
  2. Once you have closed the document, you will access the document properties. From this page, you can choose to further edit the document or take other actions.
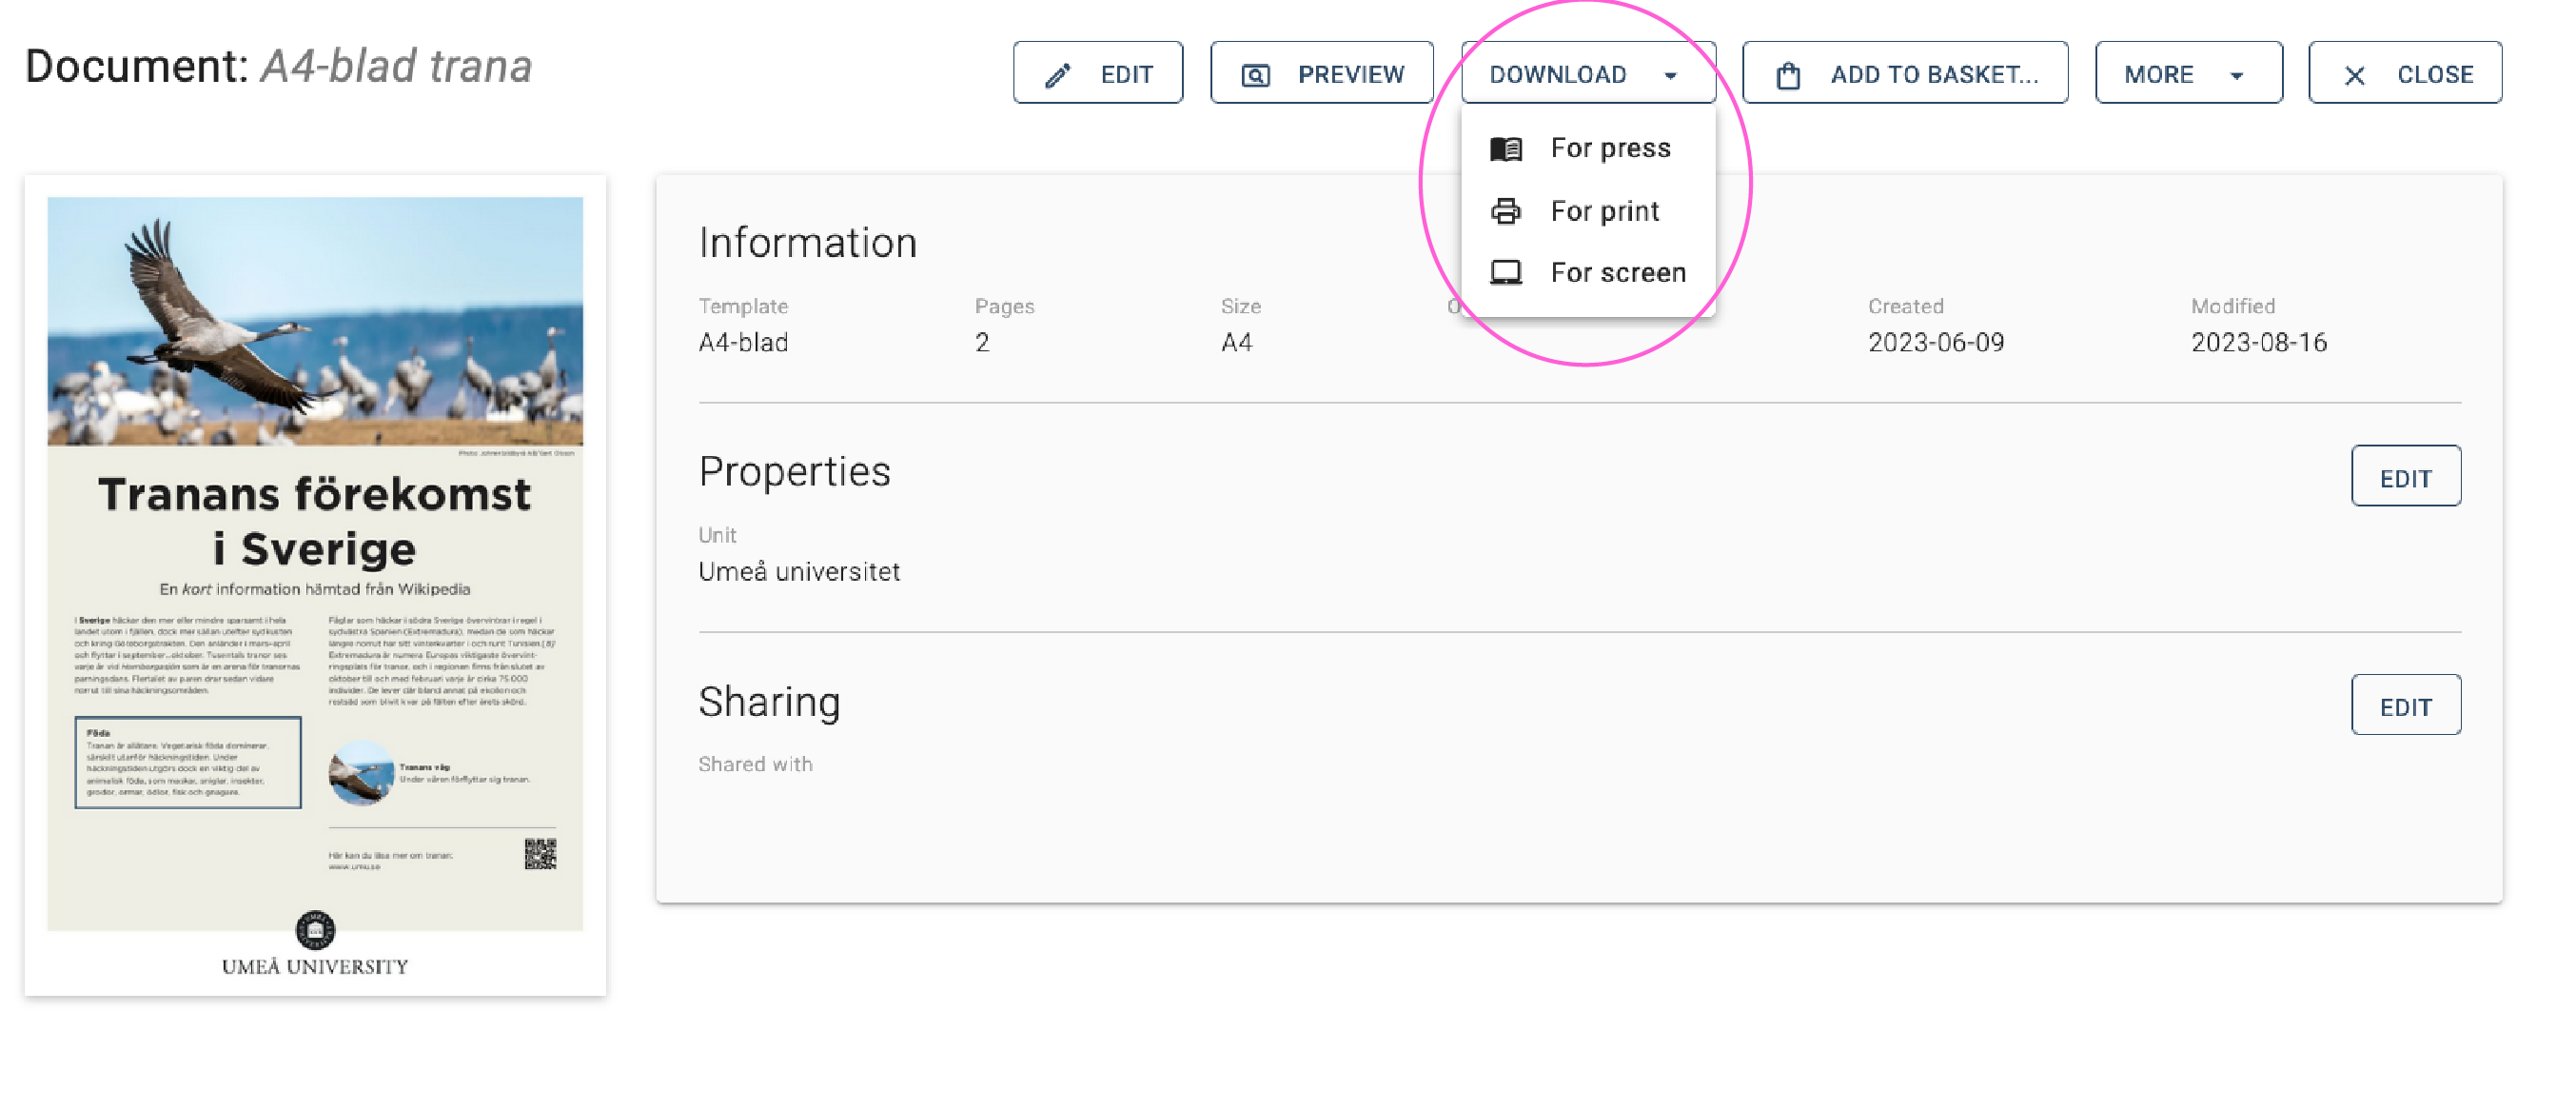
  3. Under “Download”, you can choose between three options. All options generate a PDF, but with varying properties. Learn more about downloading and printing a document.
  4. “For press” generates a PDF with crop marks that is larger than the final format. This is a good choice if you are sending your PDF to a printing office.
  5. “For print” generates a high-resolution PDF to be printed on your own printer. This provides that any images added to the document are in high-resolution formats.
  6. “For screen” generates a low-resolution PDF for digital use. If you plan to upload the file to a web page, you must first make the document accessible.
  7. Add the document to the media basket if you want to order professional printing.
  8. Under “More”, you can do the following:
    1. “Send proof” means that you will send a link to a PDF copy of the document.
    2. “Send document by email” means you send a PDF via email. You can choose which PDF version to send – for press, for print or for screen.
    3. “View document history” allows you to see when the document was saved, downloaded or sent.
    4. “Save copy” allows you to produce a similar document but with slight modification. You are asked to choose a new name.
    5. “Delete document” removes the document.

See a video of the content presented above

English subtitles can be enabled under CC in the bottom-right corner. Although the tool interface is Swedish in the film, the tool can be set to English under My user account.

How to download and print using the graphic design tool

When you have finalised a document by filling one of the document templates with content, you must save and close the document. This will take you to the properties view from which you can: continue to edit, preview, download, order print, share documents, among other things.

To print a document, you can choose to preview and print straight from the tab that pops up in your web browser. Or you can choose to download a PDF. There are three different types of PDFs to download that all have different characteristics:

  1. “For press” generates a PDF with crop marks that is larger than the final format. This is a good choice if you are sending your PDF to a printing office.
  2. “For print” generates a high-resolution PDF to be printed on your own printer. This provides that any images added to the document are high-resolution images.
  3. “For screen” generates a low-resolution PDF for digital use.  If you plan to upload the file to a web page, you must first make the document accessible.

Download a PDF – Grafiskt mallverktyg

Graphic design tool – introduction

The graphic design tool has been developed to simplify for staff to produce products for print and press with the help of templates following Umeå University’s visual identity. This page provides an overview of the functionalities available in the tool.

You can choose to learn more by watching the video or by reading the text below.

Introductory video

English subtitles can be enabled under CC in the bottom-right corner. Although the tool interface is Swedish in the film, the tool can be set to English under My user account.


Logging in

To use the graphic design tool, you need to log in using your Umu-id.

  1. Go to the login page for the graphic design tool.
  2. Click Log in.
    Grafiskt mallverktyg -log in

Start page

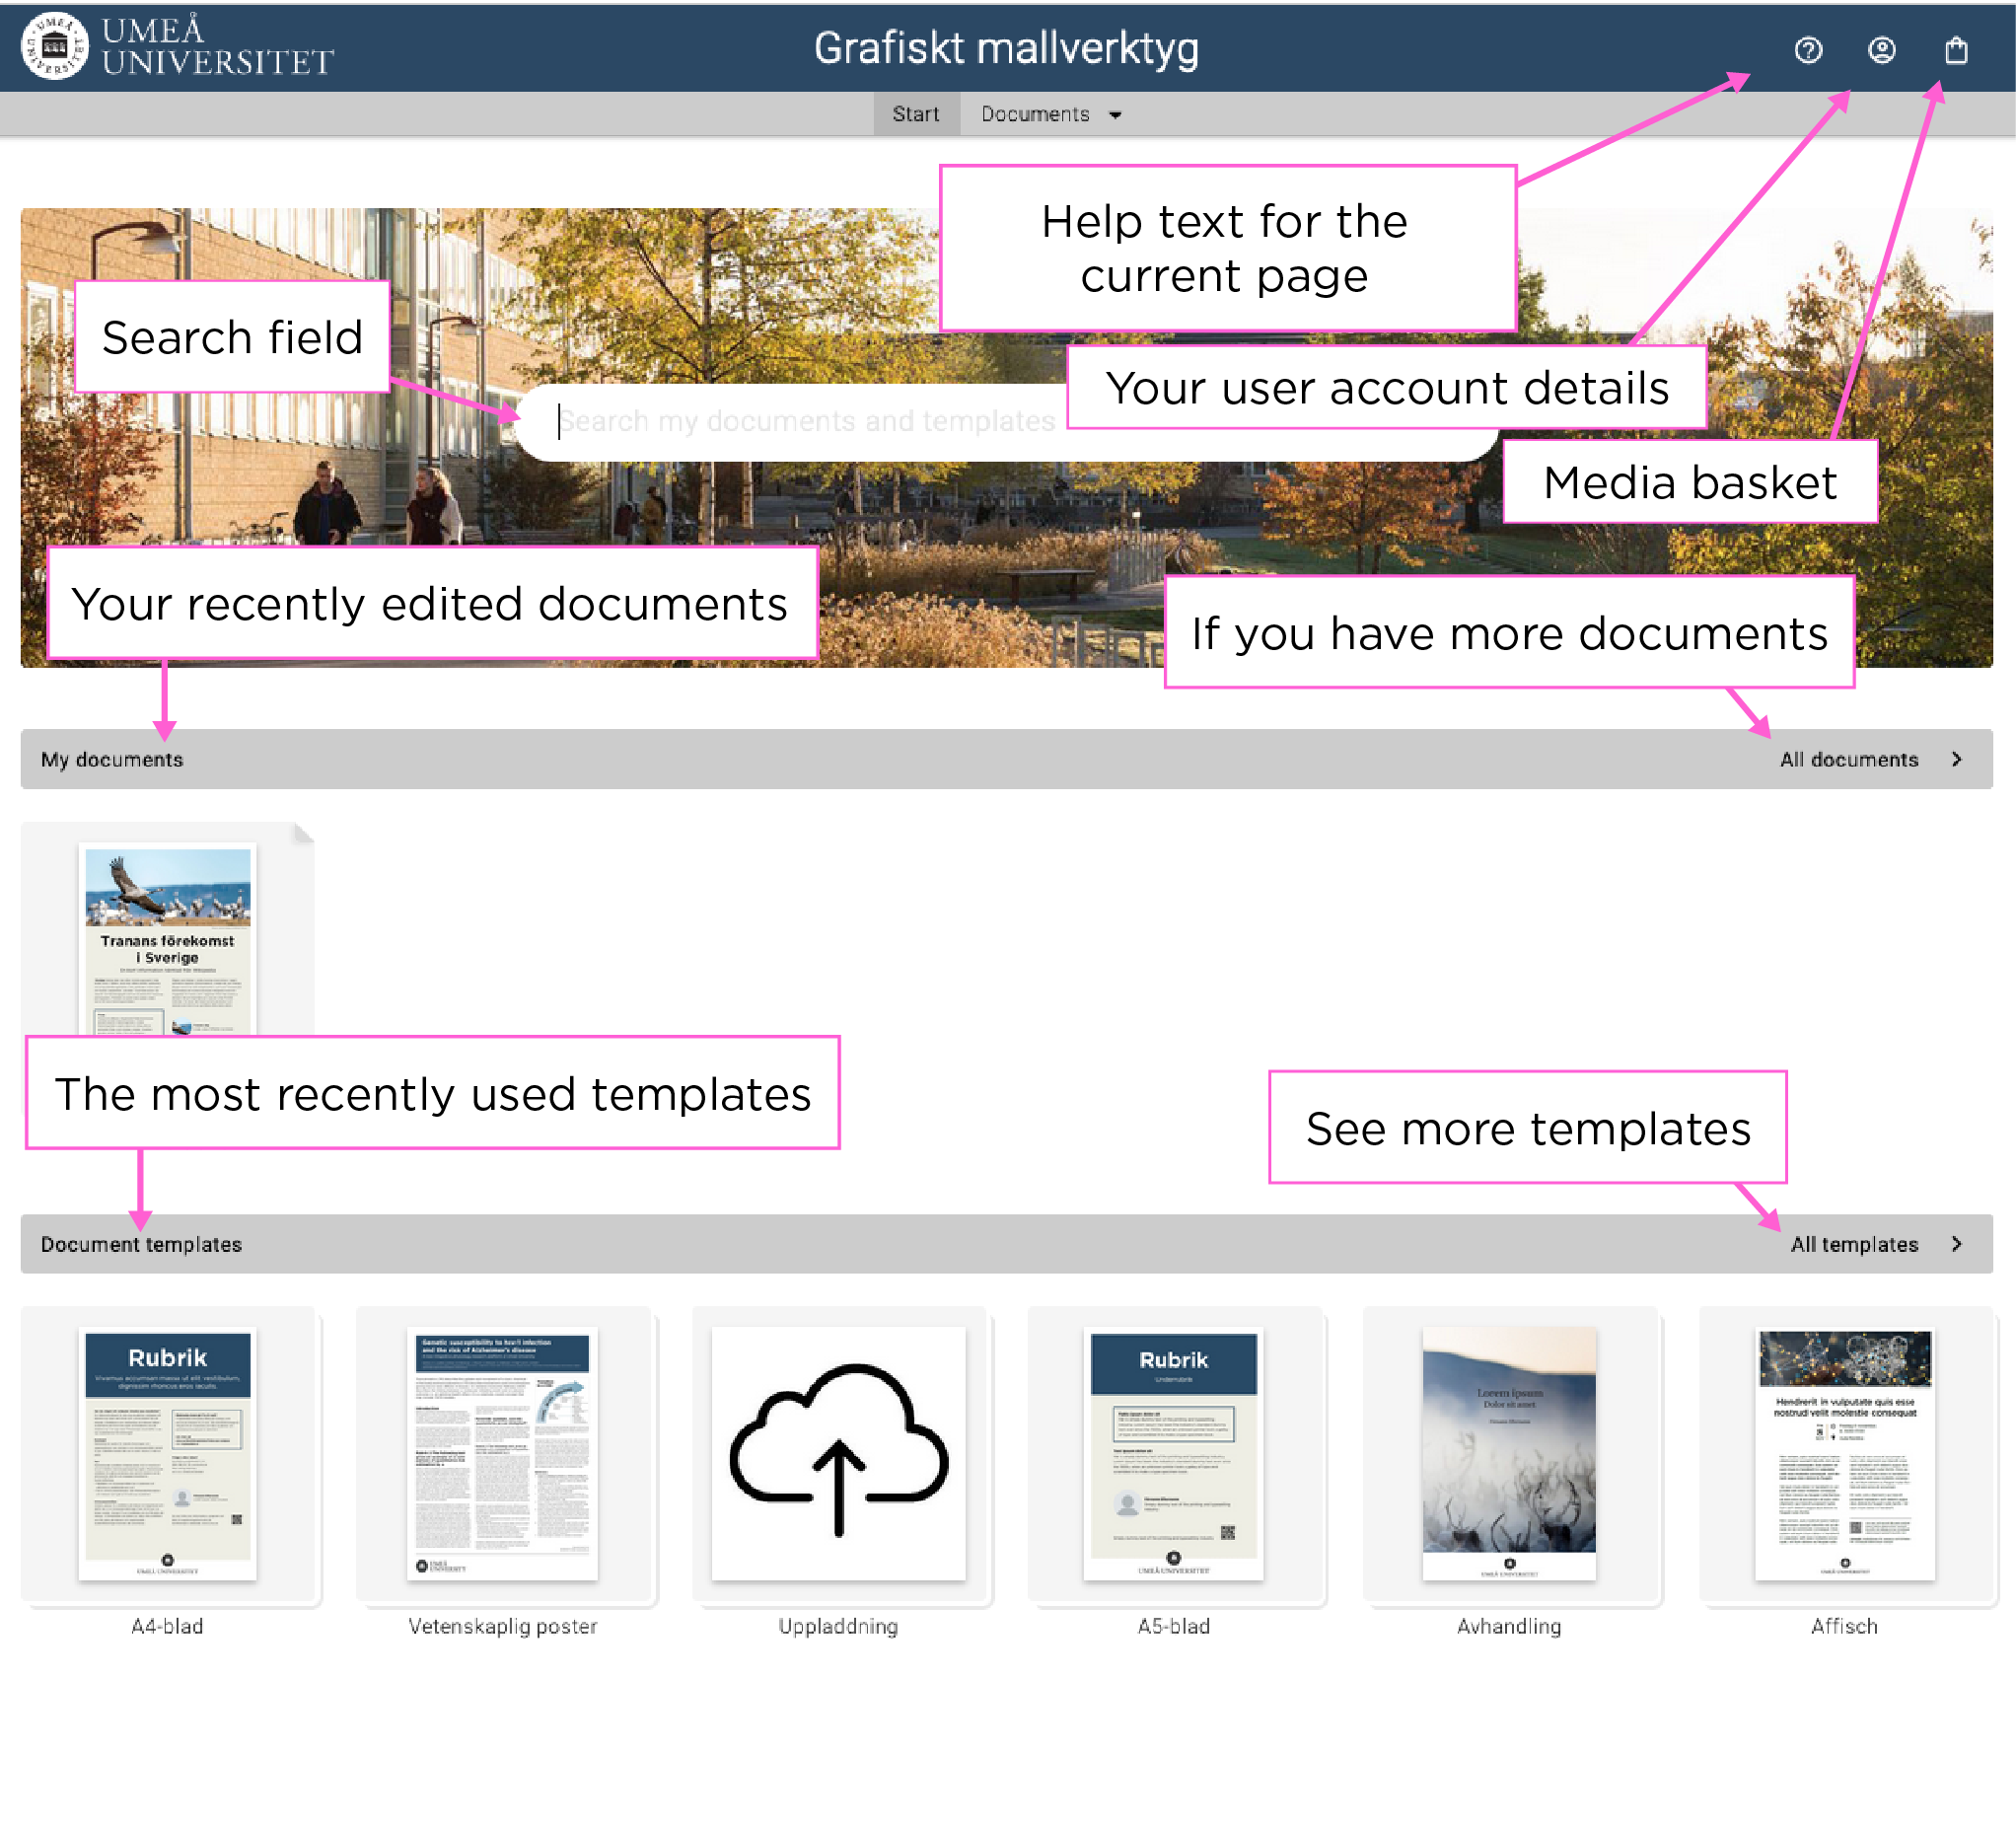
On the start page, you will find a search field where you can search among templates or documents. You can also see your recently edited documents and available document templates.

Start page – grafiskt mallverktyg

Under the icon “My user account” in the top-right corner, you can:

  • change your account details;
  • set up and manage user groups;
  • overview your orders;
  • set system language; and
  • log out.

The checkout icon is your media basket, which contains all documents you have added. Press the icon to proceed with placing an order.


Insert an image in the graphic design tool

Settings may differ slightly between the different templates in the tool.

The form for the document template looks like this:

Document template for images.

  1. Click the empty white box to select image and the following field will pop up:
    Image field
  2. Under “Search”, you can search and select an image from the University’s image database, Mediabanken. The easiest way to search among available images is to go to Mediabanken, find the ID number and paste it in the graphic design tool search field.  Always check that you have the right to use the image. You can also choose to upload your own image.
  3. After selecting an image, there are some settings you can make.
    Image settings

    • “Position” determines what part of the image is shown. Try your way forward.
    • “Zoom” allows you to zoom in and out of the image within the available area.
    • “Height” is available in some templates and allows you to alter the height of the image.
    • In the field labelled “Author”, you must specify the photographer or illustrator of the photo or illustration.