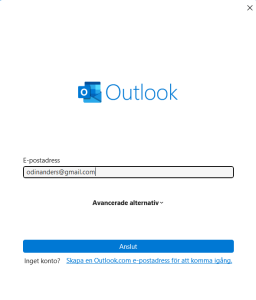
Skyddad: Utsökning från DiVA – utvecklingssida

Det finns inget utdrag eftersom detta är ett skyddat inlägg.

Utsökning från DiVA

Flytta e-post mellan olika konton

Om man vill flytta mejl från sitt umu konto till annat konto kan man kopiera breven.

Lägga till konto

I outlook lägger man till det konto man vill kopiera till (t.ex gmail)

Välj Arkiv och tryck på Lägg till konto

Skriv kontonamnet (i exemplet är det ett gmail-konto)

Nu finns det två konton i Outlook

Skapa en ny mapp i kontot som lagts till och ge den t.ex namnet umu

Gå till umu kontot och markera de mejl som skall kopieras

Dra mejlen med vänster musknapp till mappen i det tillagda kontot

Radera enstaka versioner av filer på OneDrive

Om ditt utrymme på OneDrive börjar ta slut snabbare än önskat kan det bero på att du har många olika versioner av samma fil. Denna manual visar hur du kan radera enstaka versioner för att minska på använt utrymme.

Application for outgoing exchange students within Erasmus Blended Intensive Programme (BIP)

Log in

  1. Go to: SoleMove start pagePlease make sure to only open Solemove in one tab.
  2. Choose Umeå University from the dropdown list.
  3. Login using your umu-id.

Create and submit an application

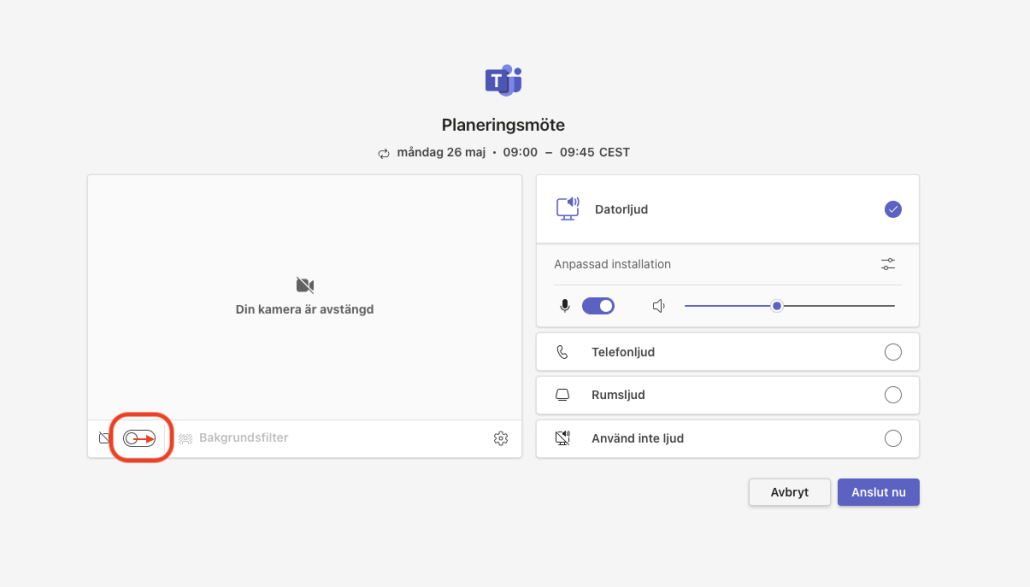
Does your view look different in Solemove than the image to the right? This may be due to the fact that you previously received a salary from Umeå University or that you are partly employed as a teacher. If so, please contact Solemove@umu.se before creating your application.

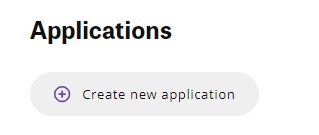
Please note, if you have previously submitted an application on Solemove, you will need to choose ‘Create new application’ before following these steps.

Some of the information added under Personal data and Current studies in your application will be transferred to your Online Learning Agreement.

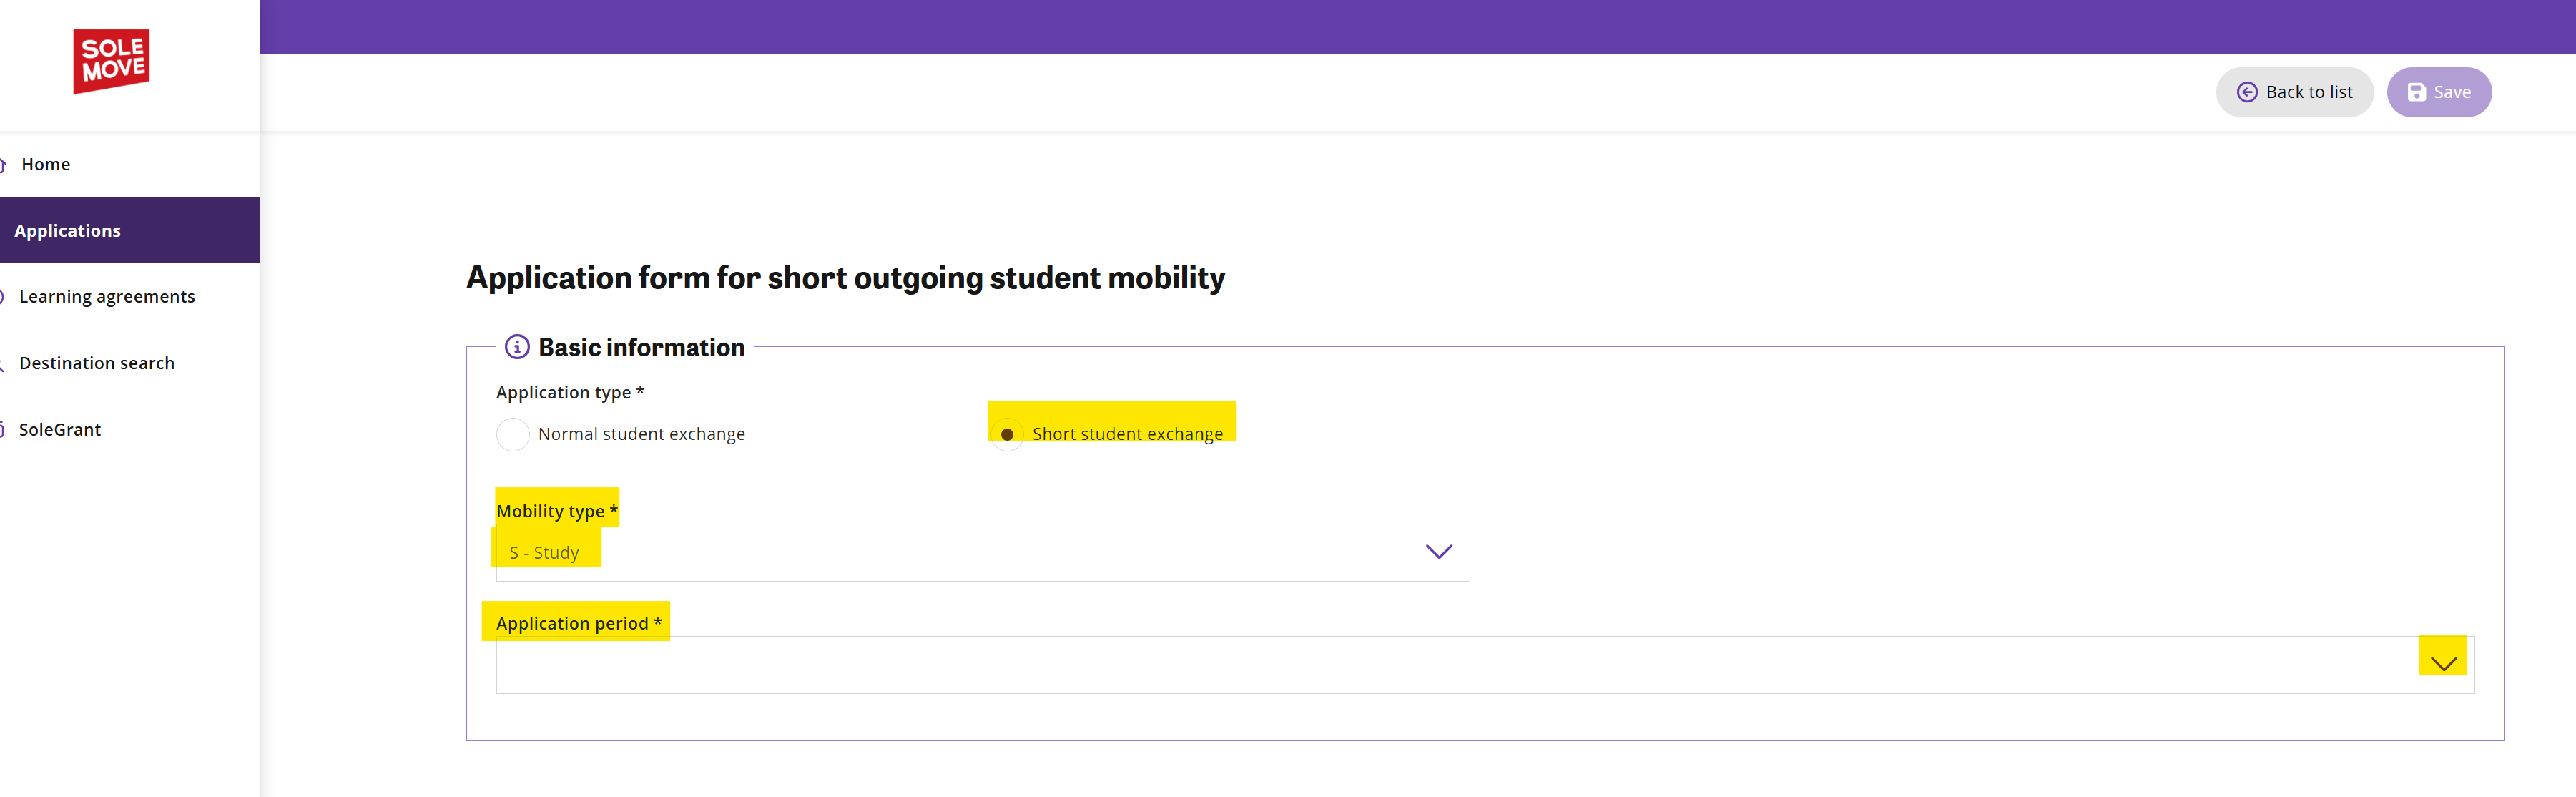
1.Select Application type. Choose ’Short student exchange’.

2.Select Mobility type ’S-Study’.

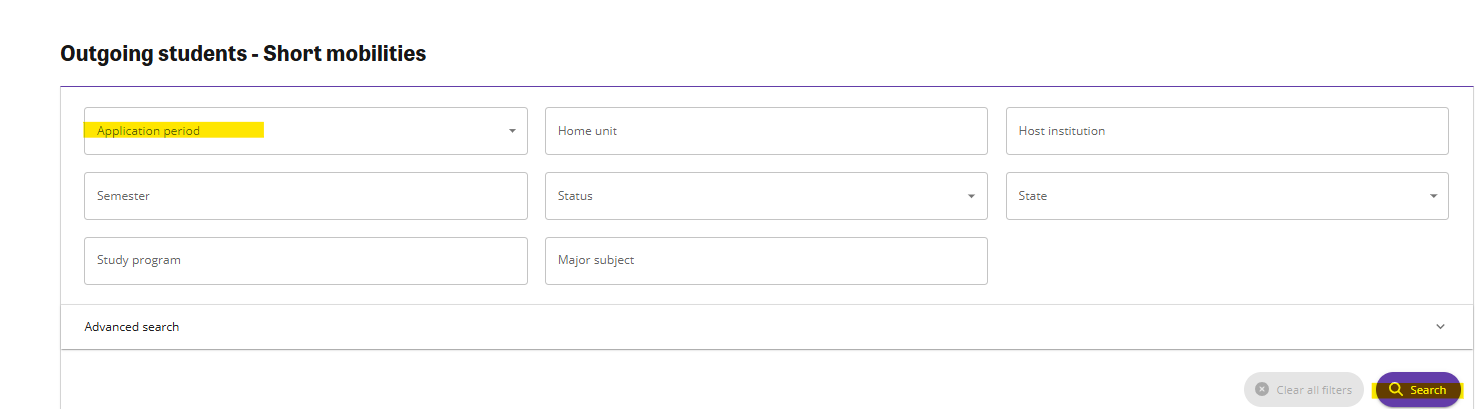
  1. Select an Application period. Be sure to select the BIP-application period you intend to apply for. Click ‘Save.

Personal data

Fill in the mandatory fields with the required information – marked with an asterisk (*). ). IMPORTANT! Make sure to fill in your name as stated in your passport (all names). Write your given name(s) /first name(s) in CAPITAL LETTERS. Please fill out your information carefully since the information on Solemove is the information that will be used in all future contact with the host university, if you were to receive a nomination.

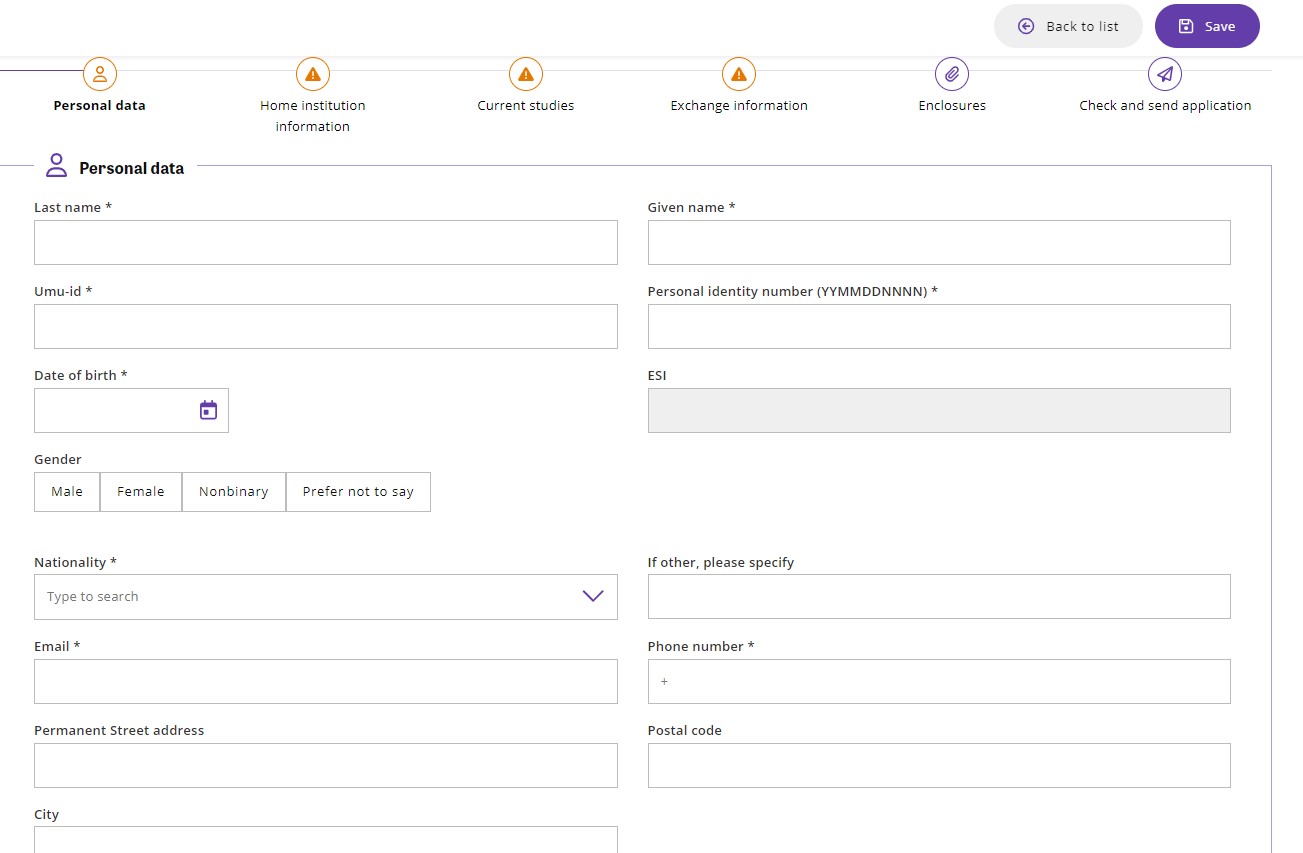
NOTE! Click ‘Save’ when all required fields are filled in.

Go to the ‘Home institution information’ tab by clicking the arrow

Select ’Unit responsible for the nomination round’ by clicking the plus icon. Choose the department from the list. Please note, it must be the same department as indicated in the Application period. Click ’Select’.

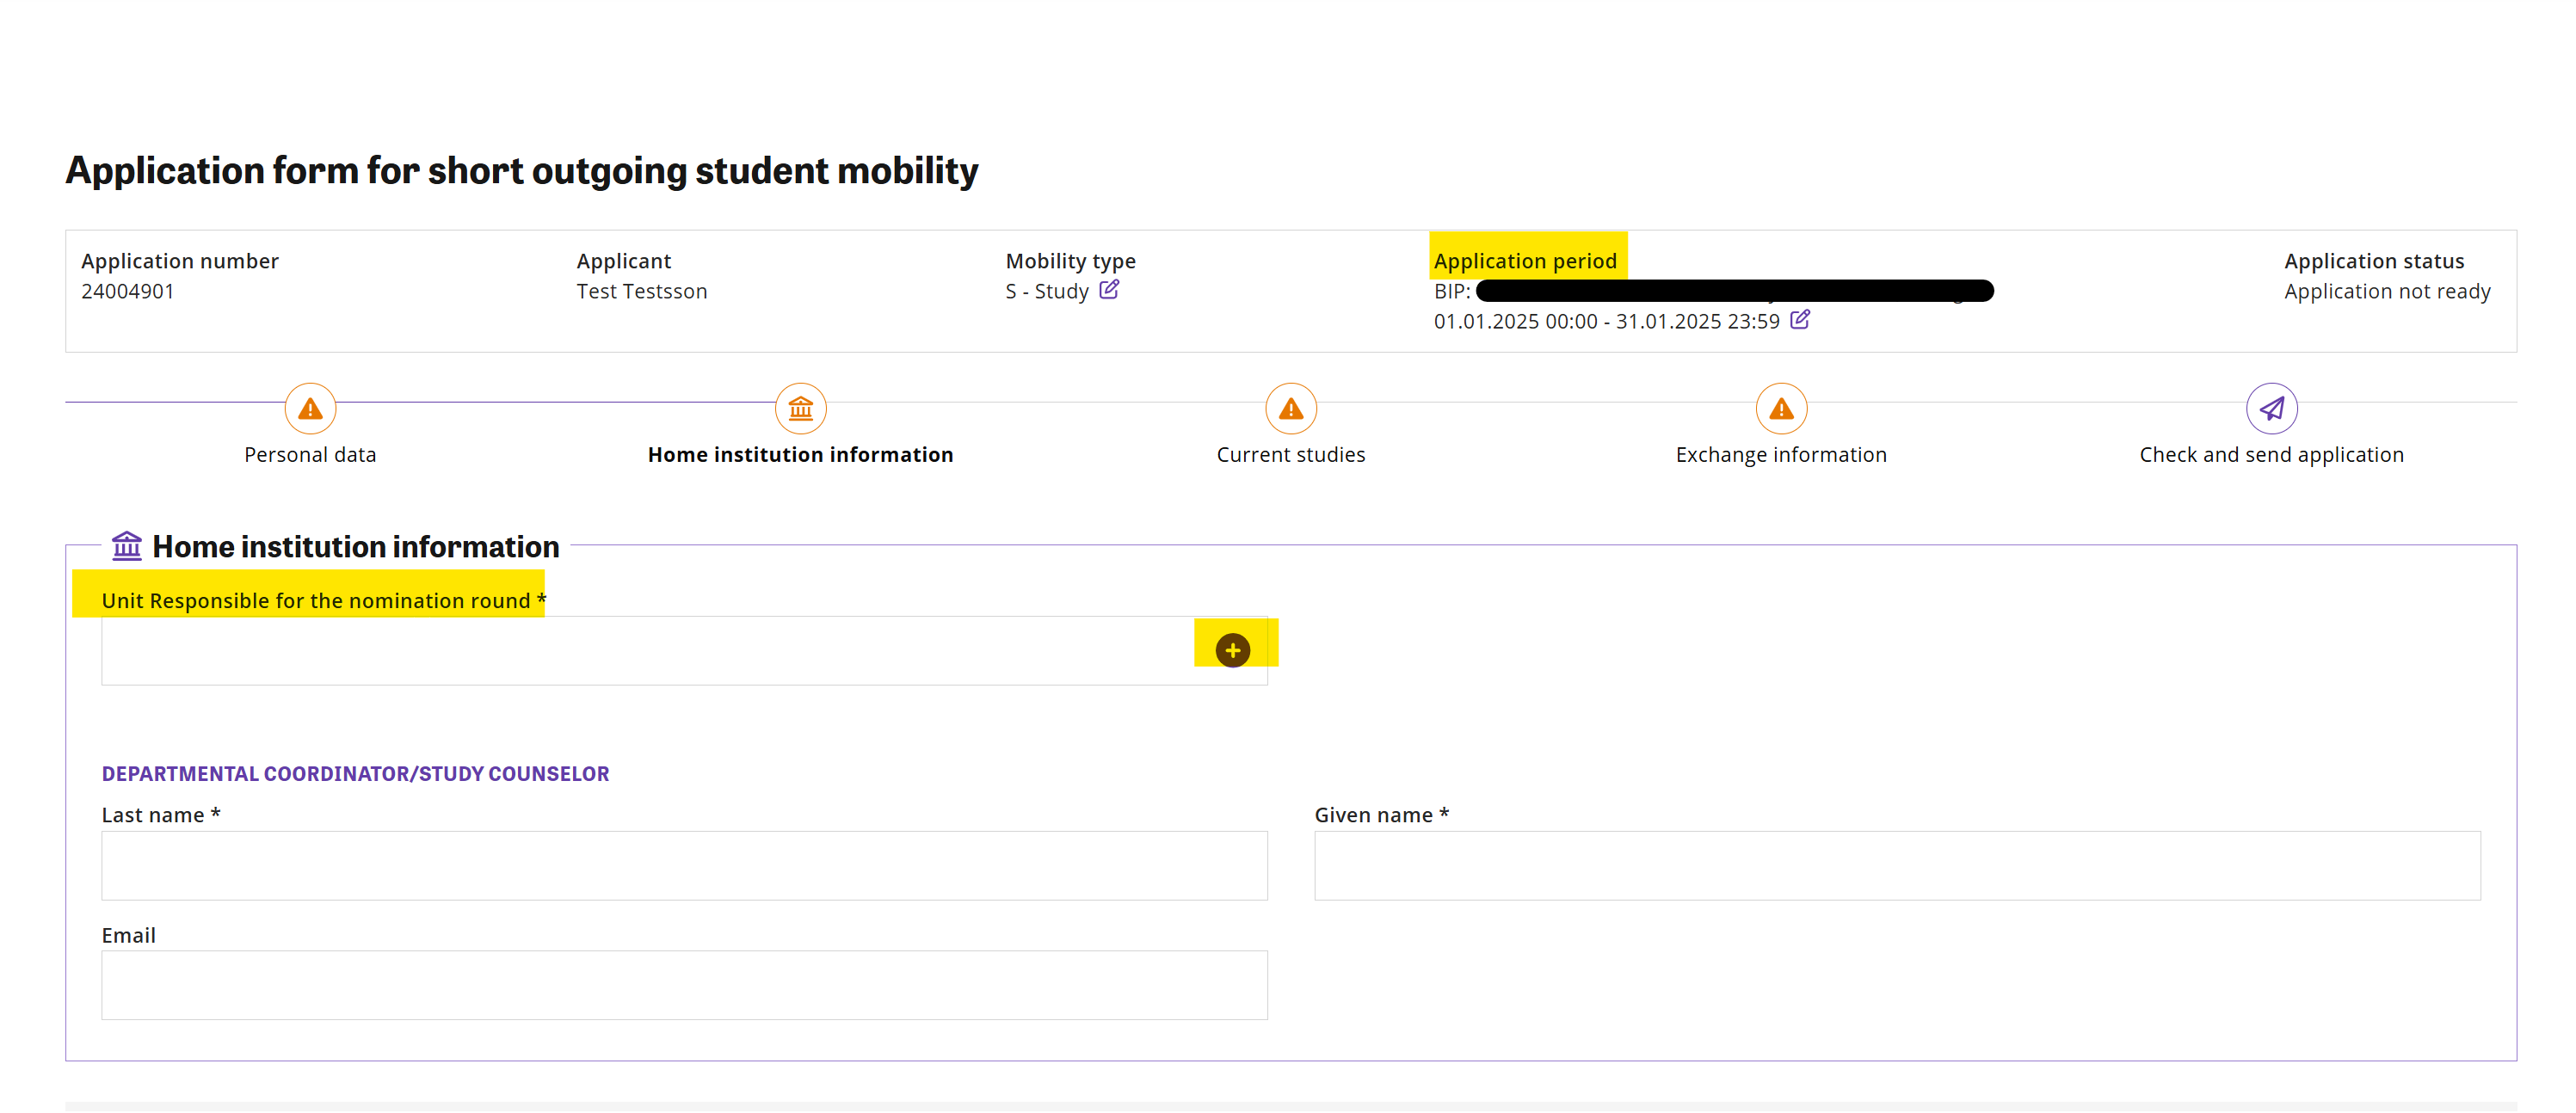
If you choose the wrong department, your contact person will not be able to see and process your application.

Fill in the contact information to the department’s coordinator. Click ’Save’.

Unsure?
If you are unsure, contact the International Contact Person at your department


Go to the Current studies tab

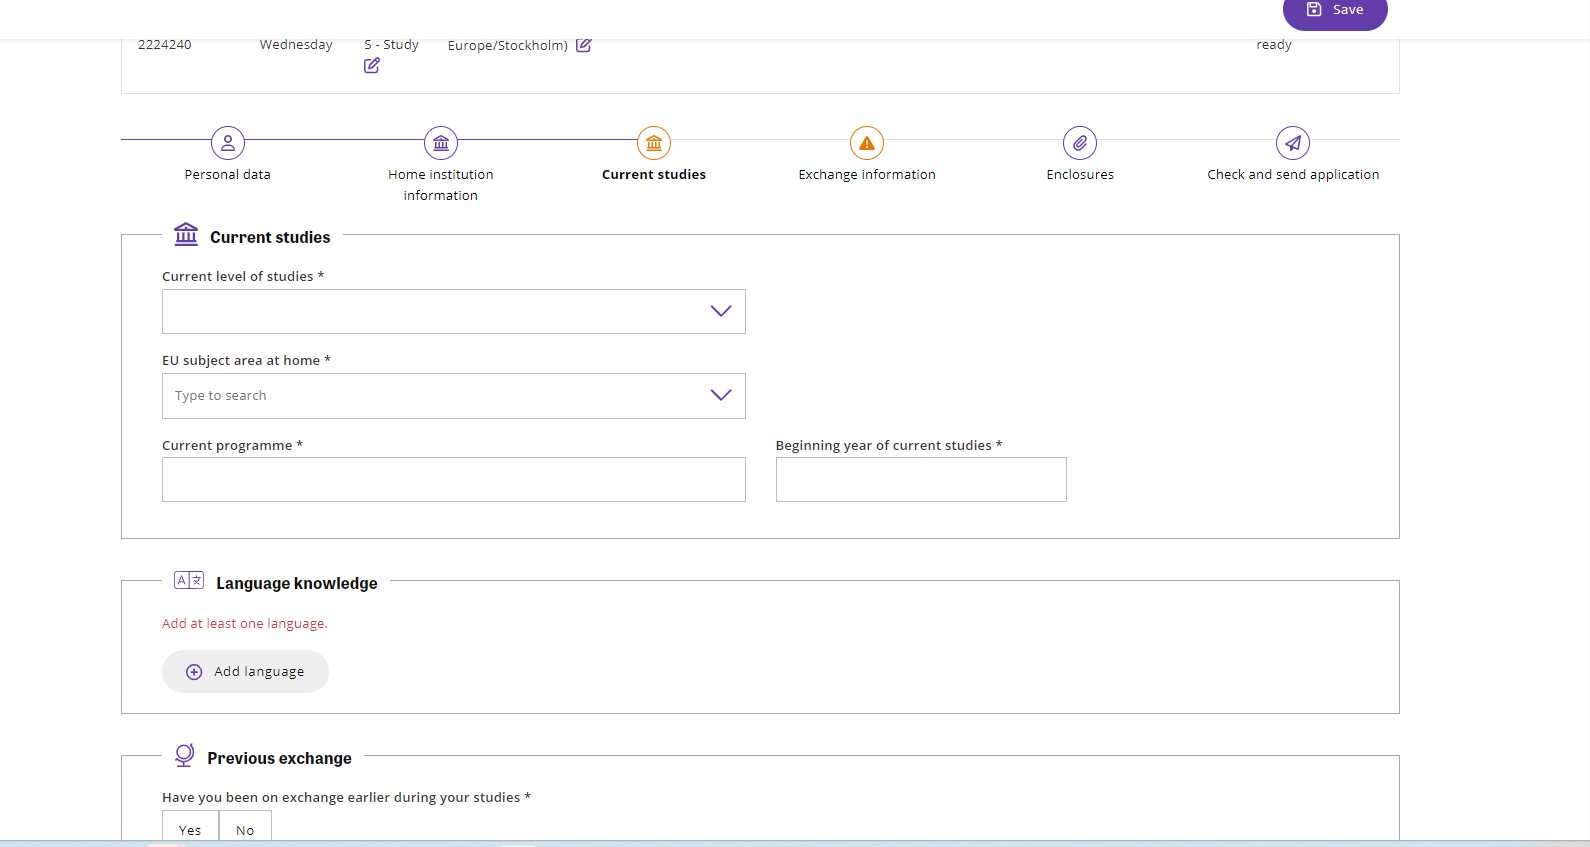
Current level of studies: Please select your level of studies at the time of this application on Solemove.

EU subject area at home: Choose from the drop-down list. If you are unsure, contact the International Contact Person at your department.

Please note: For your Online Learning Agreement (Erasmus) to be valid, the EU subject area must be a 4-digit code.

Current programme: Write your study programme. If you are not registered within a study programme, please enter your current course.

Language knowledge (obligatory): Choose the language of instruction for your exchange as the first language on the list. For English, B2 is recommended. Add another language if needed/wanted. If you want to add Swedish, put that last.

Important! Be very careful which languages and what language proficiency you enter since this data will be transferred to your Online Learning Agreement. The language and the proficiency should correspond to the ones indicated in your Language assessment diploma.

Previous exchange: If you have previously been on exchange, please write the University and semester you attended.

Click ‘Save’

Go to the Exchange information tab

Duration of exchange: choose ‘Other’from the drop-down menu and fill in the dates stated in the BIP you are planning to participate in. If you are unsure, contact the International Contact Person at your department


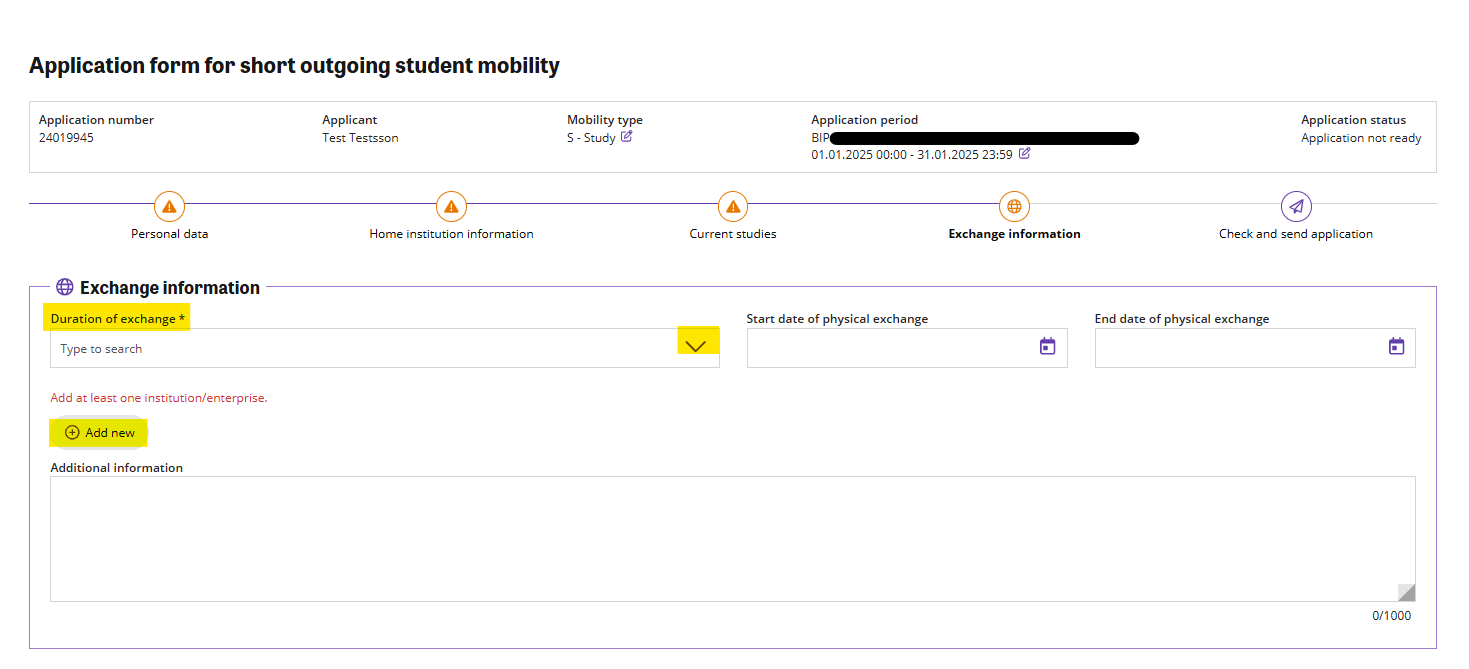
Add your host institution
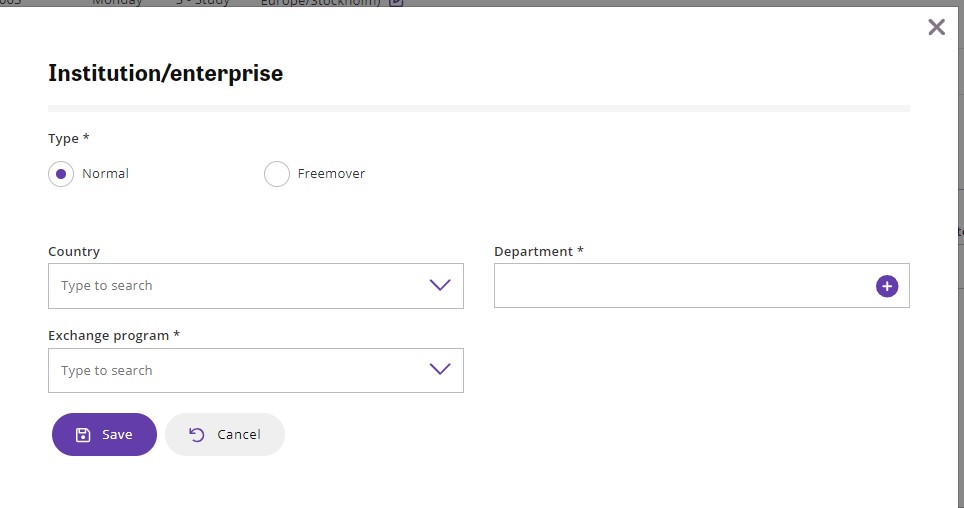
Click ‘Add new’

Choose ‘Normal’ type of exchange.

Choose ‘Country’ from the drop-down list. Choose ‘University’ by clicking the +icon. Only the available university/ies in that country will show up. Click ‘Select’ and then ‘Save’.

Click ‘Save’.

(If applicable) Additional information: in case you are in need of additional support from the partner university, write what kind of support you require.

Click ‘Save’.

 Check and send application

Go to the tab ‘Check and send application’

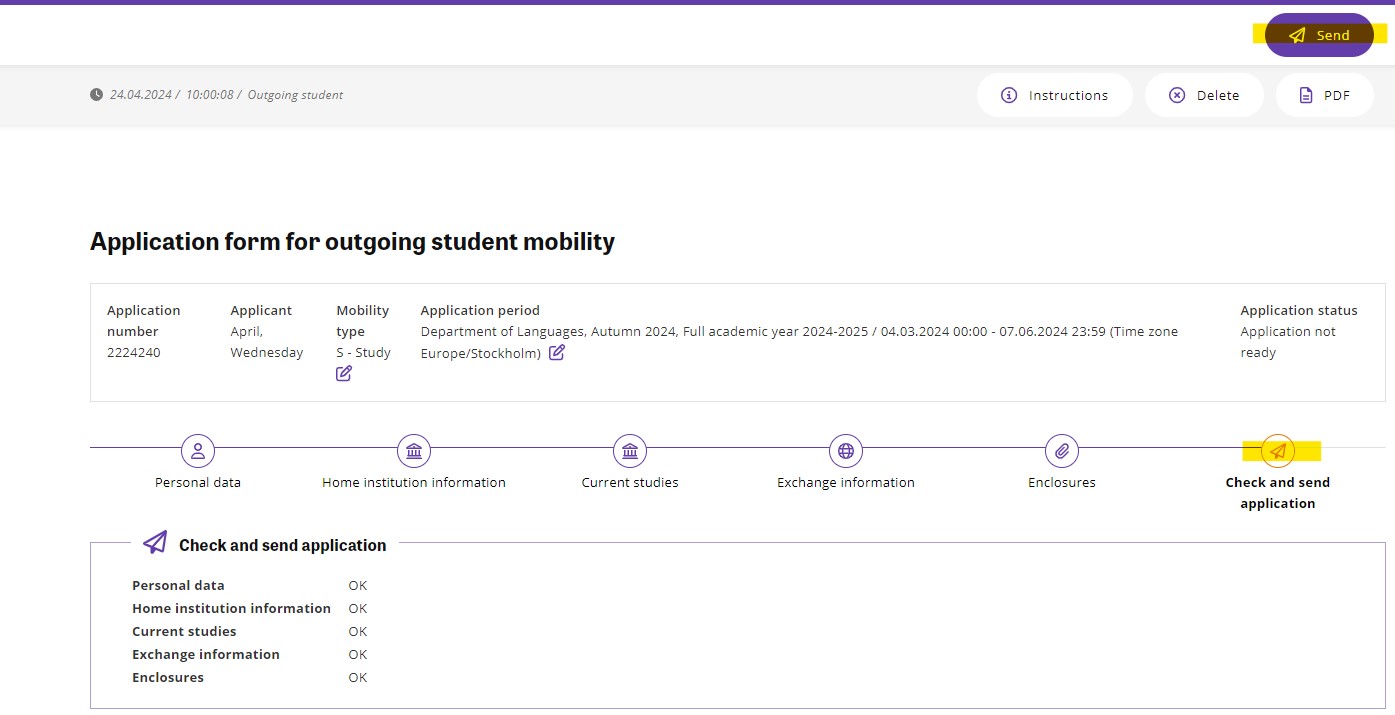
This tab displays the status of all other tabs so that you can quickly see if your application is considered complete by SoleMove (i.e. all the mandatory fields have been filled in). Press the Send application button and you will get a message if you want to send your application and after that a notification ‘Application sent!’ in the upper right corner. You cannot edit your application after it has been sent.

The review process for all applications received begins after the application deadline and takes several weeks. During this time, you can log into SoleMove and track the progress of your application.

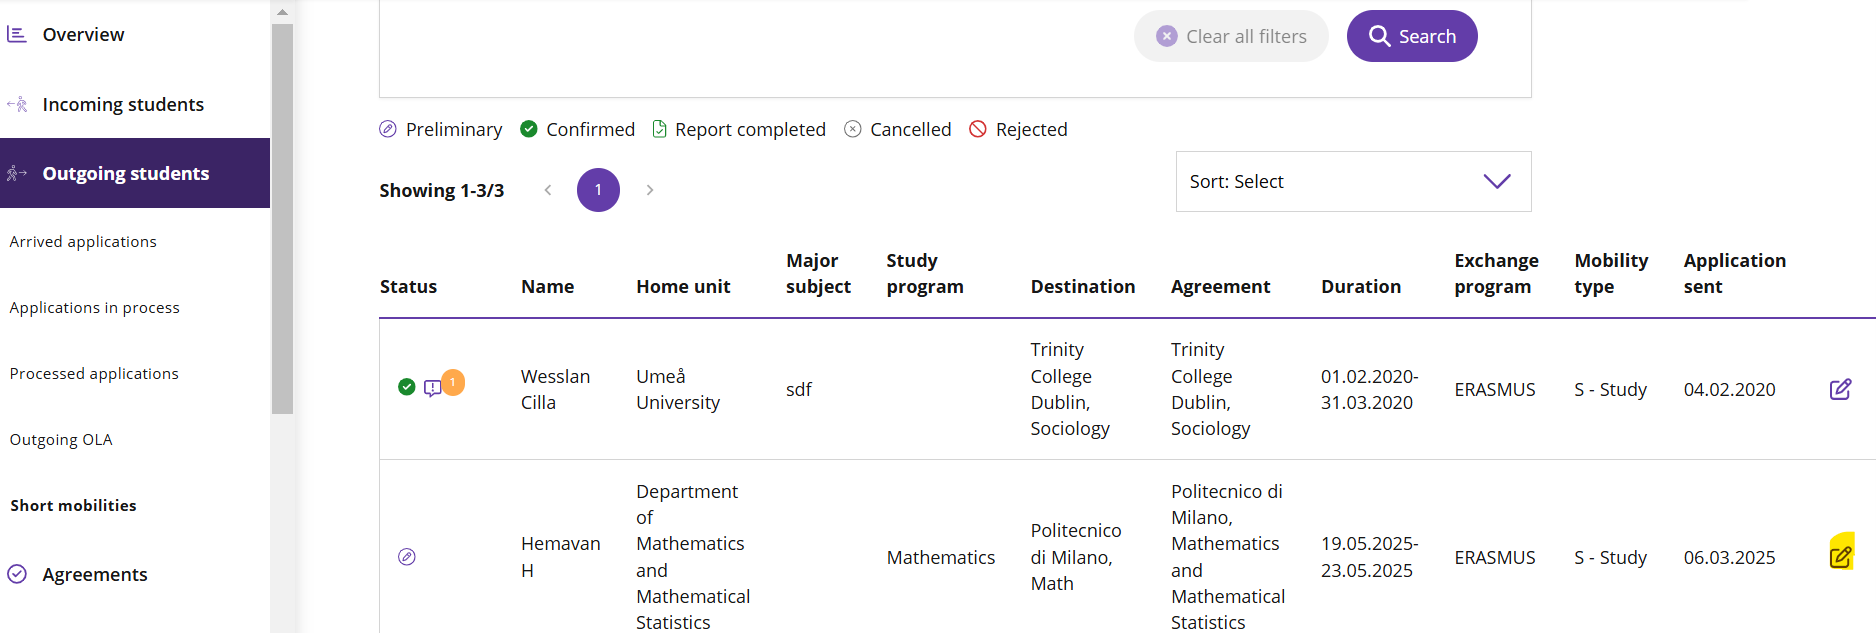
The status ‘Application received’ and ‘Processing’ indicates that someone has opened your application for review and is processing your application. Once the application has been processed, you will receive an email informing you of the outcome.

Respond to your application result

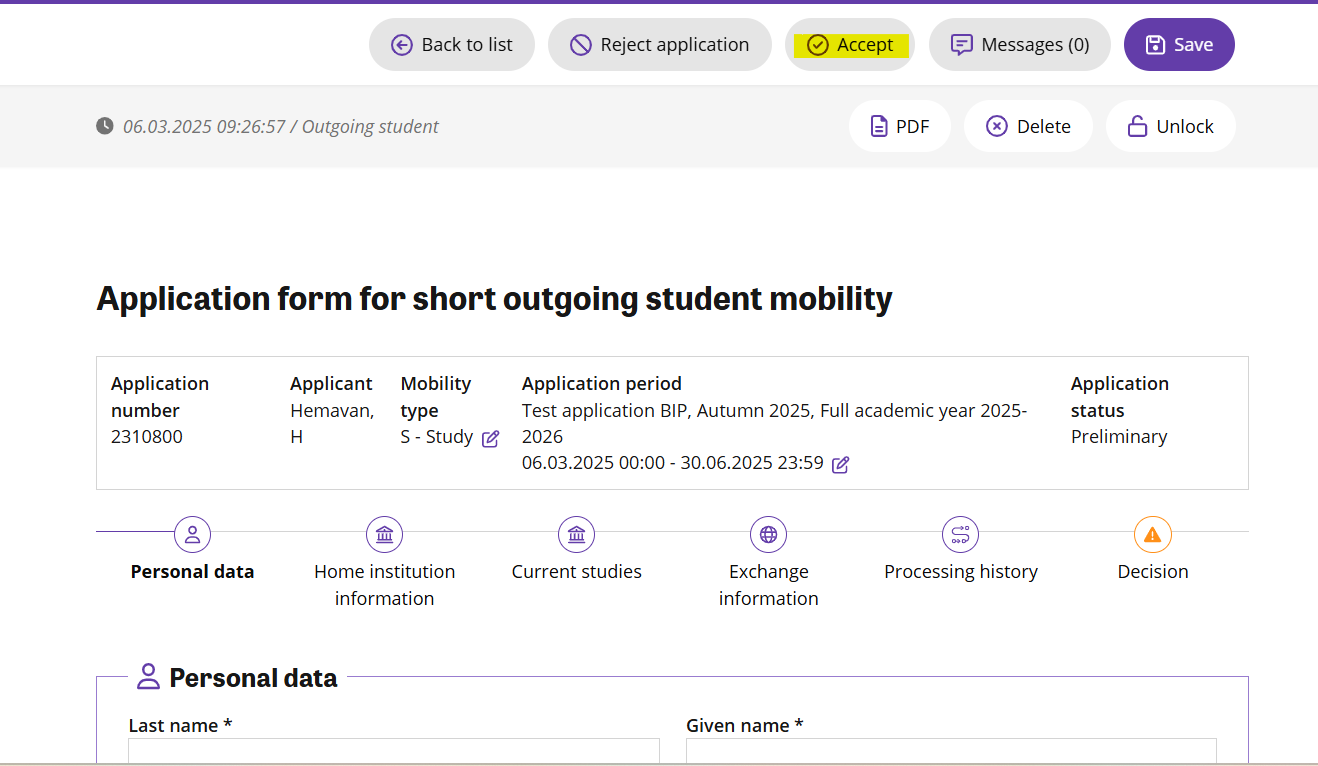
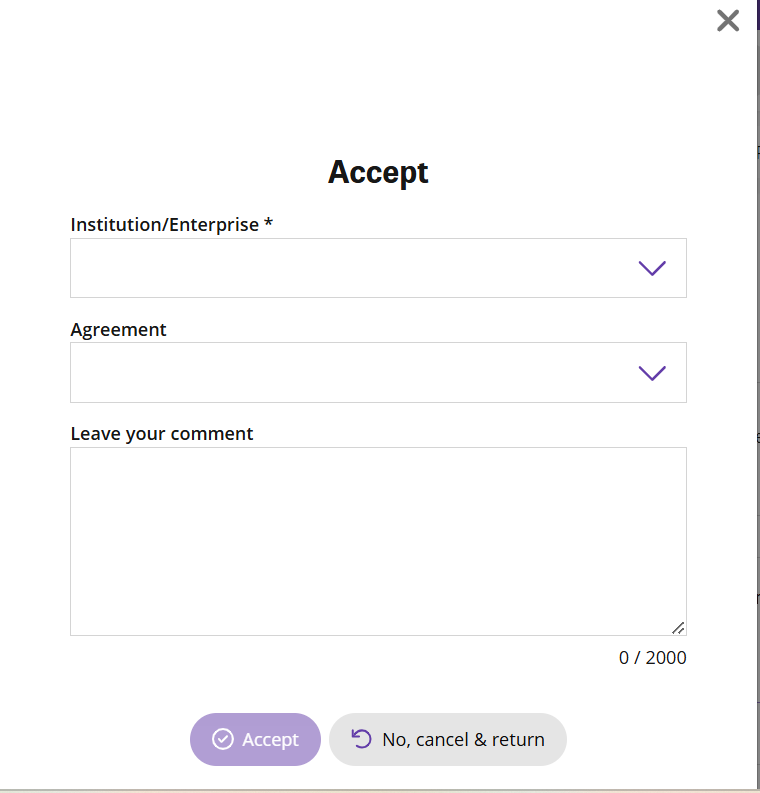
Once all applications have been reviewed, you will receive an email with the outcome of your application. Your application will either be ‘Accepted’ or ‘Rejected’.

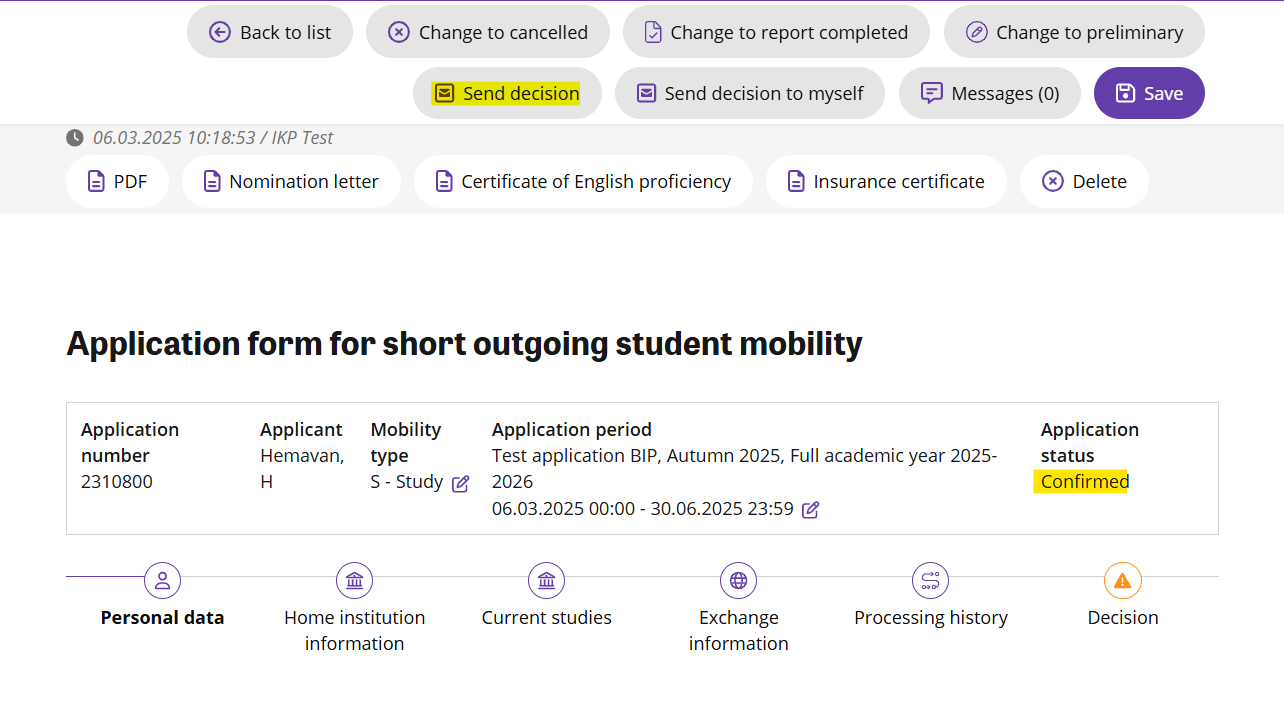
If your application has been accepted, when the e-mail has been sent to you with our decision, your application status will change to ‘Acceptance information sent’. You will now have to log in to SoleMove to ‘Confirm’ or ‘Cancel’ your application in SoleMove.

Note that you usually have seven days to decide whether to accept or decline the offer, so check your emails regularly to make sure you don’t miss the deadline!

Once you have received the outcome, your department’s international contact person will continue to process your application and nominate you to your partner university/organization. This process will vary depending on your department and the destination.

Follow these steps to log in to confirm or cancel your exchange:

  • Log in to SoleMove and open your application.
  • Click on ‘I confirm’ to accept the result of your application, or click on ‘I cancel my application’ if you wish to withdraw your application/reject the result.

Download relevant certificates and documents 

Once you have confirmed your exchange, three documents will automatically be generated in your application:

  • Your nomination letter. This can be used, for example, as a proof of your exchange if you want to rent your apartment
  • An English language certificate. This can be used to demonstrate that you meet the English language requirements. However, please note that some partner universities may require you to take an official English language test.
  • An insurance certificate. This contains Umeå’s University’s insurance policy number from Kammarkollegiet (the Legal, Financial and Administrative Services Agency).

You should download and save  all documents to your own device for future reference and easy access.


Hantera säkerhetskopiering av dina filer till OneDrive

Vanliga frågor om Microsoft Authenticator

Vanliga frågor och svar gällande Microsoft Authenticator

Grafiskt mallverktyg – studentrekryteringsmall

Den här sidan besvarar vad som är viktigt att tänka på när du ska använda mallen för digital annonsering med stillbilder i grafiskt mallverktyg som heter ”Studentrekrytering, stillbilder”.

Mallen är anpassad för att användas i digitala medier, det vill säga på plattformar så som Instagram, Facebook, Tiktok och Youtube. Mallen är inte anpassad för tryck, det går alltså inte att göra tryckfiler i malen. För att få tillgång till mallen i det grafiska mallverktyget måste du skicka in ett ärende i servicedesk, välj Grafisk mallverktyg.

Format

När du ska skapa en annons kan du välja på två olika format.

  • 1:1 (1080×1080): Används oftast som inlägg i flödet på Instagram eller Facebook.
  • 9:16 (1920×1080) Används som stories och reels på Facebook och Instagram samt på Tiktok.

Antal sidor

Du kan välja hur många sidor (maximalt tre) du vill göra annonsen på. Denna funktion passar dig som vill bygga annonsen som en trestegs-raket. Med det menas att alla tre bilder ingår i samma annons på till exempel Instagram stories.

Tänk så här när du använder flera sidor i dina annonser:

  • Bild 1: Rubrik och uppmaning
  • Bild 2: Kort text om det du vill säga
  • Bild 3: Avslutande CTA (call to action) vad du vill att mottagaren ska göra efter att ha sett annonsen.

Logotyp

Logotypen finns med i alla mallar men här kan du välja om du har en logotyp med tilläggsavsändare. Denna mall är skapad så att endast högskolorna får använda en tilläggsavsändare.

Färg

Mallen finns i fyra olika färger. Använd den färg som harmoniserar bäst med bildens färger om du använder en bild i annonsen.

Form

Det finns tre olika former om du vill ha variation i dina annonser.

Bild

Här kan du lägga in ett fotografi om du vill använda det i din annons. Fundera på vad du vill att annonsen ska säga. Behövs ett foto för det du vill förmedla? En bild kan både väcka en positiv känsla eller ta fokus från budskapet.

Om du väljer att använda ett fotografi kan du här välja den bild du vill använda direkt från Mediaflow. Säkerställ att du har annonsrättigheter för bilden.

Position

Här kan du positionera bilden så utsnittet passar bra i den mall du har tänkt använda. Du kan också zooma på bilden för att få ett närmre utsnitt. Om bilden är för ljus för att texten ska synas bra på bilden kan du justera reglaget för ljusstyrka och lägga in en toning på bilden.

Bra att tänka på med bilder

På sociala medier fungerar det ofta bra med bilder av hög kvalitet som gärna föreställer människor. Bilderna ska helst ge ett rent intryck och inte innehålla för mycket information i bakgrundsmiljön.

Utan bild

Du kan också välja att använda mallen utan bild och endast med bakgrundsfärg och text.

Texttyp

Det finns fyra olika texttyper att välja på beroende på vad du vill säga med din annons. Tänk på att uppmärksamheten på digitala medier är kort och att annonsen därför inte ska innehålla mycket text. Utöver den text du lägger in i annonsen kan du också arbeta med copytexten – det vill säga den text som ligger i inlägget i anslutning till annonsen.

  • Rubrik: Text i versaler som passar bra för en uppmaning eller kort budskap
  • Rubrik och text: En rad rubrik samt två rader text. Här kan du kort beskriva vad programmet handlar om – tänk på att programnamn ofta är långa och tar mycket textyta. Kan man förmedla vad utbildningen handlar om utan att skriva ut programnamnet?
  • Text: Tre rader text i gemener. Passar bra om du arbetar med trestegs-raket där första sidan är en rubrik och nästa sida är en kort text och sista sidan är en uppmaning.
  • Citat: Passar när du vill använda ett citat om utbildningen – kanske från en nuvarande student?

Texthöjd

Du kan justera texten i bilden. Tänk på att texten inte ska gå utanför formen i mallen. Tänk också på att texten inte ska placeras över ansikten på personer och gärna mot en så ”ren” bakgrund som möjligt för att öka läsbarheten.

Textfärg

Vit passar nästan alltid men om du har en väldigt ljus bakgrundsbild kan du behöva använda den blå textfärgen.

Ladda ner

När du vill skicka filer till annonseringen behöver du klicka på knappen ”Ladda ner”. Välj Bild (PNG-format). En zip-fil laddas då ner på din dator, som innehåller en mapp med alla sidor i separata PNG-filer.

Har du frågor om annonserna?

Sidor på Aktum som kan underlätta arbetet med att skapa annonser:

Tonalitet i studentrekrytering


Kontaktblock

Kontaktblocket visar namn, kontaktuppgifter, bild och en länk till den personliga sidan på umu.se. Blocket kan visa en eller flera personer.

  1. Gå till den mapp i resursbiblioteket där kontaktblocket ska ligga.
    Block som ska finnas i personanpassat innehåll skapas i institutionens mapp i mappstrukturen.
    Block som ska ligga på informationssidor (för det gemensamma innehållet) skapas i sidans motsvarande mapp i mappstrukturen A-gemensamt innehåll.
  2. Skapa blocket Kontaktblock och ge det ett namn. Rekommenderat är att inleda namnet med typen av block och sedan namnet på kontaktpersonen, till exempel Kontaktblock: Namn Namnssson.
  3. Lägg till den eller de personer du vill ska visas.
    1. Sök fram personens namn i sökrutan i resursbiblioteket.
    2. Dra och släpp personblocket från resusrsbiblioteket till rutan Personal.
  4. Du kan välja om befattningen ska visas och välja att sortera kontakterna alfabetiskt om du lägger in flera kontaktpersoner.
  5. Publicera och dra in blocket där du vill att det ska synas.

Bildblock, studentwebb

På grund av kopplingen mellan Optimizely och Mediaflow krävs ett bildblock för att visa en bild i brödtext. Det är alltså inte möjligt att lägga bild direkt i brödtext.

  1. Gå till den mapp i resursbiblioteket där bildblocket ska ligga.
    Block som ska finnas i personanpassat innehåll skapas i institutionens mapp i mappstrukturen.
    Block som ska ligga på informationssidor skapas i sidans motsvarande mapp i mappstrukturen A-gemensamt innehåll.
  2. Skapa blocket Bildblock och ge det ett namn. Rekommenderat är att inleda namnet med typen av block och sedan ämnet/namnet, till exempel Bildblock: Besökstider Studenthälsan. finnas i personanpassat innehåll skapas i institutionens mapp i mappstrukturen.
  3. Klicka på Välj media från Mediaflow. Leta fram den bild du vill ha antingen i mapparna i vänstermenyn eller genom att söka i sökrutan. Markera den bild du vill ha och klicka på Använd denna fil. Bildstorlek ska vara A-Standard 16:9. Beskär bilden enligt önskemål och välj Använd denna fil.
  4. Fyll i obligatorisk information
    1. Fältet Alt-text: Fyll i en Alt-text till bilden.
    2. Fältet Fotograf: Fyll i fotografens namn.
  5. Fyll i valfri information:
    • Fältet Bildtext: Fyll i om du vill ha en bildtext till din bild.
    • Fältet Placering i bildtext: Endast fullbredd är möjligt på umu.se/student
  6. Publicera blocket och dra in det på den plats på sidan som du vill att det ska synas.