Record meetings in Teams

In this manual, we describe how to record digital meetings in Teams, and where to find the recording when the meeting is over. Please note that it is important that you notify the participants in the meeting beforehand so they can decide whether it is okay to be recorded.  

Think before you record a meeting 

Ideally, avoid recording meetings unless you absolutely have to. Rather, write memos to document the meeting. If you still want to record a meeting, you should: 

  • Inform the participants in the meeting before so they can decide whether it is okay to be recorded. 
  • Ensure that the information recorded does not contain sensitive data. 

Join a Teams meeting

  1. After you start or join a teams meeting, click More, and then  click Record and Transcribe.
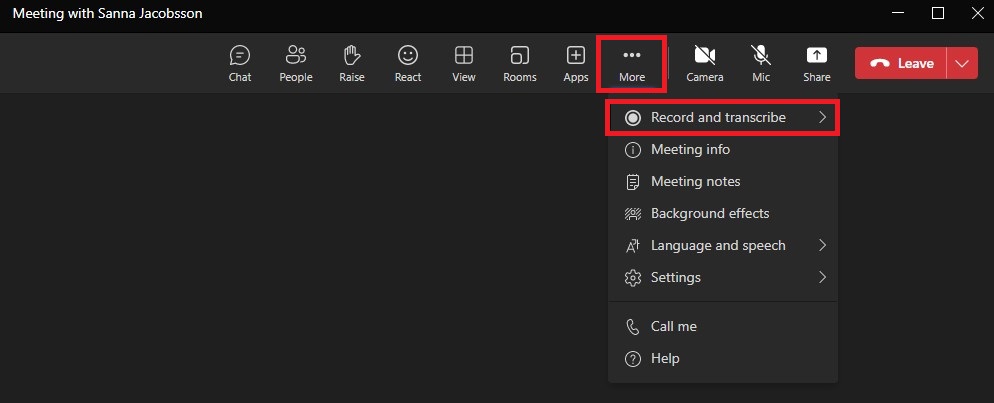
    Image showing how to record you meeting
  2. Now you will bring up another box, click Start recording when you are ready. Here you can also choose to Start transcription, if you want to transcribe the meeting.
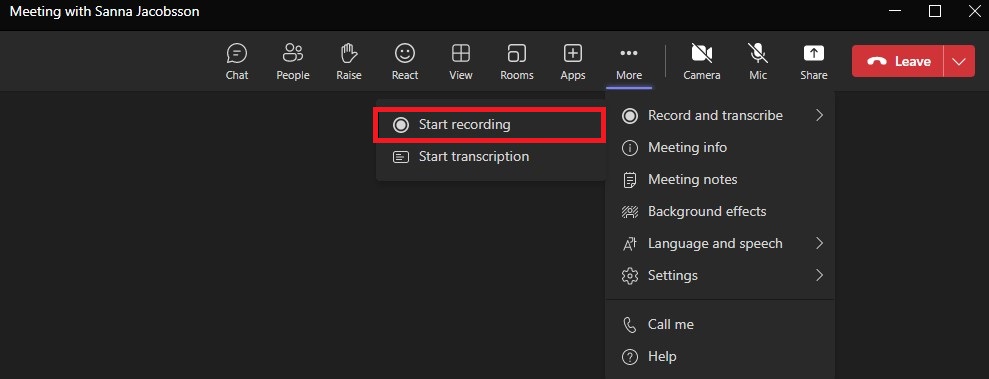
    Image showing how to start recording your meeting
  3. When you want to end the recording, do the same as when you started recording. You go to More and then Record and Transcribe, then click Stop recording.  Recording also stops automatically when the meeting ends.
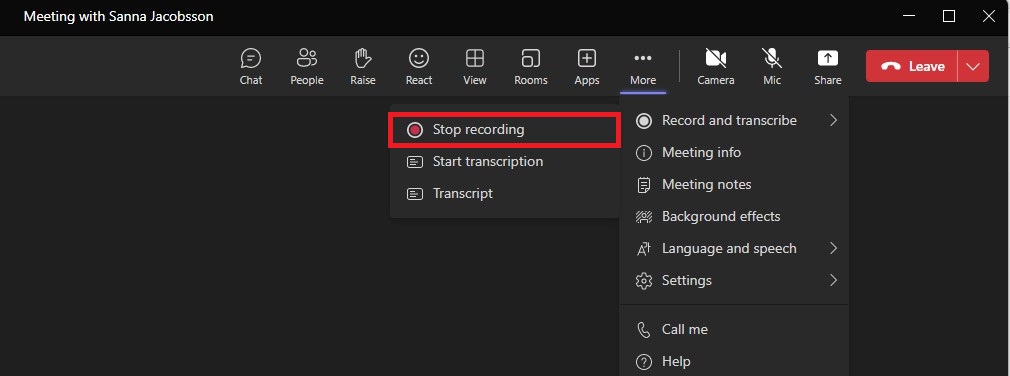
    Image showing how to stop recording your meeting
  4. Now you have made a recording of your Teams meeting. It may take a few minutes for the recording to be saved. The recording will be automatically saved in the meeting chat after the meeting is finished. Depending on the type of Teams meeting you recorded, the recording will be saved in different places 
    Channel meeting: The recording is saved in a folder under “Files” in the channel’s SharePoint, where all members of the team have access to it.  
    Regular meeting: The recording is saved in the “Recordings” folder on OneDrive for the one who started the recording. 

Automatic recording 

Before the meeting begins, you can choose to have it recorded automatically. Go to Meeting Options, and then check Record automatically. If you choose to do this, it is important that the participants in the meeting agree before the meeting starts that it is okay to be recorded.
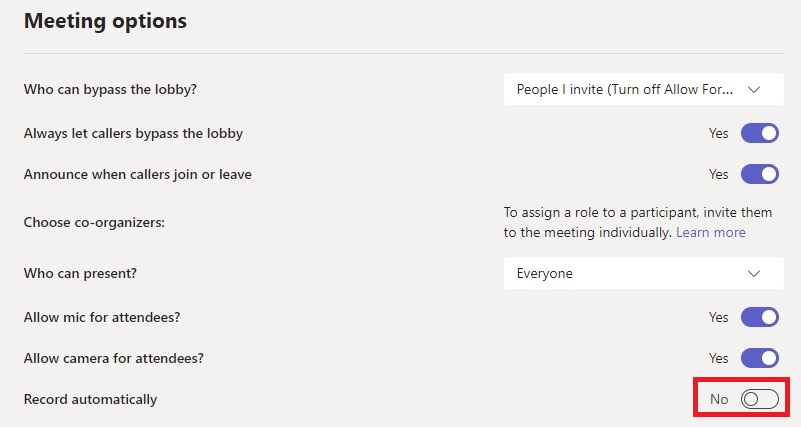
Image showing meeting options in Teams

Transfer a call

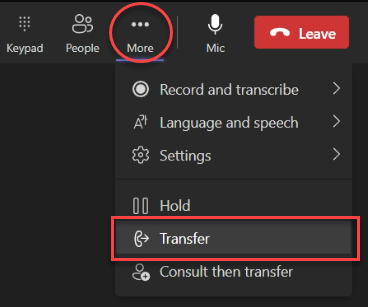
1. When you’re in a call, select More actions > Transfer in your call controls.

2. Start typing the name of the person or phone number you want to transfer the call to and select them when they appear.

3. If you are transferring to another Teams user, turn on Ring back if there’s no answer to send the call back to you if the recipient doesn’t answer. If this setting is not turned on the call will be transferred to the recipient voicemail if there is no answer. If you get the call back the popup toast will show that the recipient was not reached.

4. Select Transfer to complete the transfer.

Consult then transfer

You may want to check in with someone before you transfer a call.

Note: Consult then transfer is not available in Teams for the web.

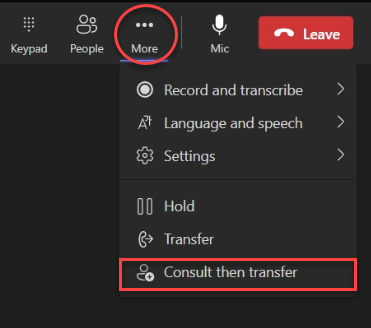
1. When you’re in a call, select More actions   > Consult then transfer.

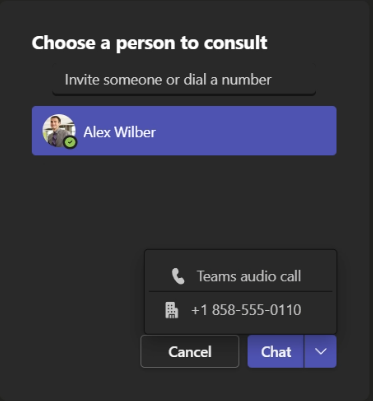
2. Under Choose a person to consult, start typing the name of the person you want to reach or a phone number and select them when they appear.

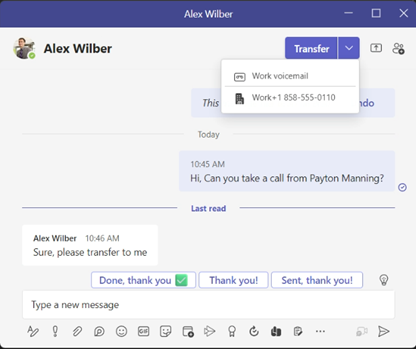
3. Consult with them by calling or using chat. Click on the chat button to start a chat, or select Teams audio call from the drop down options.

4. When you’re ready, hit Transfer to complete the transfer.

Log-in/log-out from Call Queues in Teams

When you are assigned as an agent in a Teams Call Queue, it is possible to opt-in (sign in) and opt-out (sign out). It is only when you are in opt-in status that you will get calls from the Call Queue routed to your Teams client.

Call Queues can be configured so you only get calls when you are in the status “Available” (Green).

The option to sign out and in can be disabled for some Call Queues, talk to the owner of the Call Queue if you are not able to use this function.

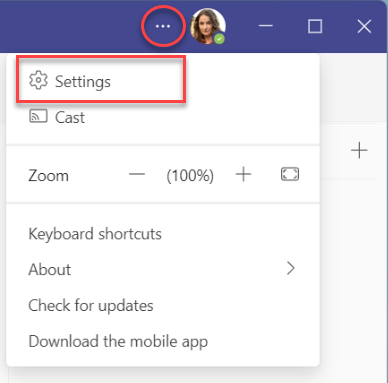
1. Open Settings in Teams by clicking on the three dots next to your profile image and select Settings.

Settings in Teams

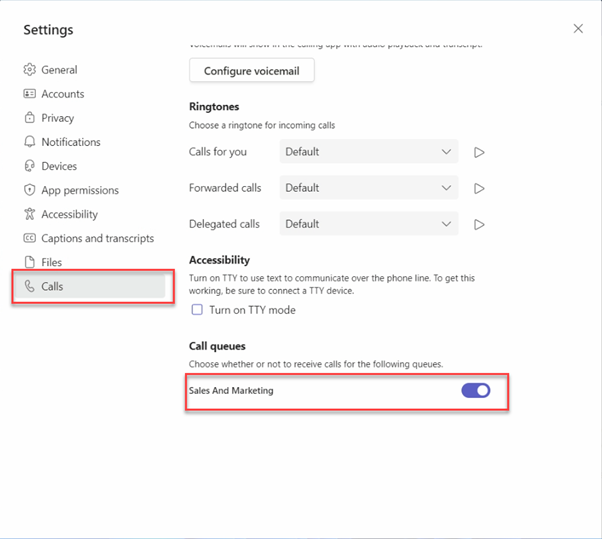
2. Open Calls in the left hand menu in settings and scroll down and you will see all Call Queues that you are assigned to. Click on the toggle switch to opt-in or opt-out.

Calls settings in Teams

Opt-in status  

Opt-out status

If the Call Queue you are using is attached to a Teams channel you can opt-in / opt-out directly from that channel in Teams.

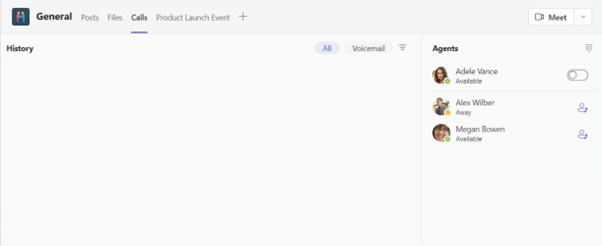
1. Open the channel your Call Queue is connected to and select the Calls tab.

2. Next to your name click on the toggle switch to opt-in / opt-out.

Switch next to your name

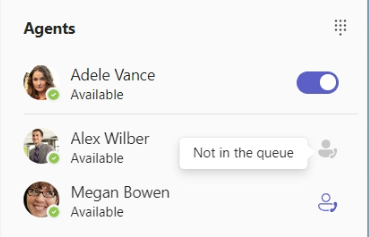
3. You can also see other users assigned to the same Call Queue and if they have opted-in or opted-out.

Agents in call queue