
Check your OneDrive
OneDrive needs to be checked periodically.
There is no monitoring, the user needs to check this himself.
Check that OneDrive is running and that you are logged in.
If OneDrive is running, you should then see an icon in the taskbar, the icon looks like a cloud.
The Windows icon looks like this:
![]()
The Mac icon looks like this:

Click on the icon and a box will open, there you will see if you are not logged in, you will then see a button with “log in”.
It is important that you check that the icons look like this and that you are logged in. Check this periodically.
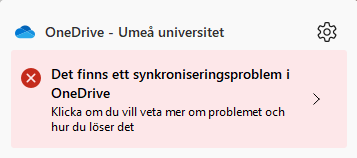
If the icon has a red cross, something is wrong.
![]()
You then need to fix this error as soon as possible, as it can prevent files from synchronizing. The error is usually due to the fact that some files cannot be synchronized. Click on the OneDrive icon and you will see the error.
Ni kan då åtgärda felet, genom att klicka på meddelandet.
Ni kan även se det röda krysset på enskilda mappar och filer i Utforskaren / Finder.
När ni klickar på meddelandet så ser ni vad felet är och hur ni kan lösa det.

You should also check your files in the cloud. To do that, you go to https://m365.umu.se, log in, click on OneDrive and then My Files.

Then you see your files on OneDrive, they should be the same files that you see in your OneDrive folder in the explorer / finder.
You can also try saving a file in your OneDrive folder on the computer and check that it comes over to the OneDrive web interface.
Make regular checks that OneDrive is running and that there are no sync errors.
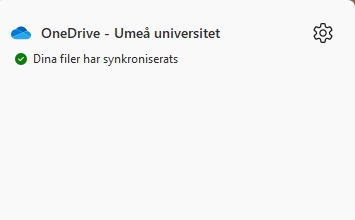
This message is good.
Device settings in Teams
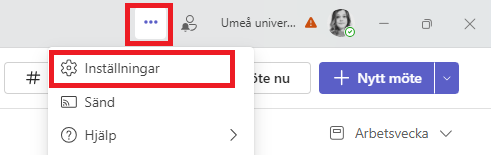
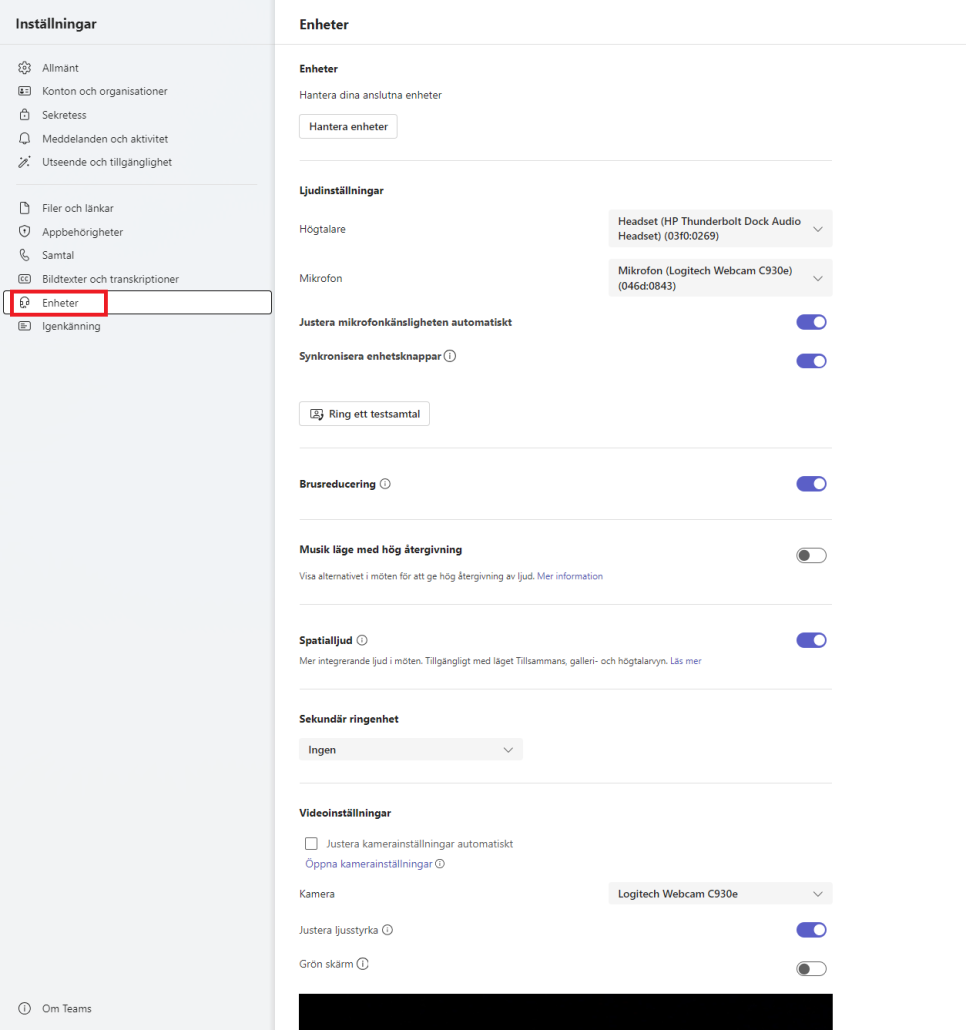
- In Teams, click the three dots, then Settings. Then select Devices.
- In the device settings, you can select your primary audio devices under Speaker and Microphone through the drop-down menu. The recommendation is that you set your headset as speaker and microphone.
- You can test that your devices are working properly by making a test call.
- Under Secondary ring device, you can set if you want the sound to come from another device when someone calls you. The recommendation is that you set your external speaker on the computer as a secondary ringing device, then you don’t have to wear your headset to hear when someone calls you. You may need to restart Teams for the changes to take effect.
- In the device settings, you can also choose which camera to use in meetings and calls, and preview the video.
Delay or remove auto-delete of your recordings
To disable automatic deletion of a Teams recording or to extend how long such a recording should remain in M365 (default is 180 days), you as the owner of the recording can go in via Microsoft Stream and change the date of deletion:
- Go to Stream in the Microsoft 365 portal
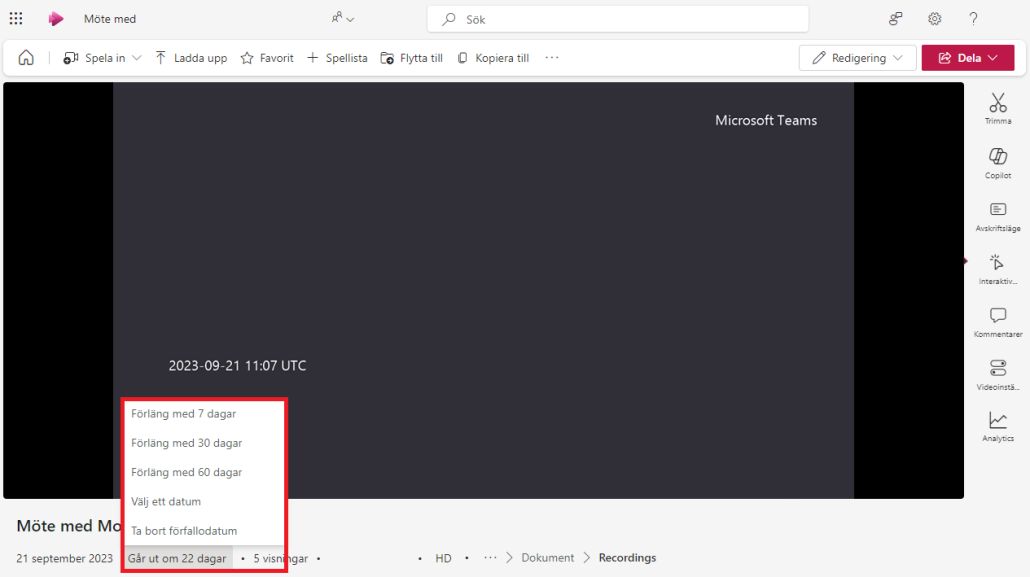
- Find the recording you want to change and click on it
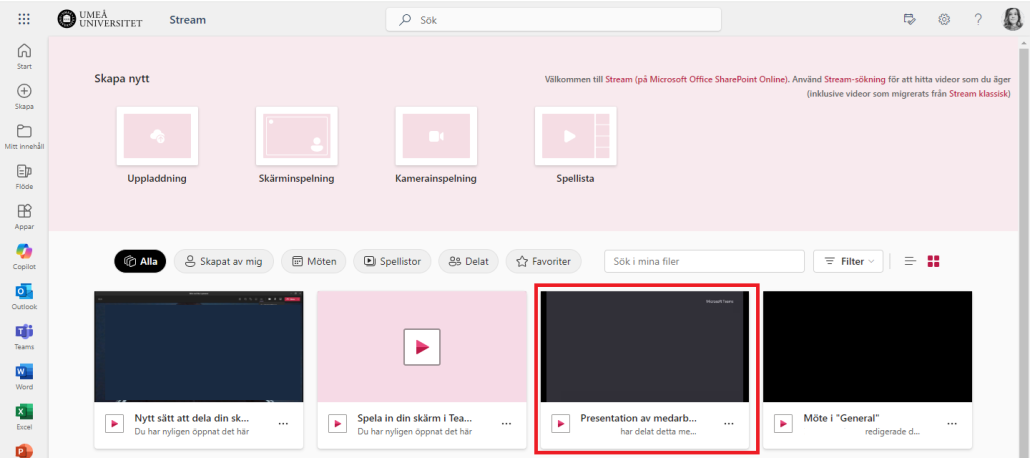
- On the left below the recording, you will find information about how many days are left until the recording is automatically deleted. Click on the number of days to change or remove the end date
Turn on Microsoft editor in the Edge browser
This instruction shows how to turn on the Microsoft editor in the Edge browser. To access the add-on, you must have an A5 license in Microsoft 365, all employees and students and affiliates who have purchased it have it.
- In the Edge browser, click the three dots at the top right, then Add-ons, then “Get extensions for Microsoft edge”.


- In the search box, search for Microsoft Editor.

- Click Download and then “Add Extensions”

- You can now go through the three dots and then Add-ons again, there Microsoft editor will appear.
- You can choose to add the extension to the toolbar through this icon
About groups in Microsoft 365
When you add a member to a group in Microsoft 365, they get the correct permissions to everything that the group includes using the Microsoft 365 Groups service. Groups should preferably have two owners and it is important to delete groups that are no longer in use.
What is a Microsoft 365 Group and how is it created?
You can gather people you want to collaborate with in a Microsoft 365 group. Within the group you can share different resources.
A Microsoft 365 group is always created “in the background” when you create any of these in Microsoft 365:
- Shared library in your OneDrive
- Sharepoint
- Planner
- Team
The people who have access to e.g. the planner also have access to the M365 group.
Groups you are a part of are visible in the menu on the left in Outlook, under “Groups”, with the exception of your Teams, which are hidden in Outlook.
What can we use the group for?
The members of the group can share different resources, for example a shared mailbox and a shared calendar.
Shared mailbox
The group can use the shared mailbox to send emails within the group.
The email address will be groupname@o365.umu.se. Therefore, the group’s shared e-mail box should not be used to send external e-mails.
You can find the settings for the group’s mailbox in Outlook. Find and click the group under “Groups”, then click the “Group Settings” gear.
Shared calendar
The shared calendar can be used for joint planning within groups, as a digital notice board, joint meetings and more. Only the members of the group have access to it.
Roles in Microsoft 365 Groups
There are three different roles: owner, member and guest.
The owner administers who will be members, therefore it is good if there are at least two who are owners of a group.
Members and guests have largely the same permissions, which are to create, read and edit content.
Remove inactive groups
If you are a member of or own many groups, you may find it difficult to navigate among groups that are no longer in use. Groups can be hidden, which makes navigation easier, but these groups can also pose a threat to information security, especially if there is information that no one owns and takes responsibility for. If you have also invited external guests with accounts that UmU does not manage, these accounts may end up in the hands of people who are not intended to have access to the information.
Therefore, we recommend that you delete groups that are no longer in use. Keep in mind that if you delete a group, all content associated with the group will disappear.
Email notifications to group forms
When you create group forms in Forms, and want to receive email notifications when a response is submitted in the form, you need to make additional settings than just in the form. In this manual, we describe how you can receive notifications to a group email, when you create group forms in Forms.
- Go to Microsoft Forms
- Go to the bottom of the page and find the group/team form you want notifications from
- Click on the team you want to set up email notifications for
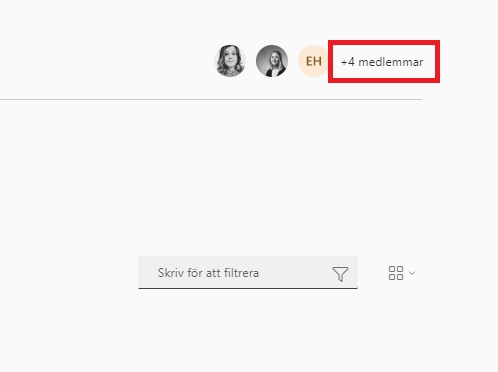
- Up in the right corner you see the members of the Team. Click on the button that says how many members the team has
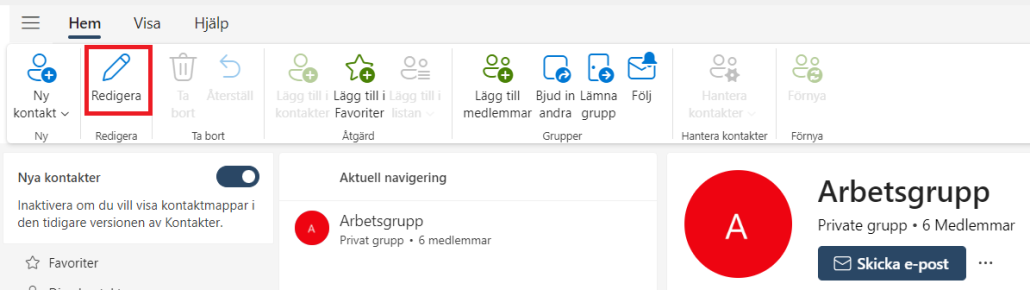
- Now Outlook on the web opens. At the top left of the menu, click Edit
- In the box that now opens, check Allow people outside the organization to send email to the group (you may need to scroll down a bit in the box)
- Then click Save.
- Done! You have now set your group forms to be allowed to receive email notifications. Make sure you also set in the group form that you want to receive email notifications for each submitted answer.
Get started with your personal booking page with Bookings with me
Bookings with me is a digital personal booking tool that integrates with your free/busy time in your Outlook calendar. The service can be used, for example, when you need to schedule employee meetings or want to offer tutoring sessions or coaching to students and colleagues. This manual guides you on how to get started with your personal booking page. If you want to know how to create and get started with a shared booking page, I recommend you to look at this page: Create a booking site in Bookings
- Go to the portal at m365.umu.se
- Go to the menu in the top left corner and then click on Bookings.
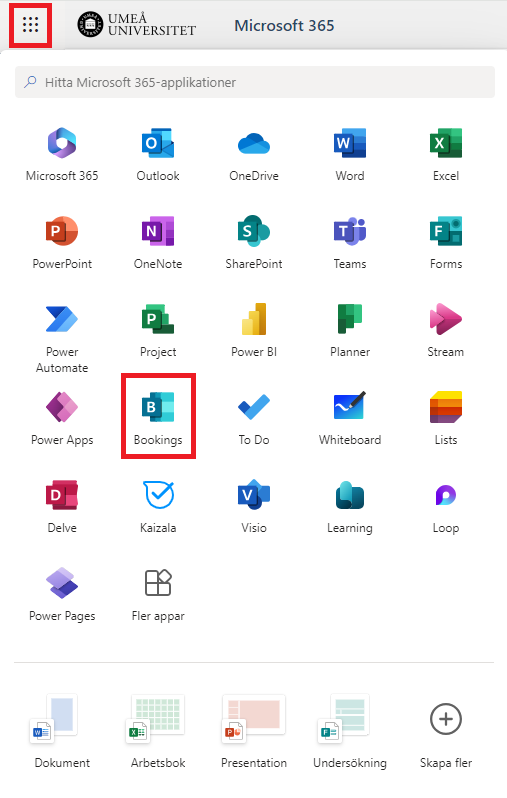
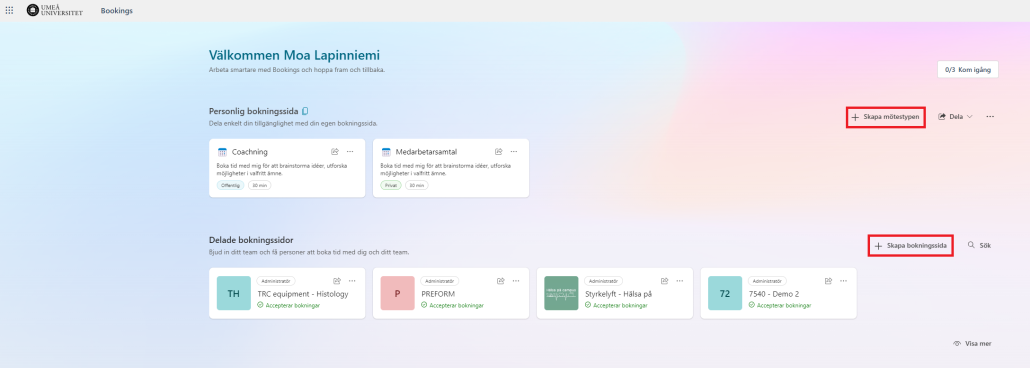
- You are now on Booking’s home page.
* To create an appointment type in Bookings for me, click Create appointment type.
* To create a new shared booking page, click Create booking page.
- Choose a title or a name for the meeting that can be booked and a short description if desired. Enter the location and how long the meeting should be
- Also choose whether the meeting should be of the type Public or private. You can read about the differences in Frequently Asked Questions about Bookings
Please note that your personal booking page is automatically added to your email signature unless you click out of it (during the selection of public and private)
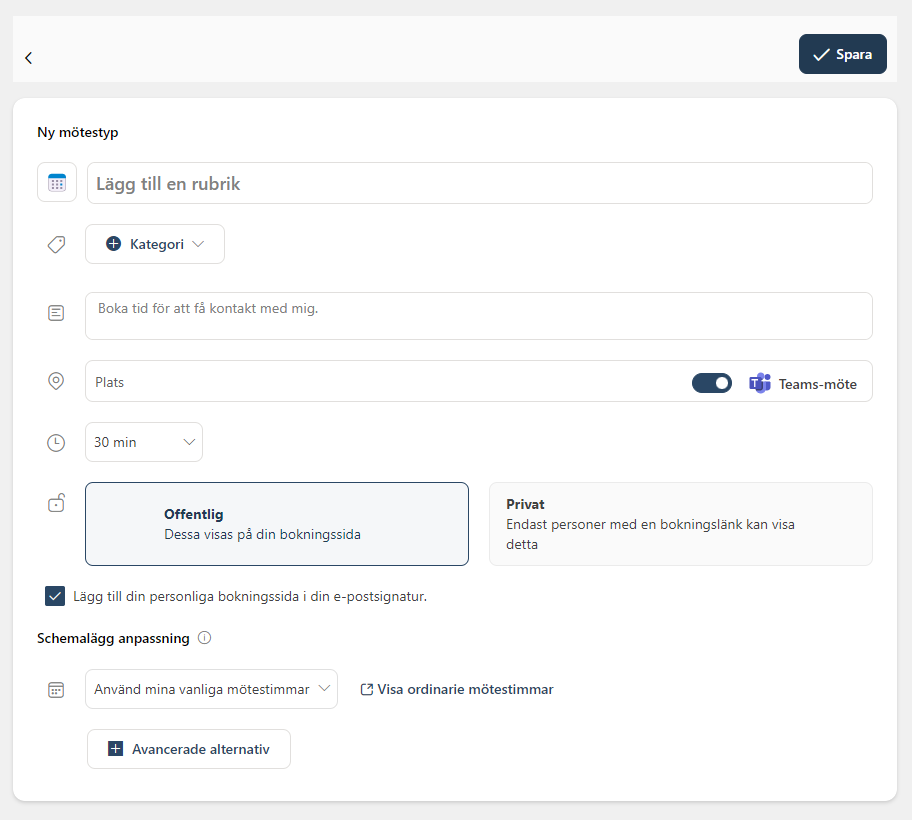
- Under “Schedule adaptation” you specify when you should be able to book
1: Use my usual meeting times: Suggested times to the booker are displayed based on your availability in the calendar. If you have a gap between two bookings in your calendar, that gap will appear as an available option on your booking page.
2: Use customized availability hours: Here you specify the date range during which it should go and book alternatively if there are any special time frames. Maybe it is only on Mondays that you want it to be possible to book? - Under advanced settings, you can set lead and buffer time as well as reminders and whether automatic follow-up messages should go out after the meeting. Read more about what this means under FAQs
- Click save at the top right when you’re done.
- You can now share a link to your booking page or meeting type and receive bookings. Depending on whether your meeting is private or public, you share in different ways. If it’s a public meeting, you use the Share button at the top, while if it’s a private meeting, you click the share button directly on the meeting type. Good luck!

Scheduling Assistant in Outlook
In this manual, we describe how to do a scheduling poll in Outlook. You can use scheduling poll to agree on a meeting time, where the meeting participants can vote on a time that suits them. This feature is available for Windows and on the web. The manual will be based on the web to also suit those who use, for example, Mac.
- Go to the portal (m365.umu.se) and open Outlook.
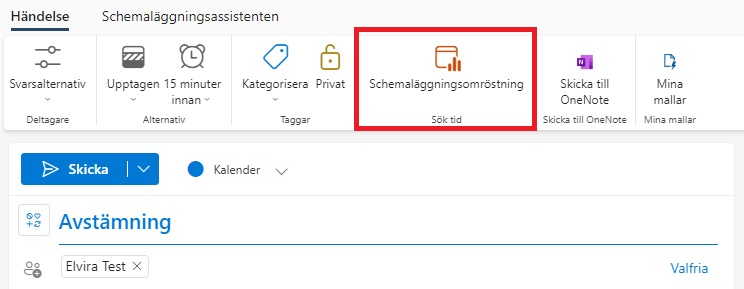
- Go to the calendar and click New Event, and select Event.
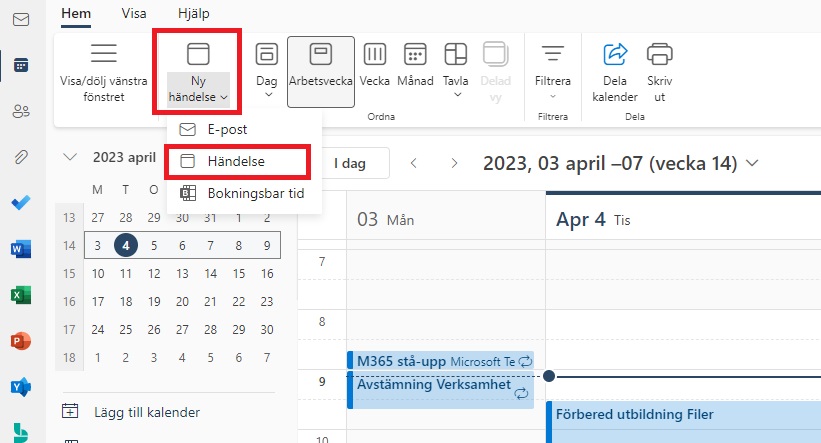
- Now you get a box where you invite the meeting participants and set a title for the meeting.
- Then go to Scheduling Poll in the menu bar
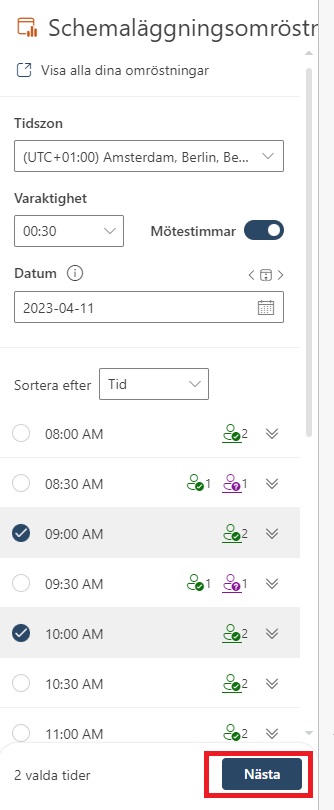
 Now you get a box on the right. Here you can choose how long the meeting should be, and what date it is. Below you can see suggestions for times when it would suit all meeting participants, or one of the meeting participants. Once you have selected which proposals you want to send out, click Next.
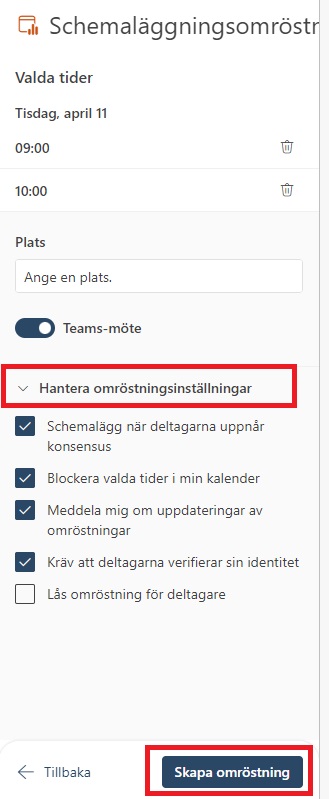
- Now you see a box with an overview of the times you selected. Here you can also choose a place, or check in Teams meeting. Under “Manage voting settings” you get options you can choose to check or uncheck:
– Schedule when the participants reach consensus: Tick this if you want the meeting to be booked automatically in the Outlook calendar when you have agreed on a time.
– Block selected times in my calendar: Add placeholders to your calendar for all of the selected times.
– Notify me of poll updates: Receive an email when a meeting attendee casts a vote.
– Require participants to verify their identity: Participants who vote must be logged in, so it is possible to identify who voted.
– Lock poll for participants: Participants cannot propose new times. When you feel ready, click Create Poll.
7. Now you see an overview of what you send in your poll, and can write a message in the email. When you’re ready, click Submit.
8. When you send the scheduling poll, placeholders will be created in your and the recipients’ calendars, for the selected times.
9. Done! When they vote, you get an email, and if everyone agrees on the same time, a booking is added to the calendar for that time, and the placeholders disappear.
How your files are stored (Files on demand)
Below, we’ll describe what “Files on demand” means, and how your OneDrive files might be stored on your PC.
What is OneDrive Files on Demand?
- Files on Demand is a built-in feature in OneDrive that allows you to choose how you want your files to be stored.
- You can save space on your computer by making files available only online.
- Make sure files are always available on your device, whether you have internet or not.
- Files on demand also apply to files you’ve synced to your OneDrive from, for example, Teams, or shared libraries.
Below, you can learn more about what the different symbols mean that you can see on your OneDrive files in your explorer:
On the files and folders you see this blue cloud: ![]() it means that the files are only available online, and do not take up space on your computer. You’ll see these files directly in Windows Explorer, but won’t download until you open them. You also need to be connected to the internet to open these files. For those of you who use a Mac, the symbol looks like this:
it means that the files are only available online, and do not take up space on your computer. You’ll see these files directly in Windows Explorer, but won’t download until you open them. You also need to be connected to the internet to open these files. For those of you who use a Mac, the symbol looks like this: ![]()
The files and folders where you see this green checkmark: ![]() are files that are online files, but when you open them, they are downloaded and become a locally available file. Right-click on the file and select “free up space”. Thus, these files are both online files and files that are available locally on your device. For those of you who use Mac, you will not see a symbol next to your file.
are files that are online files, but when you open them, they are downloaded and become a locally available file. Right-click on the file and select “free up space”. Thus, these files are both online files and files that are available locally on your device. For those of you who use Mac, you will not see a symbol next to your file.
The files and folders where you’ll see this green checkmark: ![]() are files that you’ve actively chosen to keep on your device at all times. These files are downloaded and take up space on your device, and you can access them at any time, even without an internet connection. For those of you who use a Mac, the symbol looks like this:
are files that you’ve actively chosen to keep on your device at all times. These files are downloaded and take up space on your device, and you can access them at any time, even without an internet connection. For those of you who use a Mac, the symbol looks like this: ![]()
Other symbols in your OneDrive
Aside from these three symbols, you may also see other symbols on your files or on your OneDrive icon on your taskbar, such as a pause icon, exclamation mark, or warning triangle. Keep an eye out for symbols on your OneDrive cloud. You can click on your OneDrive icon on the taskbar to see what the error is and how it can be resolved. Here’s what the symbols might look like:
![]()
![]()
![]()
![]()
Do you want to keep your files on your computer at all times?
If you want to keep all your OneDrive files on your computer, and thus always have access to them offline, you can right-click on the OneDrive folder in your menu on the left side of your explorer, and then select “Always keep on this device”. This is not something we recommend, as it is often better to select specific documents and folders that want to be kept on the device. That way, it won’t take up unnecessary space on your computer. Here’s how to keep your OneDrive files on your device.