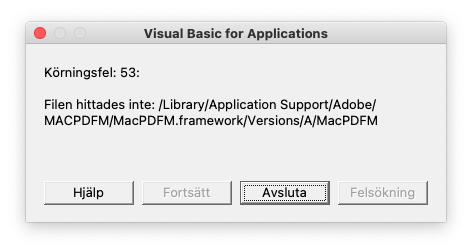
Manual

Manual
  • Svenska
  • Menu Menu
Jonas Sundström

My backup for MacOS

Updated: 2021-02-16/in Employee, English, Mac, My Backup /by Jonas Sundström

My backup is activated for all employees.

For affiliates, the Head of Department or equivalent or IT manager at the department must activate you.
When this is done, an email is sent to those for whom the service is ordered.

1. Go to the following address https://minbackup.umu.se:4285/ and log in with your Umu-ID

2. For App Downloads, select the client according to the operating system you have on your computer and the file will be downloaded.

3. Open the downloaded file and install Code42 CrashPlan.

———————————————–

NOTE! If you have MacOS Catalina (10.15), you need to change the rights on the computer for the backup to work. Also applies if you have updated MacOS from the previous version to Catalina (10.15).

a. Open System Preferences

b. Select Security and Privacy

c. Select the Privacy tab

d. In the left part go to Full Disk Access and select CrashPlan. If CrashPlan is missing, add it via “+”

———————————————–

5. When the installation is complete, start CrashPlan and type in your Umu-ID and serveradress minbackup.umu.se

6. When prompted, login with Umu-ID

7. Click Manage files to proceed to select which files you want to back up, the default is only My documents

https://manual.its.umu.se/wp-content/uploads/2018/02/manual-loggo.png 0 0 Jonas Sundström https://manual.its.umu.se/wp-content/uploads/2018/02/manual-loggo.png Jonas Sundström2020-10-02 12:34:502021-02-16 14:02:25My backup for MacOS
Jonas Sundström

Installation of VPN client MacOS

Updated: 2021-01-29/in Employee, English, Mac /by Jonas Sundström

This guide assumes that you have a VPN account at Umeå University. If you do not have one, you can order it at https://administrationsverktyg.umu.se/Vpn

To install the client on a computer with MacOS do the following:

Open a web browser and surf to https://vpn.umu.se

1. Log in with your login for your VPN-account (Umu-id or VPN-user).

2. The page verifies the operating system.  It can take a few minutes.
3. Click on the link Download for macOS to download the client to your computer.

4. Open the file you downloaded ((anyconnect-macosx-[version]-web-deploy-k0.dmg) and and start the installation by clicking on the installer vpn.pkg.

5. Finished!

Set up the client with the correct information

When the installation is finished you need to input the correct information.

1. Start the program. You can find it via /Applications/Cisco/Cisco AnyConnect Secure Mobility Client

2. Write in vpn.umu.se in the window that opens and then choose Connect.

4. If you receive a question regarding your login credentials, fill in your VPN-account (Umu-id or vpn-user) and click OK

5. Finished! When you are connected via VPN the picture will look like this

https://manual.its.umu.se/wp-content/uploads/2018/02/manual-loggo.png 0 0 Jonas Sundström https://manual.its.umu.se/wp-content/uploads/2018/02/manual-loggo.png Jonas Sundström2020-04-01 13:41:292021-01-29 14:11:48Installation of VPN client MacOS
Linda Johansson

Clear cache files in your web browser (MacOS)

Updated: 2021-01-29/in Employee, English, Mac, Student /by Linda Johansson

To be sure that you se the latest version of the web page in your browser, it is recommended that you empty the cache files before you surf to a specific page.

Cache files contain information from web pages you have visited in order for them to re-load faster next time you visit them.


Chrome (MacOS)

  1. Open Google Chrome
  2. Choose Chrome in the menu bar
  3. Click on Clear Browsing Data
  4. Choose the time frame you wish to clear (ex. All Time)
  5. Click the check boxes for Cookies and other site data and Cached images and files
  6. Click on Clear Data

Firefox (MacOS)

  1. Open Mozilla Firefox
  2. Choose History in menu bar
  3. Click on Clear Recent History
  4. Choose the time period you wish to empty
  5. Click on Clear Now

Safari (MacOS)

  1. Open Safari
  2. Choose Safari from the menu bar
  3. Click on Reset Safari
  4. Mark Clear history
  5. Click on Reset
https://manual.its.umu.se/wp-content/uploads/2018/02/manual-loggo.png 0 0 Linda Johansson https://manual.its.umu.se/wp-content/uploads/2018/02/manual-loggo.png Linda Johansson2018-06-18 12:11:592021-01-29 14:11:49Clear cache files in your web browser (MacOS)
Linda Johansson

Connecting to a Skype for Business meeting with the web app (Mac)

Updated: 2021-02-16/in Employee, English, Mac, Skype /by Linda Johansson

If you do not have the full client version of Skype, but need to connect to a Skype for Business meeting (for the first time).

1. After you click on the meeting link, choose Install and join with Skype-web app.


2. Install the app by clicking on SkypeMeetingsApp.dmg

3. Go back to the webpage where the program was installed from and click on Join the Meeting. click on Allow in the next step.

4. Type in your name and then click on Join.

5. You should now be connected to the meeting.

https://manual.its.umu.se/wp-content/uploads/2018/02/manual-loggo.png 0 0 Linda Johansson https://manual.its.umu.se/wp-content/uploads/2018/02/manual-loggo.png Linda Johansson2018-03-26 12:39:142021-02-16 10:16:59Connecting to a Skype for Business meeting with the web app (Mac)
Linda Johansson

Login Skype for Business (Mac)

Updated: 2021-02-16/in Employee, English, Mac, Skype /by Linda Johansson

The login for older versions of Skype for Business Mac can appear slightly different.  It is recommended to always run the latest version of the client.

1. Download the program from Microsoft and install it.  OSX 10.11 or newer is required.

2. Start Skype for Business.

3. Fill in:
SIP-address (firstname.lastname@umu.se).
Click on ”Advanced options”.


4. Fill in your user-ID (ad\Umu-id) under ”User name”.
Click on ”Save”.

5. Fill in your password to (Umu-id).

6. Click on Log in to start.

https://manual.its.umu.se/wp-content/uploads/2018/02/manual-loggo.png 0 0 Linda Johansson https://manual.its.umu.se/wp-content/uploads/2018/02/manual-loggo.png Linda Johansson2018-03-26 12:10:152021-02-16 10:16:59Login Skype for Business (Mac)
Jonathan Harding

Install eduroam for MacOS (Umu wifi)

Updated: 2021-02-01/in Employee, English, Mac, Student /by Jonathan Harding

This guide will show you how to use Ciscos program to connect to eduroam on campus.
Note you must be on the Umeå University’s campus and have a connection to Umu wifi to be able to complete this guide. The quide will not work at NUS.

1. In the wifi menu choose  Umu wifi.

2. Start a web browser (Safari or Firefox) and open, for example, http://www.eduroam.umu.se. You will then be redirected to the correct page. Write in your Umu-ID (umu-id@ad.umu.se) and password, klick on Sign On.

3. Click on Start

4. Write in your information about your computer and click on Continue.

5. Ciscos installation program will download. called  SPW.tar, to the folder Downloads.

6. Dubbel click on the  SRW.tar file and it will extract to create a file called ”cisco_network_setup_assistant.dmg”.

7. Dubbel click on the Cisco Network Setup Assistant to start the  installations programme.

8. Click Start. During installation, you must approve changes.

9. When all certificates are installed, click Exit.

10. Wi-Fi has now automatically switched to eduroam.

11. Access Settings – Network – Wi-Fi – Advanced.
Remove Umu wlan and Umu wifi if they are there otherwise your computer can be connected to them before eduroam is connected.

https://manual.its.umu.se/wp-content/uploads/2018/02/manual-loggo.png 0 0 Jonathan Harding https://manual.its.umu.se/wp-content/uploads/2018/02/manual-loggo.png Jonathan Harding2017-09-11 08:56:562021-02-01 08:34:43Install eduroam for MacOS (Umu wifi)

Contact Servicedesk

Create a support ticket at www.umu.se/servicedesk, call 090-786 63 00 or visit us at MIT-building.

Scroll to top