
Create a board view in Microsoft Lists
Lists is a tool in Microsoft 365 where you can create, share, and track lists. In this manual we describe how you create a board view.
Observe that the appearance can differ whether you are using Mac or Windows.
Create board view
- Go to your chosen list in Microsoft Lists you want to create a board view in.
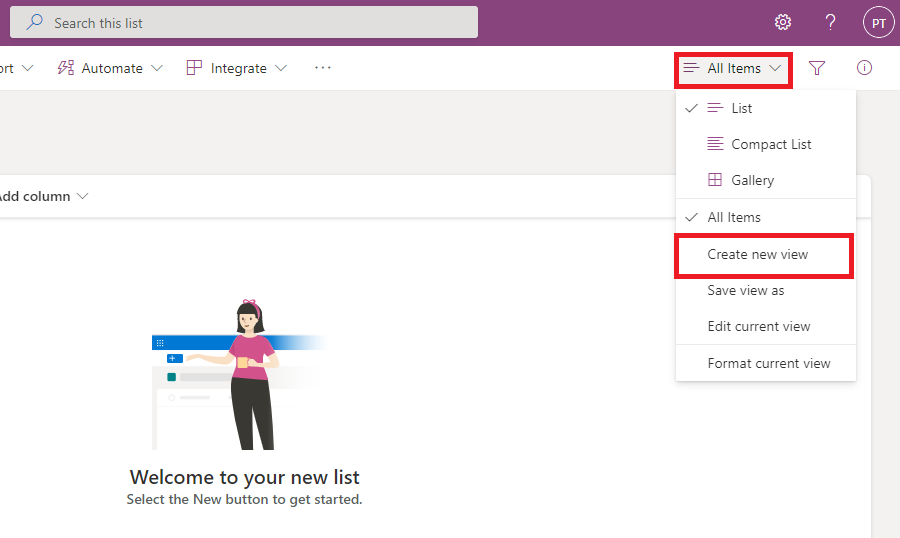
- Choose All objects in the menu bar and then Create new view.
- Now you see the window where you can edit and create you new view:
1. Add the name you want for your board view.
2. Then choose Board
3. Choose how you want to organize your board by clicking the arrow to the right in this field. If you don’t already have any completed columns, it will automatically create a column that is named choice1. If you have completed columns, choose the column you want to organize you board view by (Example: by location, status, or date). Your board view will then be sorted and structured by how you have organized your board.
4. If you want your list to be public for others, you tic this box. If you want it to be private, you keep this box empty. If you choose to make it private, you are the only one who can see and edit the board.
5. When you are ready, click Create.

- Now your Board view is showing, and here you can Add new buckets and manage your current buckets. You can place your objects to the bucket they belong to and add more object by clicking the Plus-sign in the right corner of each bucket.
