Block or release quarantined email

When an email has ended up in the spam filter,  you will receive an e-mail from the sender noreply@umu.se that you have an email in quarantine. If you believe the message to be safe, you can choose to let it through so it ends up in your inbox. If the message is spam, you don’t need to do anything, it will be automatically deleted in 30 days. 

 This is what the message looks like: 

Select Release to send the message to your inbox.

Select Block sender to block the sender. 

Select Review Message to review the message to decide whether or not to let it go through. You will then see this view: 

Select the message and whether you want to release or delete it.

Reset multi-factor authentication using BankID

If you have lost your mobile device, you can receive a one-time password using BankID and reset your Microsoft authenticator multi-factor authentication.

  1. Visit My Settings
  2. Click on I want to reset my Microsoft MFA
  3. Click on With BankID
  4. Choose what device to use and follow the instructions
  5. Copy the one time password and follow the guide on how to reset your MFA with one time password


Register voucher Umu-print

This guide helps you register vouchers for the Umu-print printing solution.

Follow the steps below:

  1. Enter the code you received on your voucher. All symbols must be filled in including hyphens.
  2. Click on “Register Voucher”
  3. When the amount has been registered, you will see a text that tells you that your amount has been inserted. Please note that an administrative surcharge is charged for top-up with vouchers. The actual value is written on the voucher.
  4. To check your new balance, click on “Transaction history” in the menu on the left.
  5. You can now see exactly what you deposited into your account and when, as well as the current balance.

Install Umu-print

This guide will help you install Umeå University’s printing solution Umu-print.

Forward calls in Teams

If you can’t or don’t want to receive calls in Teams, you can forward your calls in a few different ways.

Select the “Do not disturb” status

Select the “Do Not Disturb” status to forward calls and temporarily turn off notifications.

Click on your profile in the upper right corner, then click on the status and select “Do not disturb”.

Do not disturb status

Under “Duration” you can choose how long you want the status to be displayed.

In your Calls settings in Teams, you decide what happens in case of unanswered calls, by default the call goes to voicemail.

Choose to forward calls

In the Calls settings in Teams, you can choose “Forward my calls” and what happens when forwarding, for example forwarding to voicemail.

Forward calls in Teams

Remember to change the setting back when you want to be available again.

In case of longer absence, for example vacation or leave of absence

If you have scheduled yourself as “Out of office” in your calendar in Outlook, you will also appear with the status “Out of office” in Teams.

You can supplement your absence in Teams with a status message. Click on your profile in the upper right corner and then select “Set status message”. You can also choose how long the message should be displayed.

When you’re away from Teams, your calls are directed to voicemail by default.

Out of office greeting in Teams

In the Calls settings in Teams, under “Configure voicemail”, you can enter your own out of office greeting and choose when you want it to be played, for example when you have an auto-reply in Outlook or an out of office event in your calendar.

Installing “My Backup” (Crashplan) for Windows

This manual helps Windows users to install and log in to the cloud-based service “My Backup” (Crashplan) There are two ways to do this, and both methods are described below.


Method 1 – if you have the Software Center program

  1. Open the Software Center program by clicking on the “Start” button at the bottom left of your screen and locating the search box, or go directly to the search box at the bottom left. Enter “Software Center” in the search field and then open the program.

NOTE: If you do not have the “Software Center” program on your computer, scroll further down this instruction page to Method 2.

  1. Click on “Applications” in the list on the left side of Software Center. The “My Backup”(Crashplan v11.x) program should be found there. Click on the program and press install. The old Code42 program should then disappear from your computer and the new one installed instead. This takes about 2–5 minutes.
  2. Once installation is complete, search for My Backup (Crashplan)in the search box at the bottom left of your computer or via the “Start” button, and then open the program.
    1. My Backup (Crashplan) will ask for your username and server name
    • The username is: Umu-id@umu.se
    • The server name is clients.eu5.cpg.crashplan.com:4287

    Once you have entered this, you will be directed to the Umeå University site, where you log in with your Umu-id and password.

    1. After about 10–20 seconds, you will be logged in to My Backup (Code42 Crashplan). Open the program and click on Manage Files. Make sure that you tick the folders that you want My Backup (Code42 Crashplan) to backup (the Documents folder is default). If you save files to your Desktop, you need to click for that option as well.

    Do not forget to click on Save at the bottom right corner after you have finished selecting the files you want backed up.


    Method 2 – if you do not have Software Center on your computer

    1. The old version must first be uninstalled. This is usually version 7 or 8 of My Backup (Code42 Crashplan). The easiest way is to click on the “Start” button at the bottom left of your Desktop or to search for the word program using the search box at the bottom left. Then select Add or Remove Programs from the list menu. Go in there.
    2. Inside Add or Remove Programs, scroll down until you see My Backup (Code42 Crashplan). Click on it once and you should see the version name.

      If you have an older version, such as one starting with 7 or 8, you can uninstall that program.
    3. Once the outdated and old version of My Backup (Code42 Crashplan) is removed, go to the address https://console.eu5.cpg.crashplan.com/ and log in with your umu-id@umu.se
    4. Click on Administrationat the top left and then on Downloads
    5. Download the latest version of Windows – 64-bit version 10.x (click on the blue arrow on the far right)
    6. The download can take anywhere from 1 to 4 minutes in most cases. The installation file for My Backup (Crashplan) can be found under “Downloads” in your File Explorer.
    7. Double-click on the installation file and run through it (press Next a few times, install and complete the installation).
    8. Once installation is complete, search for My Backup (Crashplan)in the search box at the bottom left of your computer and open the program.

      1. My Backup (Code42 Crashplan) will ask for your username and server name
      • The username is: Umu-id@umu.se
      • The server name is clients.eu5.cpg.crashplan.com:4287
    9. Once you have entered this, you will be directed to the Umeå University site, where you log in with your Umu-id and password.
    10. After about 10–20 seconds, you will be logged into My Backup (Code42 Crashplan). Open the program and click on Manage Files. Make sure that you tick the folders that you want My Backup (Code42 Crashplan) to backup (the Documents folder is default).

      Do not forget to click on Save at the bottom right corner after you have finished selecting the files you want backed up.If you need more help, contact the Service Desk!


Delete groups in Microsoft 365

Delete groups in the tool 

You can delete groups in the respective tools where the group is located, such as Planner, SharePoint, and Teams. Note that if you delete a group, you delete everything that belongs to the group. For example, if you delete a group in Planner, you delete the SharePoint site and possibly the Team that belongs to the group. 

Delete group in Planner

  1. Go to Hubben – Planner (office.com), it lists all planners you have authorization to. 
  2. To delete, go under the three dots and select Plan settings.
  3. At the bottom of the Plan Settings dialog window, you can find the button to delete the group.

Delete group in SharePoint

  1. It’s not easy to find all of your SharePoint sites. That’s why you need to search for them, and you can do so with the following link that includes a search query: SharePoint
  2. Select the site you want to administrate. If you are an owner, then under the gear you will receive website information. At the bottom of that window is the Delete option.

Skärmdump site information Sharepoint

Delete group in Teams 

  1. Go to your Teams client and select Team on the menu to the left.
  2. In the listing of teams, you can click on the three dots of the desired team. If you are the owner, you have the option of clicking on Delete team at the bottom of the menu.

Delete one specific team in Teams

Administrate groups through Outlook (Office 365)

If you’ve moved your email to Office 365, you can easily administer the groups you belong to or own through Outlook.

  1. Open Outlook and go to your email box.
  2. Select Groups on the menu to the left.
  3. It lists the groups that you have permission to and that are configured to be visible in Outlook.
  4. Select Group, then open Group Settings in the top menu. In the menu presented, you can administer your group.

Skärmdump som visar Gruppinställningar i Outlook

Frequently asked questions SharePoint

What is SharePoint?

SharePoint is a free cloud-based application, primarily used to create websites. You can use it as a secure place to store, manage, share, and access information from a unit. Everything you need is a browser.

In SharePoint you can:

  • Build intranets and create sites, document libraries, and lists.
  • Add web parts to customize the content.
  • View important visuals, news, and updates with a team or communications site.
  • Discover, follow, and search for websites, files, and people throughout the company.
  • Manage your daily routines with workflows, forms, and lists.
  • Sync and store files in the cloud to let everyone work with you.
  • Get the latest new wherever you are with the mobile app.


How do I find SharePoint?

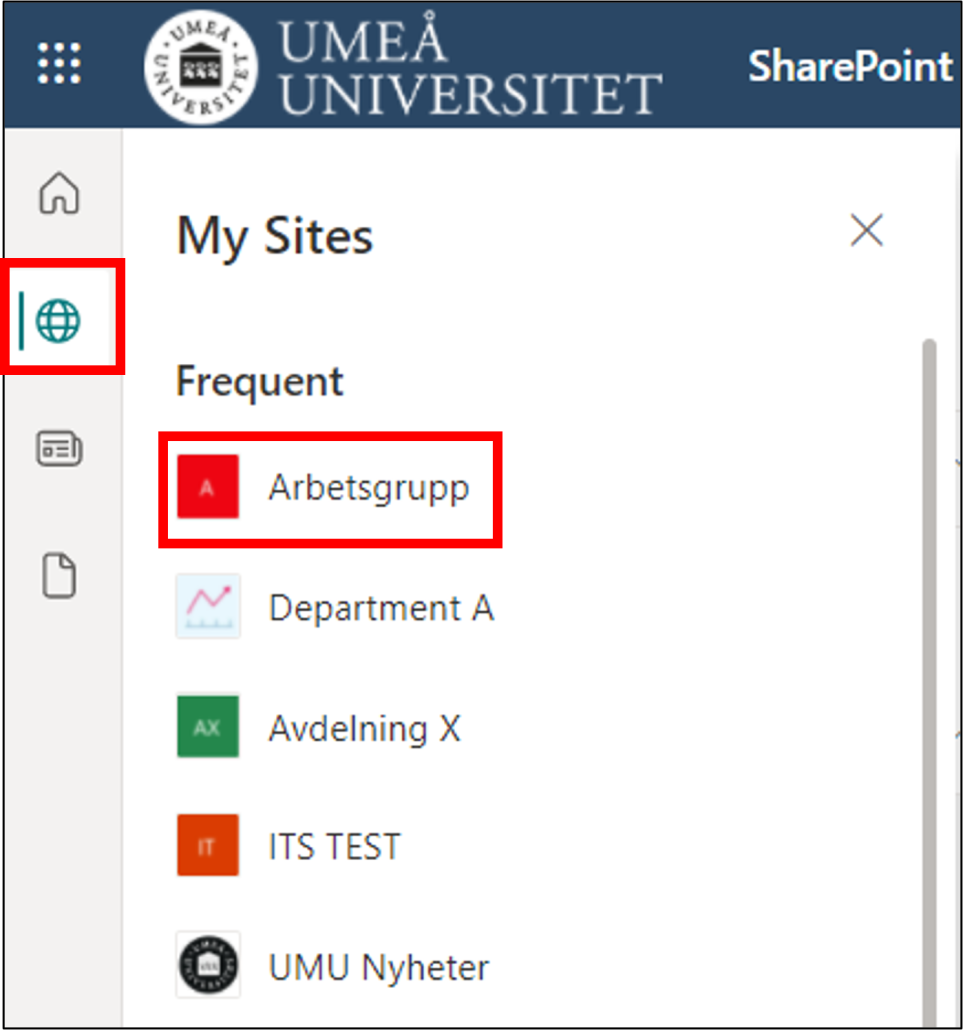
Go to www.m365.umu.se and sign in with your Umu-ID. You will enter your personal Office 365 portal. Select SharePoint in the left menu or select All applications and then SharePoint.  

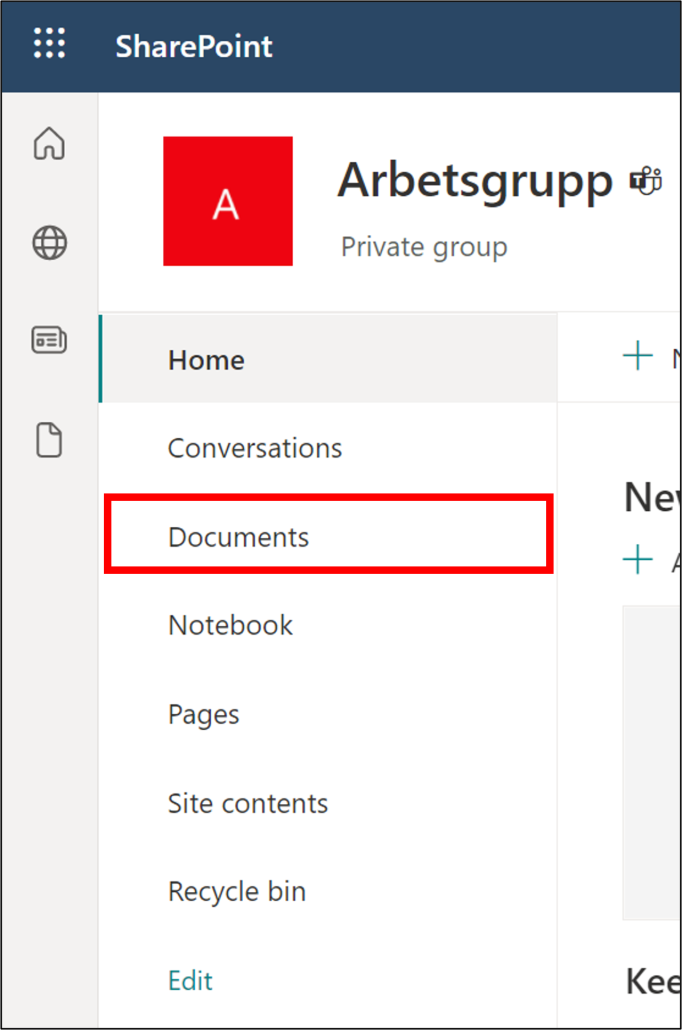
What is a team site?

With a SharePoint team site, you and your team can share and manage content. Use a team site to store and collaborate in files or to create and manage lists. You can also:

  • Follow and stay updated on project statuses.
  • Organize and edit shared content.
  • Connect to a Microsoft 365 group to access group resources.
  • If you need a website to share information with others, you can create a communication site instead.

Want to learn more? See: Find, create, and delete team sites in SharePoint

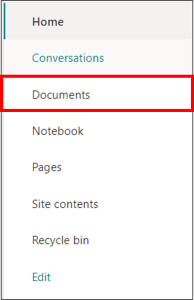
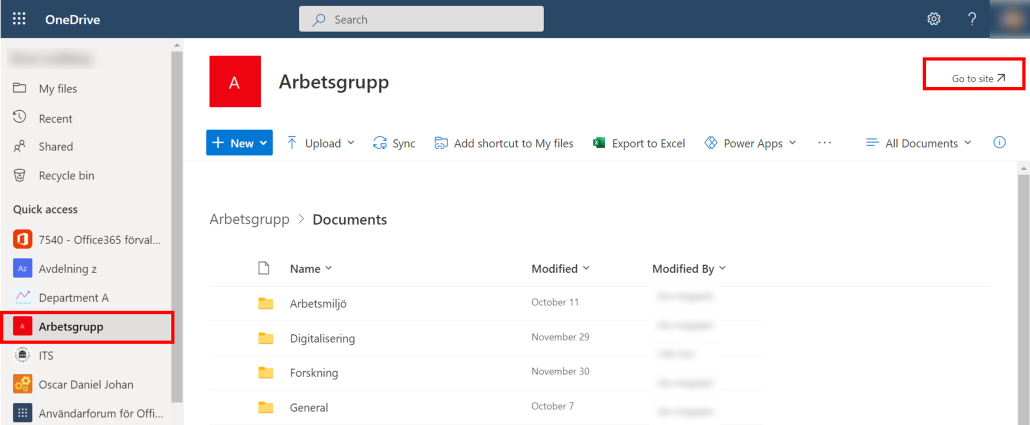
What is a document library?

A document library is a secure place for file storage where you and your employees can easily find your files, work together, and access them from any device. For example, you can use a document library in a SharePoint site to store all files related to a specific project or client. Moving files between folders is easy – just drag them from one place and drop them where you want.

Want to learn more? See: Create a document library in SharePoint


Can I add files from my computer to a SharePoint document library?

Yes, you can add files from your computer by dragging them from your computer and dropping them in SharePoint. You can also upload a file by browsing your computer. See more here: Upload files and folders in SharePoint

Observe! If you want to create and upload files to a library, you must have permission to participate in the library. If you do not know what permissions you have, contact your SharePoint administrator.

Can I copy files in SharePoint?

Yes, you can copy and move files and folders from a SharePoint library.

See more here: Move or copy files in SharePoint

Can I stop sharing a file in SharePoint?

Yes, you can share and stop sharing files if you have permission for it in a SharePoint group. Se more here: Stop share files in Office 365

What is a news post in SharePoint?

A news post is a feature that you can use to spread news within an existing SharePoint site. You can use different “web parts” (information) to mediate your message. For example, text, image, video etc.

Can I delete a SharePoint team site?

Yes, you can delete a SharePoint site. However, you need to be the owner of the SharePoint site.

Se more here: Find, create, and delete team sites in SharePoint

Can I delete files and folders in SharePoint?

Yes, you can delete files and folders in your SharePoint library. Keep in mind that if you delete files from a SharePoint library that are connected with a Team, the teams files will also be deleted.

Important: When you delete a folder, the folder and any files and subfolders in it are deleted. You can move or archive the contents of the folder before deleting it. You or your administrator might be able to recover a folder and its contents from the Recycle Bin. (see next question).

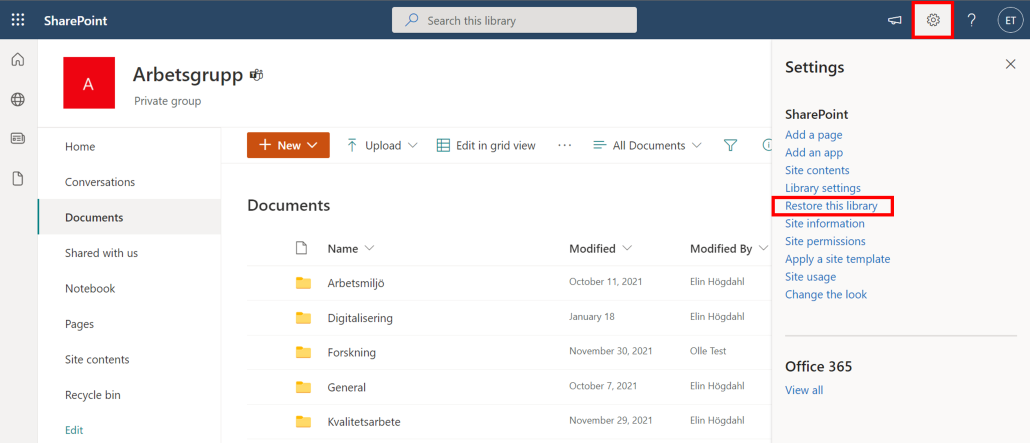
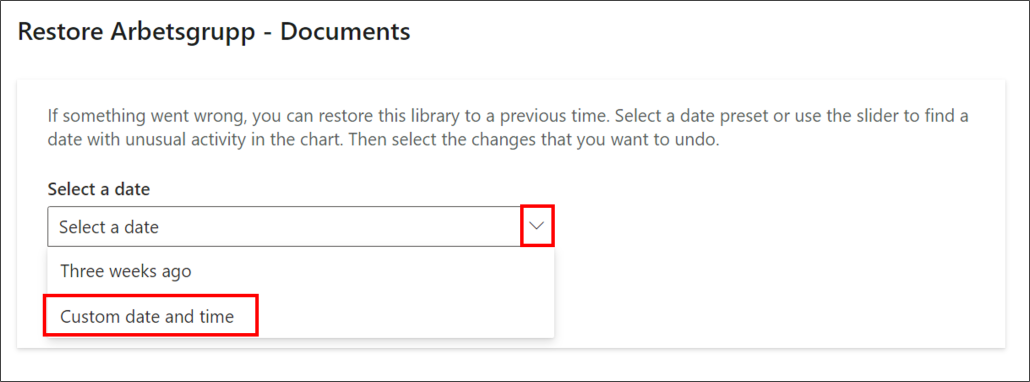
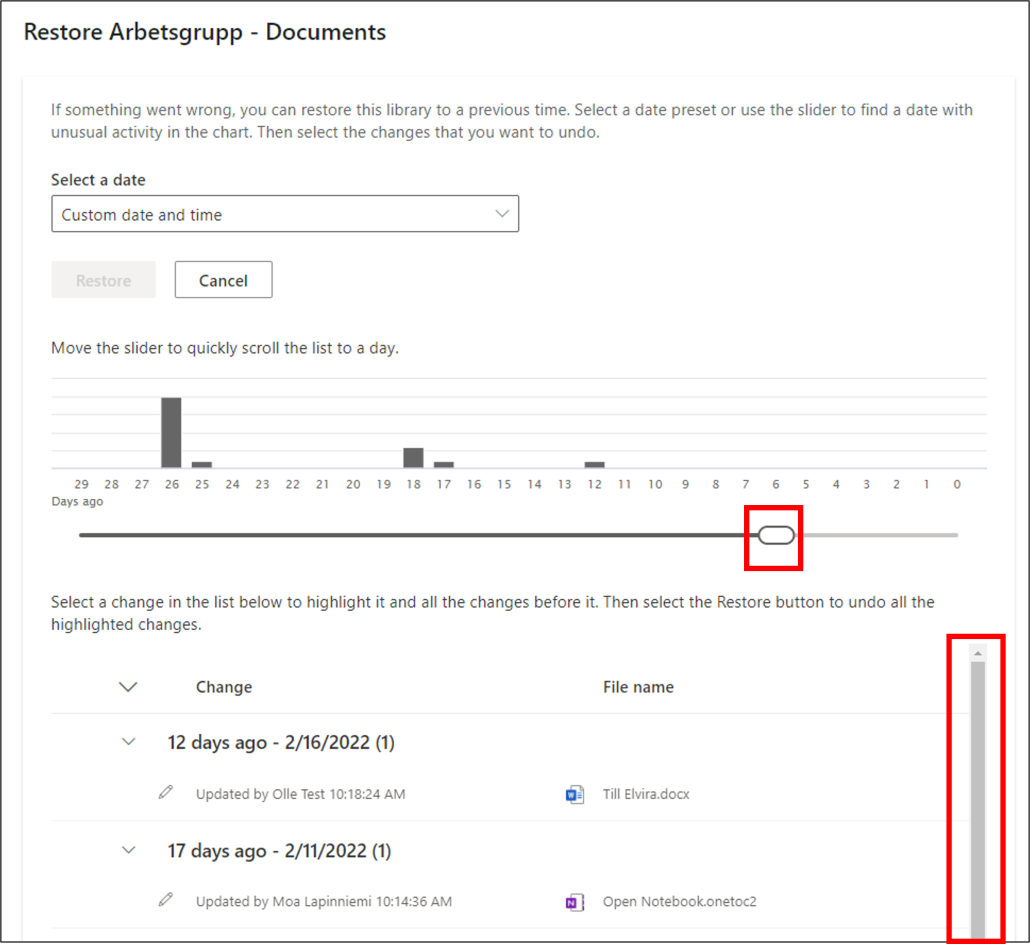
How long are deleted items stored in the Recycle Bin?

SharePoint keeps items for 93 days from their original location. They remain in the site’s trash can at all times, unless someone deletes them from there or empties the Recycle Bin. In that case, the items go to the site collection recycle bin where they remain for the 93 days unless:

  • Site collection recycle bin exceeds its quota and starts emptying the oldest items
  • The items are manually deleted by the site collection administrator from the site collection recycle bin.

Can I delete a document library or News Post in SharePoint?

Yes, as the owner of the SharePoint team site, you can delete document library and news posts

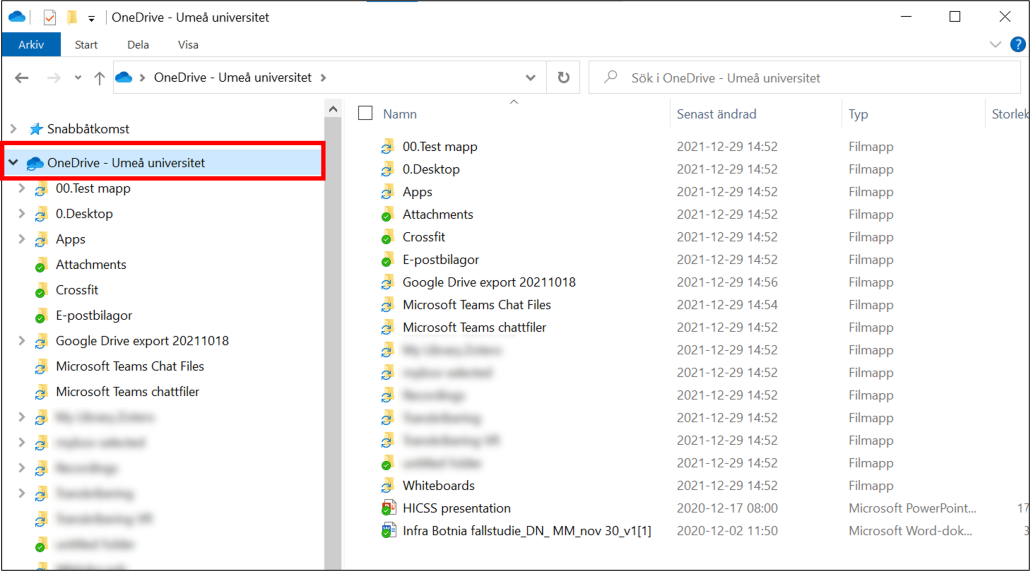
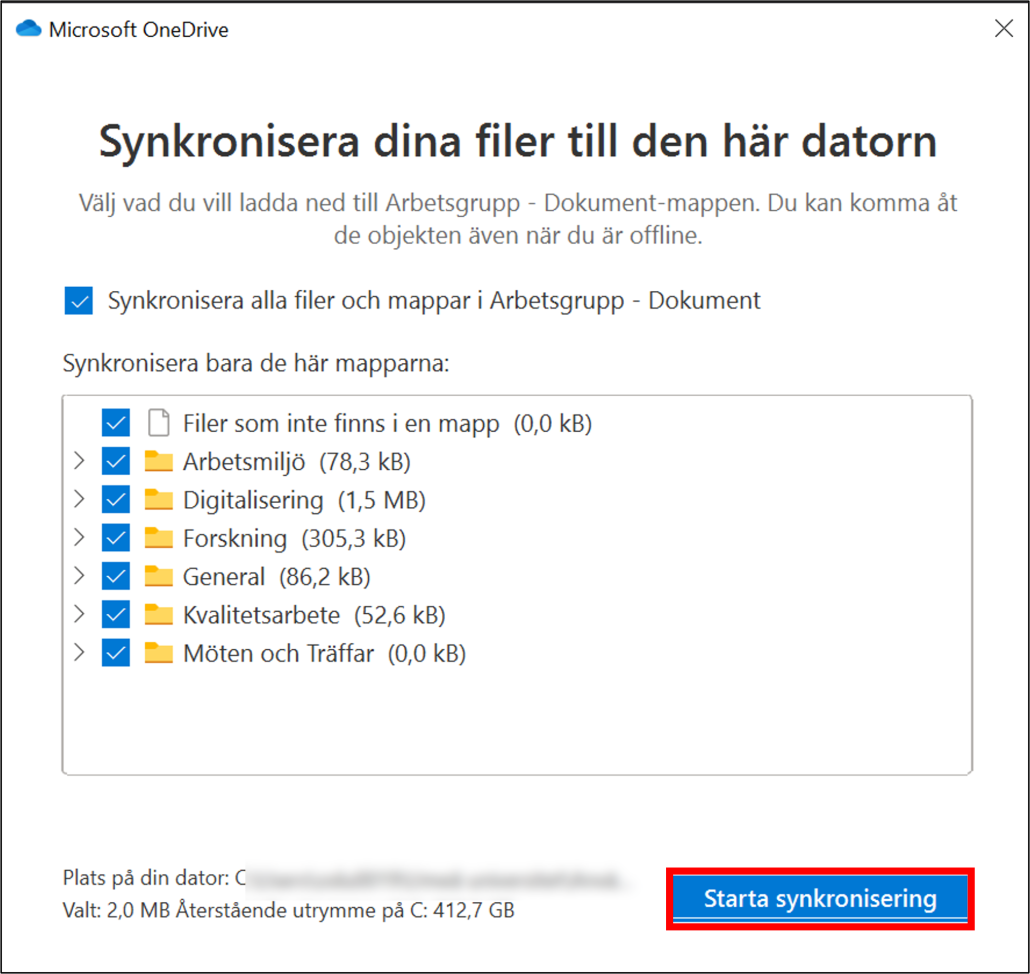
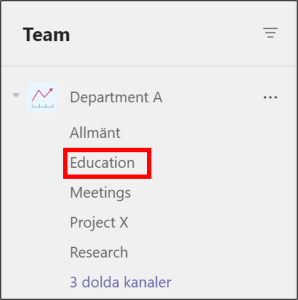
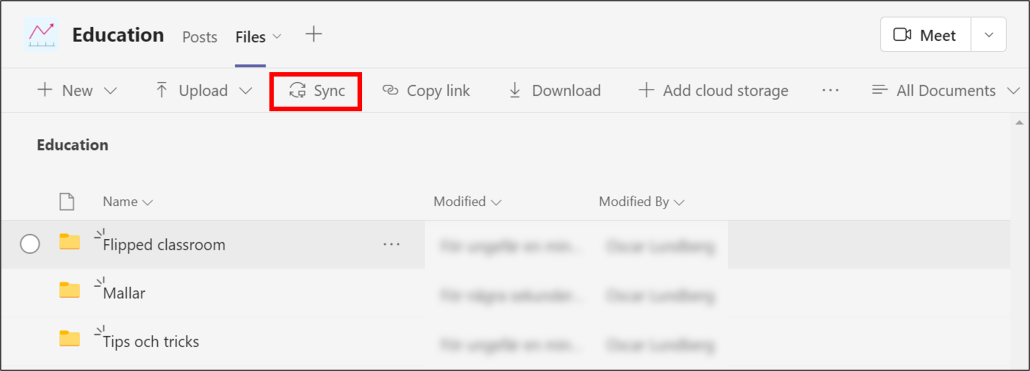
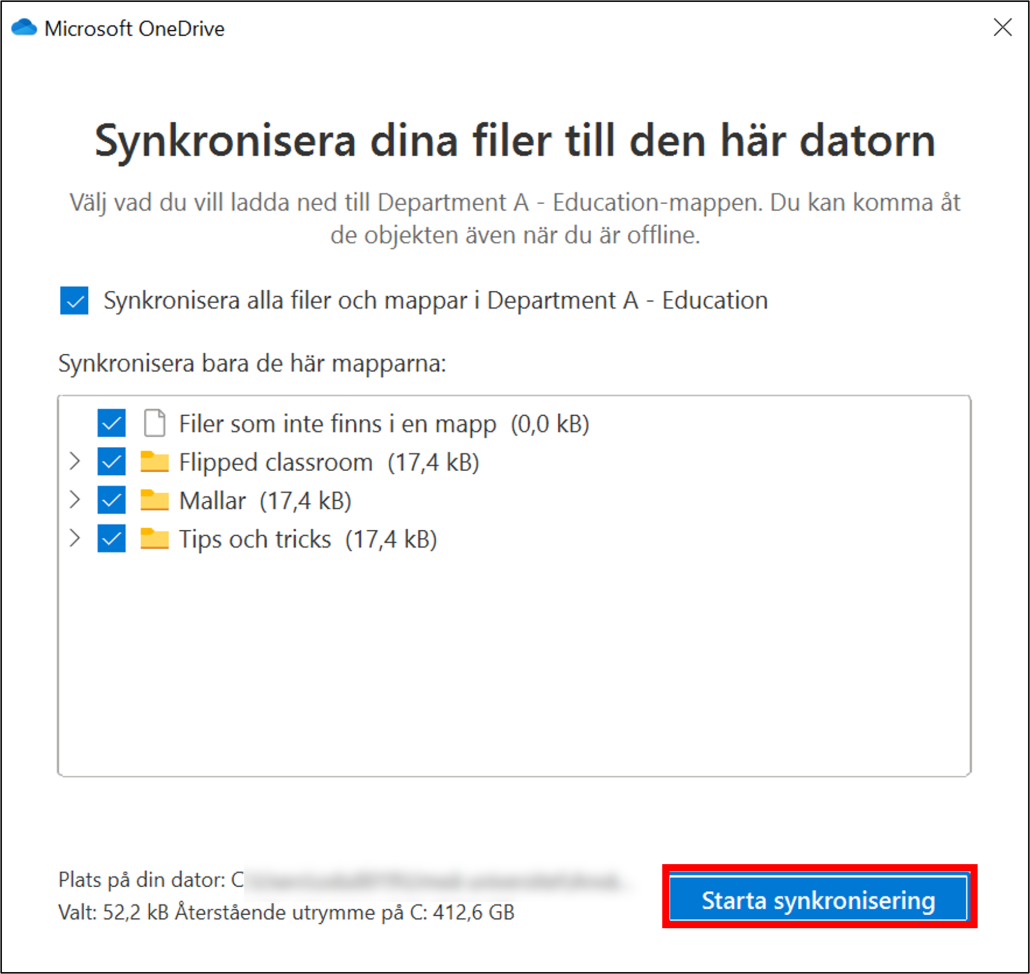
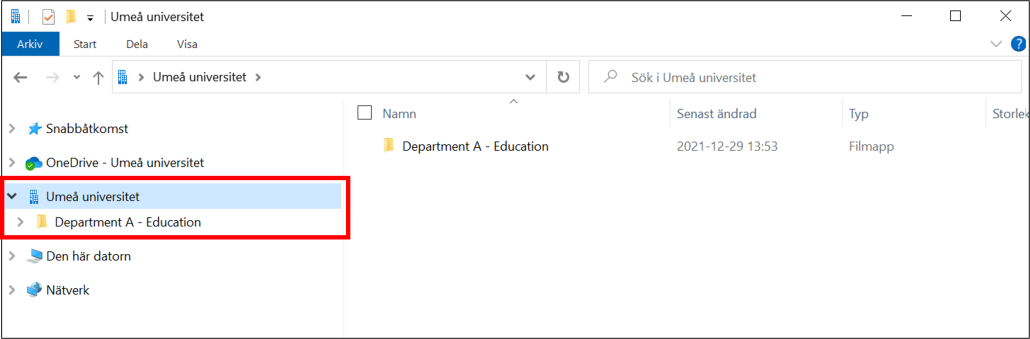
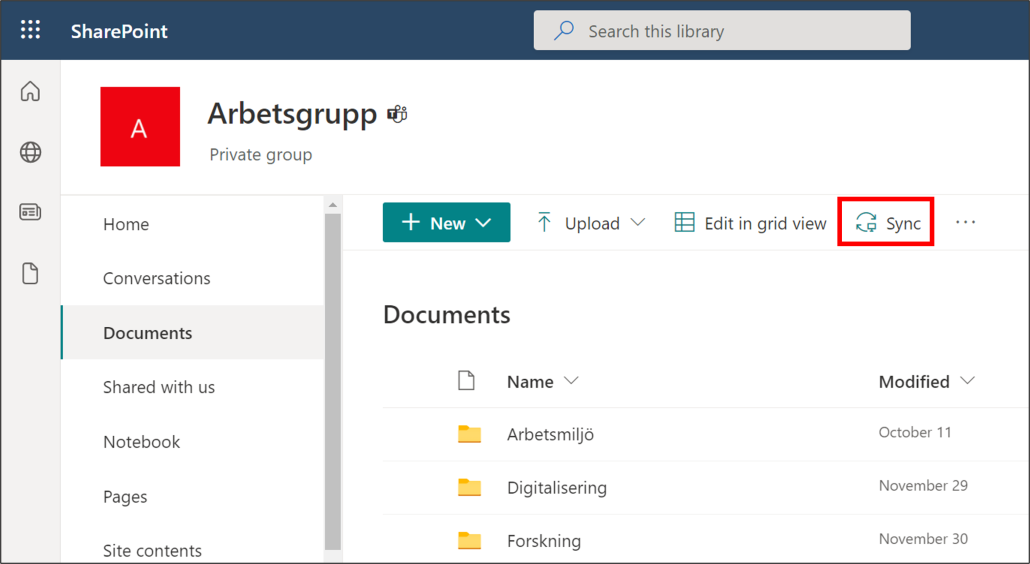
Can I sync files from SharePoint to my computer?

Yes, you can sync files from SharePoint to your computer.

Se more here: Sync files in O365

Can I make sure some people can’t edit documents in SharePoint?

Yes, as the owner of a SharePoint team site, you can manage permissions on folders and files.

Restore a shared document library in SharePoint

In this manual, we’ll show you how to restore a shared document library in SharePoint. If many of your SharePoint or Teams files are deleted, overwritten, corrupted, or infected with malware, you can restore a fully shared library to a previous time.


  1. Go to the SharePoint site you want to restore. Click on the globe, my sites in the menu on the left.
  2. In the list you will see your websites. Choose the site that holds the SharePoint document library that you want to restore. (e.g., Arbetsgrupp)
    restore shared document liberary - chose sharepoint site
  3. (In Microsoft Teams, go to the Files tab at the top of the channel, select three dots, and then click Open in SharePoint.)
  4. When you’re on the SharePoint page you selected, click on Documents in the menu on the left.
    restore shared document liberary - choose documents
  5. Select Settings Icon, and then click Restore library. (Note! If Reset this library doesn’t appear under Settings, you either don’t have permission or you’re looking at a classic library).
    restore shared document liberary - settings and restore this liberary
  6. Click on the arrow and choose for how long you want to restora your liberacy to. (You can restore to a maximum of 29 days ago.)
  7. Choose custom date and time to be specific.
    restore shared document liberary - choose time to restore to
  8. Use the scroll-function to specify time.
  9. Use the other scroll-function to show activity within the document library to identify documents that you may want to restore.
    restore shared document liberary - custom time, choose time
  10. When you are done, scroll down an click on restore.

Syncronize files from OneDrive, Teams or SharePoint to your computer

You can sync folders, files, and entire libraries from Office 365 to your computer. This means that you can work with the same files you have in Teams, SharePoint or OneDrive. In this manual, we will show you how to sync files from your OneDrive, Team, Team Channel, and a shared SharePoint library. Our recommendation is that you do not sync too many files.

Sync my own files from OneDrive to your computer

  1. Select Start on your computer and find the OneDrive app.
  2. Log in to OneDrive with your account, umuid@ad.umu.se.
  3. When you are logged in, the blue cloud appears down to the right.
  4. You can set which folders you want to sync by clicking on the OneDrive cloud and then the gear at the top right
  5. Gå sedan till Konto och Välj mappar, bocka i de mappar du vill synkronisera och klicka sedan på OK.
  6. Syncing from your OneDrive is now complete. A new tab is created in your Explorer/Finder – “OneDrive – Umeå University”. You can now work with these files from your computer. Note that these are the same files that are on OneDrive for the web. It’s just another way of working from the computer.
    sync files from onedrive to your computer - Explorer view

Sync files from an entire Team to your computer

  1. Select the Team you want to sync files from to your computer.
  2. Select a Team channel and click on Files
    sync files from Team to computer - select files
  3. Click on Document
    sync files from Team to computer - select documents
  4. Now you will be able to access all files associated with the Team. Then click Sync.
    sync files from Team to computer - select sync
  5. The OneDrive app starts. Make sure all folders and files are selected. When you’re done, click Start Sync.
    sync files from Team to computer - OneDrive app opens - select files to sync - click start sync
  6. Synchronization from an entire team is now complete. A new tab (with a “House”) is created in your Explorer/Finder. See selected locations in the image. You can now work with these files from your explorer. Note that these are the same files that are in the team. It’s just another way of working from the computer.
    sync files from entire Team to computer - explorer view

Sync files from a specific channel in a Team

  1. Choose the Team you want to sync files from to your computer.
  2. Click the channel from which you want to sync files to your computer. For example, the Education channel that the picture shows.
    sync files from specific Team channel to computer - choose team channel
  3. Click on Files
    sync files from specific Team channel to computer - select files tab
  4. Click on Sync
    sync files from specific Team channel to computer - click sync
  5. OneDrive app starts. Make sure the correct files are selected (as you can see, these are the same folders as the image in step 4). When your are done, click Start Sync.
    sync files from specific Team channel to computer - OneDrive app opens - control if right folders are included in the sync - click sync
  6. Synchronization from a specific Team Channel is now complete. A new tab (with a “House”) is created in your Explorer/Finder. See selected locations in the image. You can now work with these files from your explorer. Note that these are the same files that are in the Team Channel. It’s just another way of working from the computer.
    sync files from specific team channel to computer - Explorer view

Sync your files from a shared SharePoint library

  1. Go to the shared library. The easiest way to do this is by using your OneDrive via: O365.
  2. Choose the shared library from the list that you want to sync (for example, as shown in the pircture – Team Arbetsgrupp).
  3. Select Go to Site.
    sync files from shareed sharepoint liberar - select team - click go to site
  4. In the menue on the left, click Documents.
    sync files from shareed sharepoint liberar - select documents
  5. Click on Sync
    sync files from shareed sharepoint liberar - click on sync
  6. The OneDrive app starts. Make sure all folders and files are selected. When you’re done, click Start Sync.
    sync files from Team to computer - OneDrive app opens - select files to sync - click start sync
  7. Synchronization from a shared document library is now complete. A new tab (with a “House”) is created in your Explorer/Finder. See selected locations in the image. You can now work with these files from your Computer. Note that these are the same files that are in SharePoint. It’s just another way of working from the explorer.
    sync files from entire Team to computer - explorer view