Adding new wallpapers to teams on PC
In Teams, you can choose to add different background images to be displayed when you are in a digital meeting. The Communication Unit has developed a number of different backgrounds that you can add. Here is how you do it!
- Launch Teams.
- Open the calendar via Teams.
- Enter an upcoming, old or start a brand new team meeting in the calendar
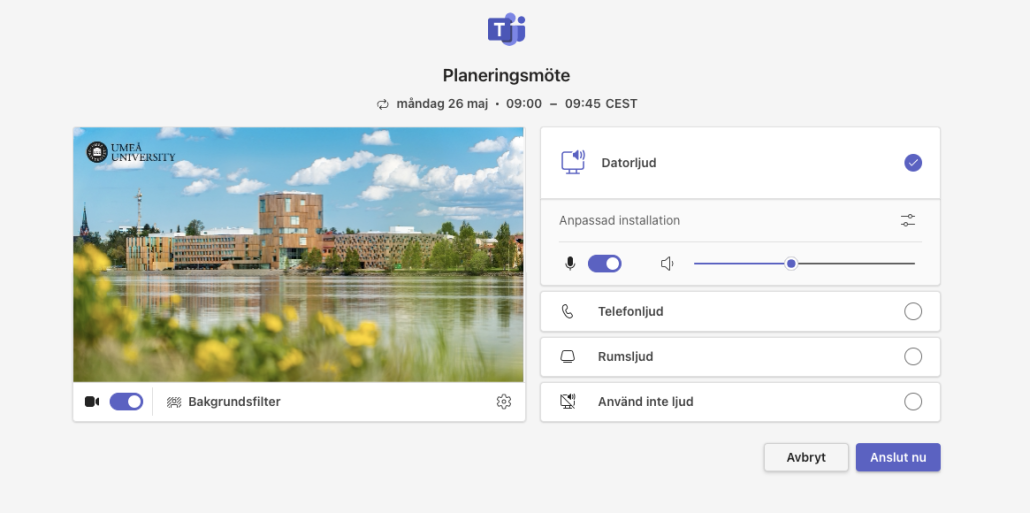
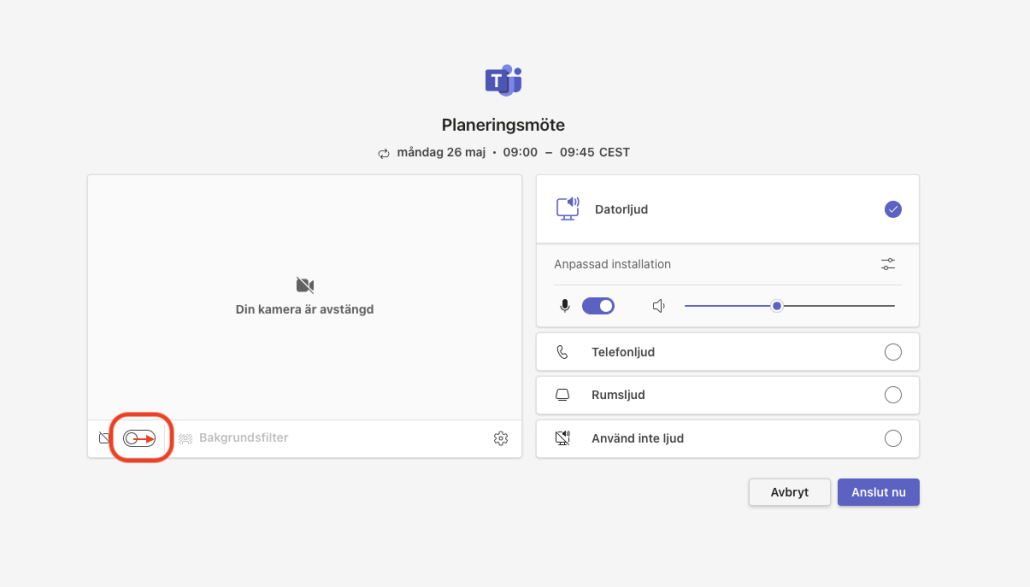
- Then click on Connect

- If the Team Camera is not switched on, click on the ‘Camera’ button to switch on the camera. You should then be able to see yourself.
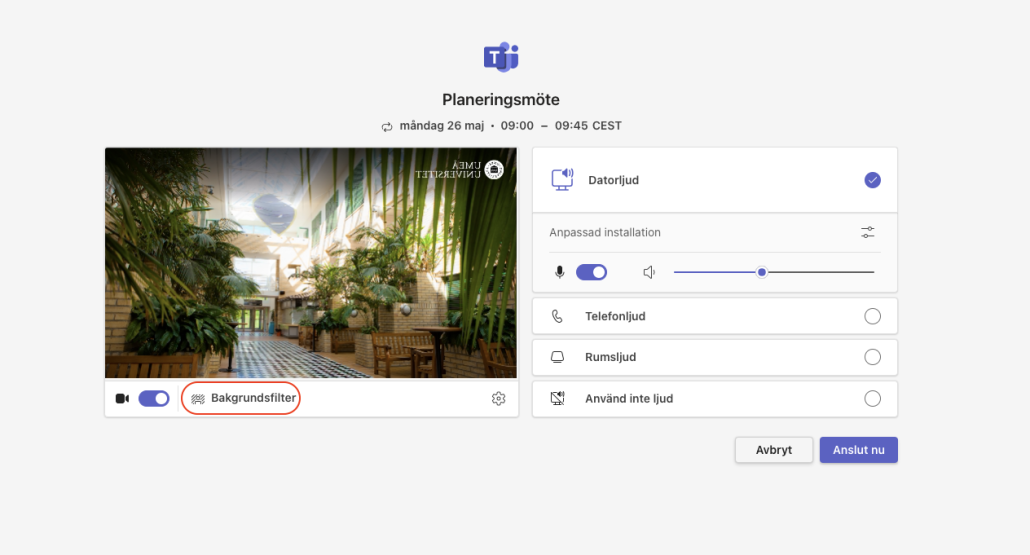
- Then click on the ‘Background filter’ link
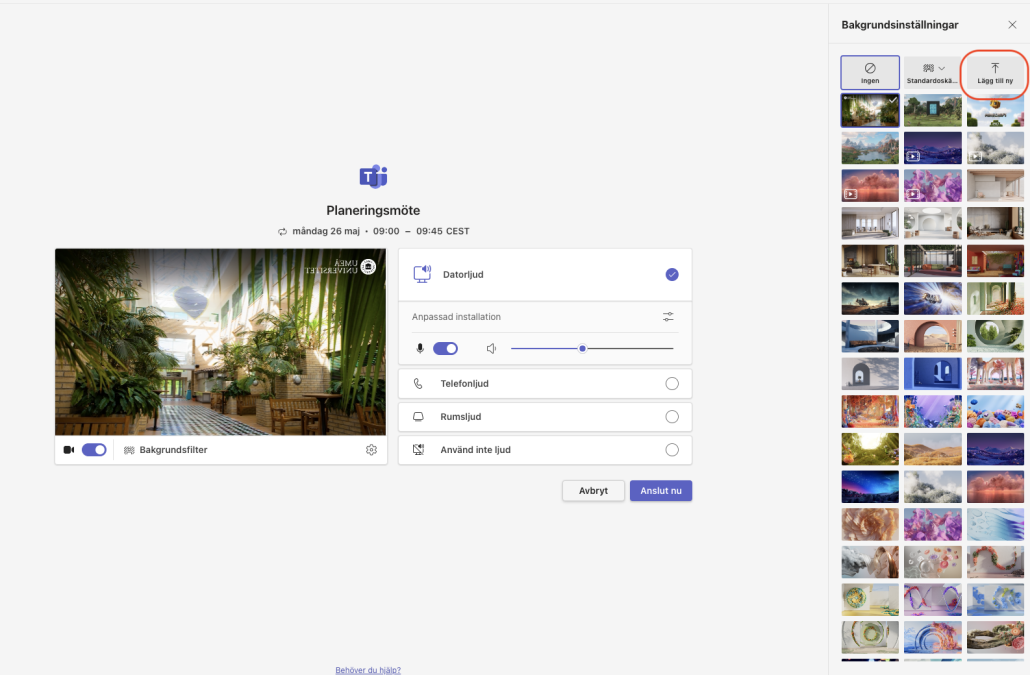
- Then click on the ‘Add new’ option at the top right of the meeting window that opens up.
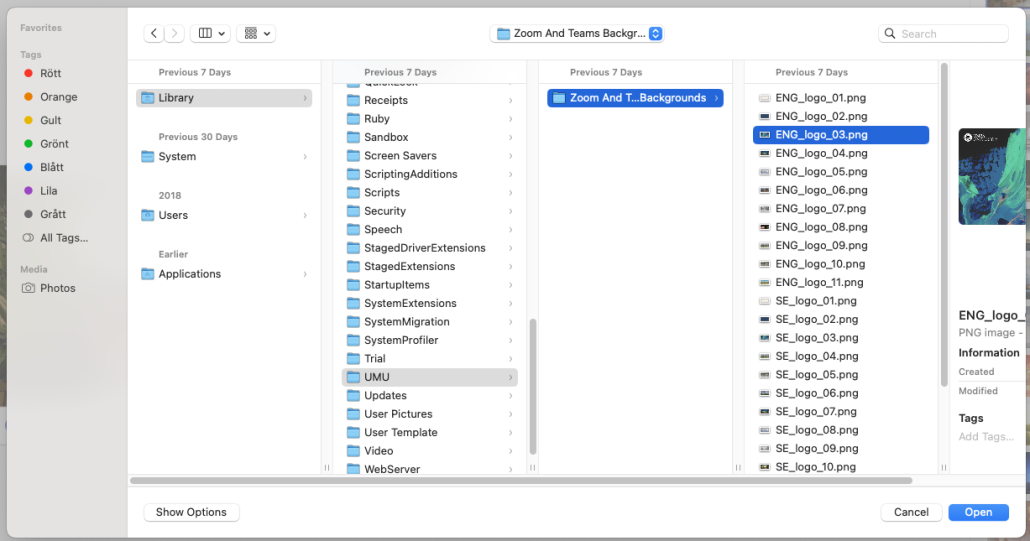
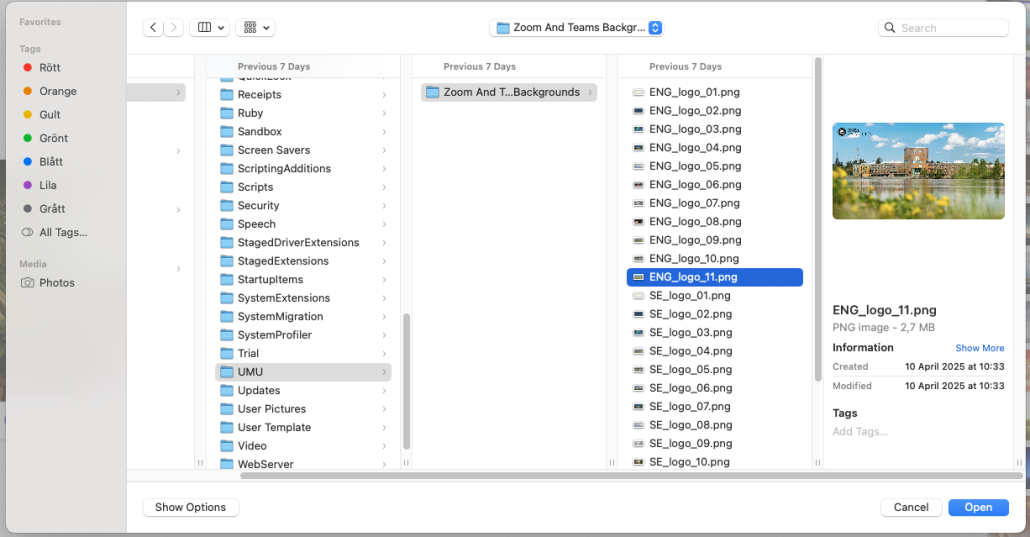
- On your computer’s hard drive, locate the folder called OSDisk (C:)
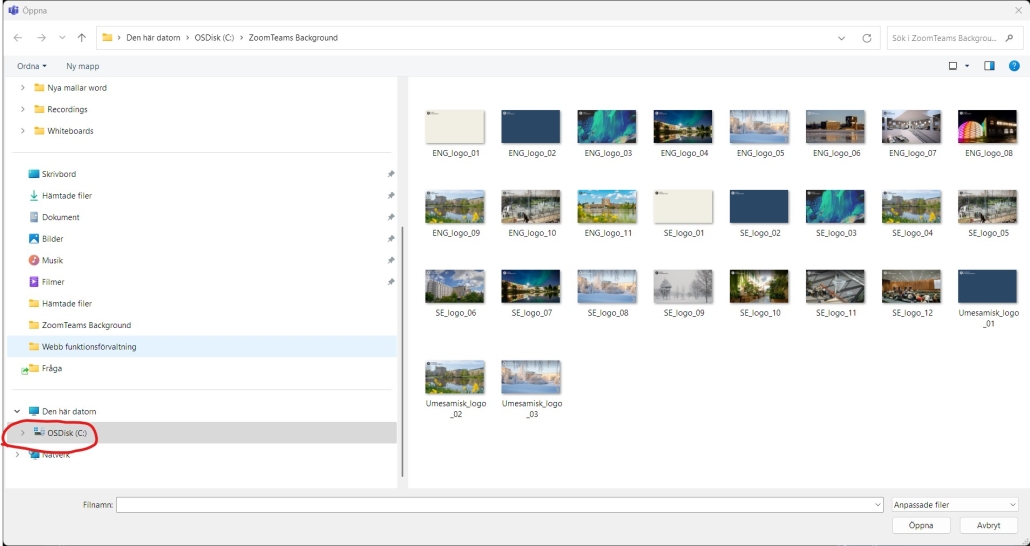
- After that, locate the folder called ZoomTeams Background. Then choose which UMU background you want to use in the meeting.
- Select the desired image and click Open. Note that you can only add one background at a time.
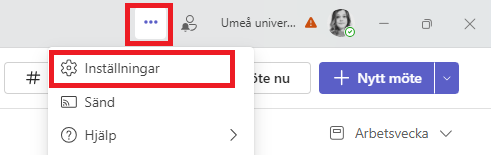
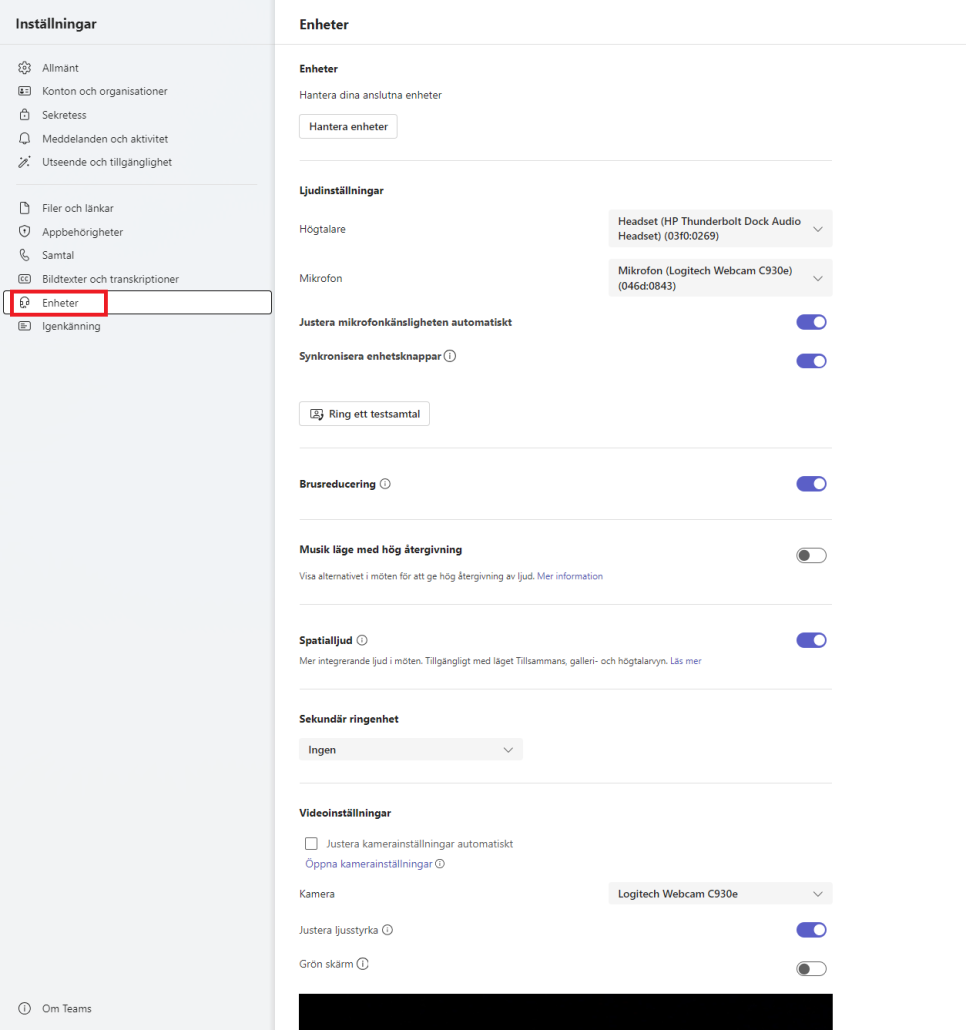
- NOTE! If the image is mirrored for you, you need to change that setting in Teams. Go to Settings – select Devices, scroll down to the Video section and switch off mirroring.
- Now you can either close down the Team Meeting or choose to Connect now with the new background image.
- Done!