Syncronize files from OneDrive, Teams or SharePoint to your computer

You can sync folders, files, and entire libraries from Office 365 to your computer. This means that you can work with the same files you have in Teams, SharePoint or OneDrive. In this manual, we will show you how to sync files from your OneDrive, Team, Team Channel, and a shared SharePoint library. Our recommendation is that you do not sync too many files.

Sync my own files from OneDrive to your computer

  1. Select Start on your computer and find the OneDrive app.
  2. Log in to OneDrive with your account, umuid@ad.umu.se.
  3. When you are logged in, the blue cloud appears down to the right.
  4. You can set which folders you want to sync by clicking on the OneDrive cloud and then the gear at the top right
  5. Gå sedan till Konto och Välj mappar, bocka i de mappar du vill synkronisera och klicka sedan på OK.
  6. Syncing from your OneDrive is now complete. A new tab is created in your Explorer/Finder – “OneDrive – Umeå University”. You can now work with these files from your computer. Note that these are the same files that are on OneDrive for the web. It’s just another way of working from the computer.
    sync files from onedrive to your computer - Explorer view

Sync files from an entire Team to your computer

  1. Select the Team you want to sync files from to your computer.
  2. Select a Team channel and click on Files
    sync files from Team to computer - select files
  3. Click on Document
    sync files from Team to computer - select documents
  4. Now you will be able to access all files associated with the Team. Then click Sync.
    sync files from Team to computer - select sync
  5. The OneDrive app starts. Make sure all folders and files are selected. When you’re done, click Start Sync.
    sync files from Team to computer - OneDrive app opens - select files to sync - click start sync
  6. Synchronization from an entire team is now complete. A new tab (with a “House”) is created in your Explorer/Finder. See selected locations in the image. You can now work with these files from your explorer. Note that these are the same files that are in the team. It’s just another way of working from the computer.
    sync files from entire Team to computer - explorer view

Sync files from a specific channel in a Team

  1. Choose the Team you want to sync files from to your computer.
  2. Click the channel from which you want to sync files to your computer. For example, the Education channel that the picture shows.
    sync files from specific Team channel to computer - choose team channel
  3. Click on Files
    sync files from specific Team channel to computer - select files tab
  4. Click on Sync
    sync files from specific Team channel to computer - click sync
  5. OneDrive app starts. Make sure the correct files are selected (as you can see, these are the same folders as the image in step 4). When your are done, click Start Sync.
    sync files from specific Team channel to computer - OneDrive app opens - control if right folders are included in the sync - click sync
  6. Synchronization from a specific Team Channel is now complete. A new tab (with a “House”) is created in your Explorer/Finder. See selected locations in the image. You can now work with these files from your explorer. Note that these are the same files that are in the Team Channel. It’s just another way of working from the computer.
    sync files from specific team channel to computer - Explorer view

Sync your files from a shared SharePoint library

  1. Go to the shared library. The easiest way to do this is by using your OneDrive via: O365.
  2. Choose the shared library from the list that you want to sync (for example, as shown in the pircture – Team Arbetsgrupp).
  3. Select Go to Site.
    sync files from shareed sharepoint liberar - select team - click go to site
  4. In the menue on the left, click Documents.
    sync files from shareed sharepoint liberar - select documents
  5. Click on Sync
    sync files from shareed sharepoint liberar - click on sync
  6. The OneDrive app starts. Make sure all folders and files are selected. When you’re done, click Start Sync.
    sync files from Team to computer - OneDrive app opens - select files to sync - click start sync
  7. Synchronization from a shared document library is now complete. A new tab (with a “House”) is created in your Explorer/Finder. See selected locations in the image. You can now work with these files from your Computer. Note that these are the same files that are in SharePoint. It’s just another way of working from the explorer.
    sync files from entire Team to computer - explorer view


Work with multiple organizations in Teams

If you work in multiple organizations that use Teams (for example Umeå University and Region Västerbotten) and want to use Teams for each organization, these are instructions that may facilitate your work.

One way to make it easier when you’re a member of multiple organizations is to use different interfaces for different organizations. For example, you can use the Teams app on your computer when you work in the organization Umeå University and the web interface for Teams when you work in the organization Region Västerbotten. This will make it easier to keep the two organizations separated. You need to be signed in to both of your accounts at the samt time for this to work.

Sign in to the organization Umeå University on your computer.

  1. Open Teams on your computer. If you haven’t installed Teams yes, go to o365.umu.se to install it.
  2. Sign in with your Umu-id (umu-id@ad.umu.se) and password.
  3. You can now work in Umeå Universitys organization in your desktop app.

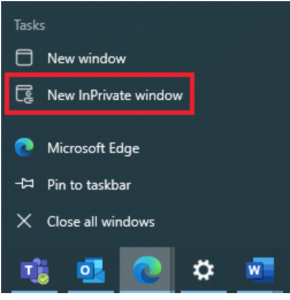
Sign in to another organization in the web interface

  1. Open a new incognito/InPrivate window in your browser by clicking on your browser and select New InPrivate window or New Incognito window (depending on which browser you use).
  2. Go to www.office.com and sign in with your e-mail and your password.
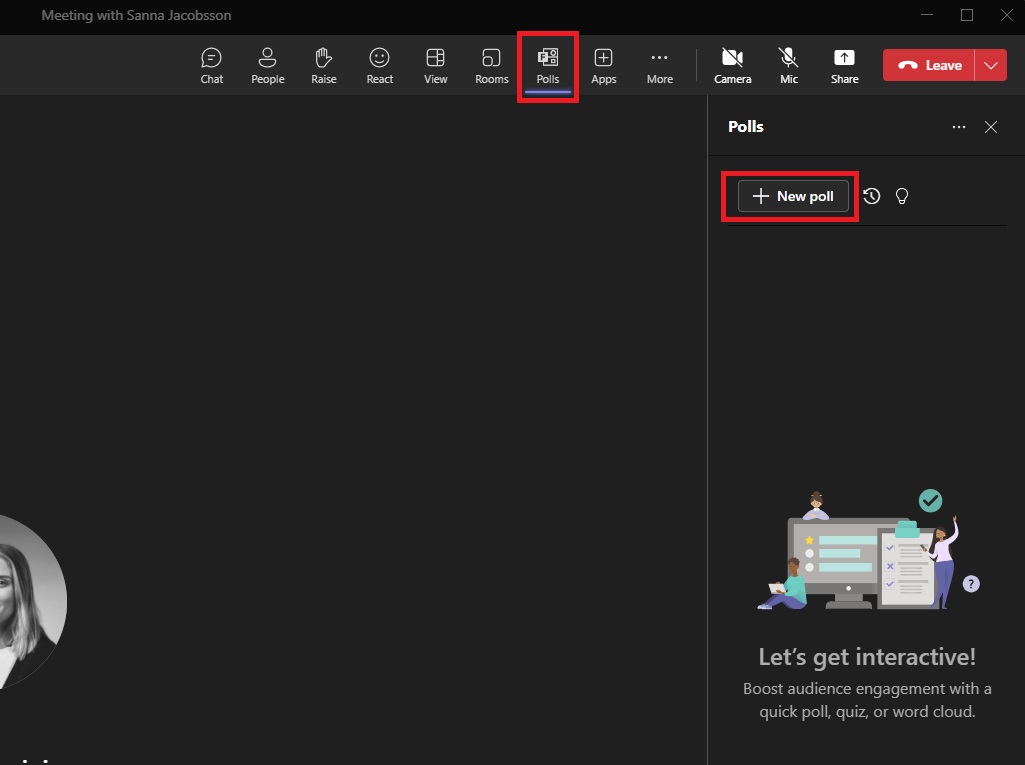
  3. Select Teams and use it via the bowser when working on your secondary account.

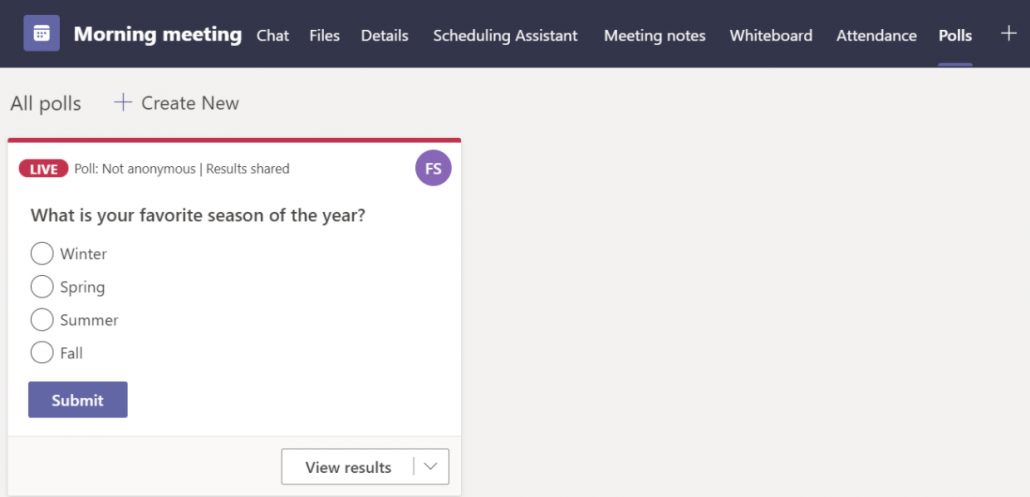
Work as a guest of a team in an external organization

If you’ve been invited as a guest to a team that belongs to an external organization, for example Region Västerbotten, you will not see these teams among your teams that belong to the organization Umeå University. You need to switch between the different organizations to work with teams that belong to an external organization.

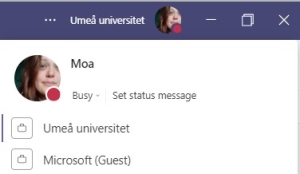
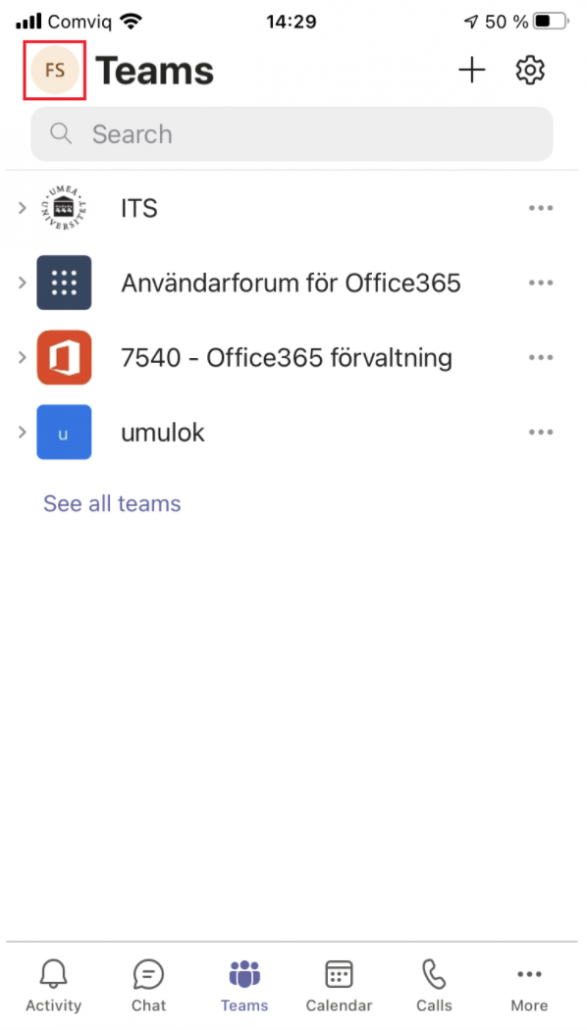
  1. Click on your profile picture in the upper right corner.
  2. You will now see a list of the organizations you’ve been invited to. In the example below you can see what it looks like if you’re a member in both Umeå University and Microsoft.

Book a live event in Teams

  1. Open the calendar and select the arrow to the right of New meeting. Then select Live event.
    Image showing how to create a live event
  2. To the left you can add a title, a location, a date, time and a description of what the event is about.
  3. To the right you can invite people to the event group. The eventgroup consists of the organizer, producers and presenters. The organizer can choose to be a producer or presenter during the event.
    Organizer – Schedules the event and sets up permissions for the event group and the participants.
    Producer – Makes sure that the participants can view the event without any problem and starting and ending the event.
    Presenter – Shares audio, video, screen and also answering questions.
  4. When you’re done, select Next.
  5. Now you choose the permissions for the event. You can either choose that only specified people can watch the live event, or that the entire organization can watch it. Both options require sign-in with Umu-id.
  6. Then you choose how to produce the event. You can either choose to produce it through Teams by sharing content from presenters webcams and screens, or to use an external app or device.
  7. Select Schedule when you’ve chosen how to produce.
  8. A new window will open where you can invite attendees by selecting Get attendee link.

Book a meeting in Teams or Outlook

Book a meeting in Teams

  1. Open the calendar and select New meeting in the upper right corner.
  2. Meeting view appear, follow these instructions to make a good meeting:

A) Add a title of the meeting

B) Add attendees by writing their name or email adress.

C) Adjust date and a start and end time.

D) Add a physical location if the meeting is on an physical location or conference room.

E) Write a description/agende/purpose of the meeting so the participants can prepare.

When you’re done with the booking, select Send.

Book a meeting in Outlook

  1. Open the calendar and select New Teams meeting in the upper menu.
  2. Add a title, attendees, date, starting and ending, a location and a description what the meeting is about. You will now see a link to the meeting.
  3. Select  Meeting options in the upper menu to make settings for the lobby, like if the attendees will be allowed to use their camera or microphone, or be able to chat and give reactions.
  4. When you’re done, select Send.

Stop share files in Microsoft 365

To share files or folders, change settings for sharing or to stop share files you use o365.umu.se. There you can choose if you want to stop sharing files or folders from SharePoint (i.e., Teams) or OneDrive. This manual shows you how to stop share files/folders in SharePoint, but the same settings works for OneDrive as well. 

  1. Open m365.umu.se and sign in using your Umu-id.
  2. Click on the icon for SharePoint in the left menu.
  3. Select the SharePoint team where the files/folders you want to stop share are located.
  4. Select Documents in the left menu to view all existing folders and documents in the Sharepoint team. A channel in Teams is viewed as a folder in SharePoint.
  5. Go to the folder or file that you want to stop share.
  6. Place the pointer on the file/folder to view a hidden menu.
  7. Click on the three dots and then Manage access.
  8. Below Manage access you can see a list of the people you have shared the file with. Click somewhere in the area shown in the picture below.
  9. To stop share with one or several people, click on the X next to the name.
  10. When you click on X you will receive a control question. If you’re certain that you want to remove the access from the ones you’ve chosen, click Remove, otherwise select Cancel.
  11. The access is now removed, and you have stopped sharing your files/folders.

Create Breakout rooms during a Teams meeting

This manual will show you how to create breakout rooms directly into an Teams meeting and interact with meeting participants through breakout rooms. (If you want to prepare your Breakout rooms before the teams meeting – see this manual)

It can be hard to have an open discussion and meaningful exchange of ideas with several participants. With breakout rooms you can create smaller groups for better conversations and brainstorming sessions.

Create breakout rooms

  1. Start the meeting.
  2. Select the icon with two squares, Breakout rooms.
  3. Select the number of rooms you want, 1-50 and whether you want Teams to assign participants Automatically or if you want to assign the participants yourself Manually. This is the only time you can choose to have people automatically assigned to breakout rooms.
  4. Select Create rooms.

Assign participants to breakout rooms manually

If you chose Manually in the previous procedure, follow these steps. If you chose Automatically your participants will be assigned to a breakout room as soon as you open the rooms.

  1. Select Assign participants.
  2. Choose the people who will share a breakout room by selecting the check boxes next to their names.
  3. Select Assign and then select a room for those people.
  4. Repeat steps 2 and 3 until everyone has been assigned to a room.

Rename the breakout rooms

You can rename each breakout room if you want it to reflect the people in it or what they’re doing.

  1. Point to the room, select More options (the three dots) and then Rename room.
  2. Enter the new name and select Rename room.

Set a time limit for the breakout session

A timer will be visible in each breakout room when you set a time limit so that the participants are aware of when the session will end. When time is up the room will close and your participants will return to the main meeting.

  1. Select More options (the three dots) at the top of the breakout room pane, and then select Rooms settings.
  2. Select Set a time limit, and then select the down arrow and chose for how long time you want.
  3. Select Settings to return to the main Breakout rooms pane.

Open the breakout rooms

  • To open all the rooms at the same time, select Start rooms. By default, meeting participants are moved to their assigned rooms as soon as you open the room.
  • To open a single room, press on the three dots next to the room and Open room.

You can open and close breakout rooms more than once during a meeting.

Turn off automatic entry

By default, meeting participants are moved to their assigned rooms as soon as you open the room. By turning off the automatic entry your participants will receive a message asking them to join a breakout room.

  1. Click on the three dots at the top of the Breakout room pane and then select Rooms settings.
  2. Switch the toggle next to Automatically move people into opened rooms to off.

Interact with participants

As the meeting organizer you can join any of the breakout rooms, write in the chat or send announcements to everyone.

  • Select More options*** next to the room and then Join room.
  • Select Return to leave a room, then you return to the main meeting.
  • Back in the main meeting, select Resume.

Make an announcements to all breakout rooms

  1. Select More options at the top of the breakout rooms pane and select Make an announcement.
  2. Enter your announcement.
  3. Select Send.

Participants will receive a notification in their meeting chat to check for your announcement.

Close breakout rooms

The participants will return to the main meeting when you close the breakout rooms. You can either close rooms individually or all at the same time.

  • To close rooms individually, select More options next to the room and then Close room.
  • To close all the rooms at the same time, select Close rooms.

When everyone is back to the main meeting, select Resume.

Share files from one team to another

Link file as a tab

  1. Go to the team and channel where the files you want to share with people outside of the team are located.
  2. Select Files and Open in SharePoint.
  3. Find the file/folder you want to share in SharePoint. Select the share icon or the three dots and then Share.
  4. You can now review the permission before sharing the file. Click on Umeå University…. to adjust the settings. Then copy the link.

  5. Go back to the team and channel where you want to share the link. Select the +.
  6. Select Website. Enter a name for the tab and paste the link. Members of the team can now view the files you gave them permission to view from the first team.

Other ways to link a file

This method works well when you for example want to link a file in a post in Teams, in an e-mail, OneNote, Word etc.

  1. Follow step 1 to 4 above.
  2. Write a text that describes the content of the link, for example “Meeting times for project A”. Right-click when you’re done.
  3. Select Insert link or Link.
  4. Paste the link in the field and select Save. Done!

Remove permissions to a link

If you want to revoke the access to a link you previously shared, return to the original team.

  1. Select Files and then Open in SharePoint.
  2. Instead of selecting the share icon, this time select the three dots and then Manage access.
  3. To remove the link, select the X to the right.
  4. The link is no longer available to anyone other than the original team.

Set up quiet hours for Teams on mobile phone

If you use Teams on your mobile phone you can set up quiet hours. This means that you can turn off all notifications for Teams during certain times, for example during evenings and weekends. 

Set up and activate quiet hours

  1. Open the Teams application on your phone.
  2. Select the menu in the upper left corner by clicking on your profile picture.
  3. Select Notifications.
  4. Select During quiet time.
  5. Here you can choose if you want quiet hours, quiet days or both. If you have an Android, you can also set exceptions if you want some type of content to always be visible regardless of quiet hours, for example if someone makes a mention.

Switch between public and private team

You can choose between two privacy settings in Teams – public or private team. This setting controls who can view and join your team. This instructions will show you how to change a public team to a private, or the other way around.  

Two types of privacy for teams

Public team
A public team is available to everyone at Umeå University. This means that when someone searches for teams, they can find your team in a list and join it without your approval. All files and content in a team is searchable for members of a team.
 Both students and staff can see and join public teams.

Private team
A private team is only available to the people you invite or approve. In most cases, you should choose a private team.


How to do:

  1. Go to your team and click on the three dots to the right of the teams name. Select Edit team.
  2. To switch between public and private – use the menu that says Privacy.
  3. Click on the arrow to the right and select a new option.
  4. Select Update.

Set up your notifications in Teams

When you want to set up and adjust your notifications settings in Microsoft Teams, there are two options: for the entire application or for each channel.

Set up notifications for the Teams application

  1. Click on the three dots next to you profile picture in the upper right corner in Teams.
  2. A menu will appear, select Settings.
  3. Select Notifications and set up the different notifications under each heading.

If you’ve chosen to receive a notification via email – please note that you will unfortunately not receive this notification if you are signed in or have the application open in the background. This is because you are considered as active and will therefore only receive notifications in the application.

Set up notifications for a channel in Teams

  1. Go to the channel where you want to adjust your settings, and click on the three dots.
  2. Select Channel notifications.
  3. In the next menu, you can choose how you want to be notified when something happens.
  4. Select Custom to get more options for the notifications.
  5. Select the level of notifications
    1. Click on the arrow 
    2. Select Banner and feed if you want both an purple banner in the left corner of the screen when recieving an and an number sign in the activity clock. (see decription below)
    3. Select Only show in feed if you want notifications only in the acitivty clock. (see decription below)
    4. Select Off if you want to turn off the notifications for that teams channel.
    5. Select Include all replies if you want notifications if someone replies on your channels posts.
    6. Click Save
      change channel notifications in teams - chose notification level

Banner = Purple box with little decription of what has happened.

banner notification

Feed = Red numbers on activity and under team

feed notification

**Note** that these settings only apply to you and the specific channel, not the entire team. For example, if you are interested in what’s happening in some of the Teams channel enable notifications on them and disable notifications on the other.