Scheduling Assistant in Outlook

In this manual, we describe how to do a scheduling poll in Outlook. You can use scheduling poll to agree on a meeting time, where the meeting participants can vote on a time that suits them. This feature is available for Windows and on the web. The manual will be based on the web to also suit those who use, for example, Mac.

  1. Go to the portal (m365.umu.se) and open Outlook.
  2. Go to the calendar and click New Event, and select Event.
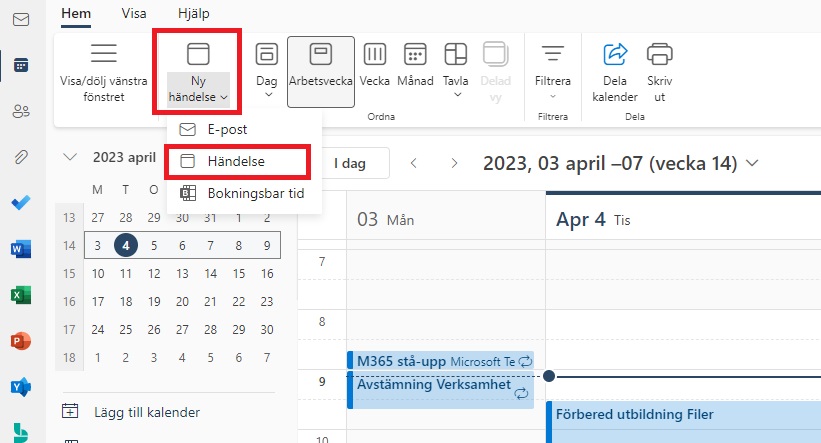
    Bild som visar hur du kommer till schemaläggningsomröstningen
  3. Now you get a box where you invite the meeting participants and set a title for the meeting.
  4. Then go to Scheduling Poll in the menu bar
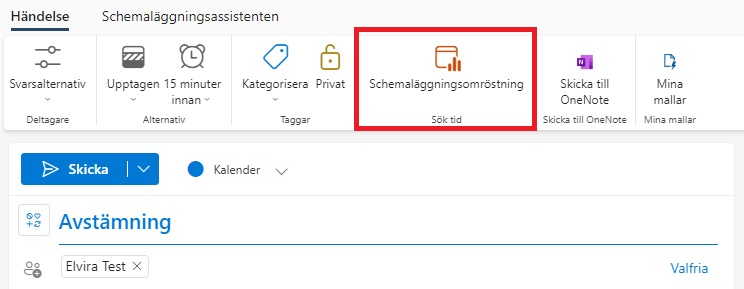
  5. Bild som visar schemaläggningsomröstningen i menyradenNow you get a box on the right. Here you can choose how long the meeting should be, and what date it is. Below you can see suggestions for times when it would suit all meeting participants, or one of the meeting participants. Once you have selected which proposals you want to send out, click Next.
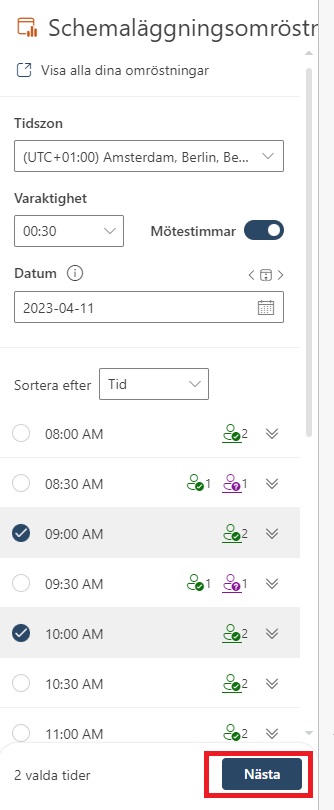
    Bild som visar antalet tillgängliga mötesdeltagare
  6. Now you see a box with an overview of the times you selected. Here you can also choose a place, or check in Teams meeting. Under “Manage voting settings” you get options you can choose to check or uncheck:

Schedule when the participants reach consensus: Tick this if you want the meeting to be booked automatically in the Outlook calendar when you have agreed on a time.

Block selected times in my calendar: Add placeholders to your calendar for all of the selected times.

Notify me of poll updates: Receive an email when a meeting attendee casts a vote.

Require participants to verify their identity: Participants who vote must be logged in, so it is possible to identify who voted.

Lock poll for participants: Participants cannot propose new times. When you feel ready, click Create Poll.
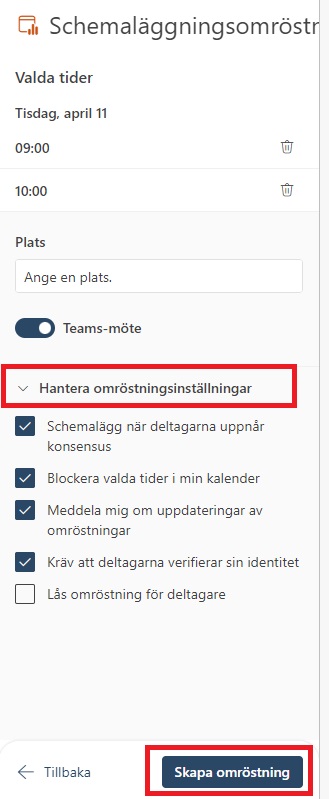
Bild som visar inställningar i omröstningen

7. Now you see an overview of what you send in your poll, and can write a message in the email. When you’re ready, click Submit.

8. When you send the scheduling poll, placeholders will be created in your and the recipients’ calendars, for the selected times.

9. Done! When they vote, you get an email, and if everyone agrees on the same time, a booking is added to the calendar for that time, and the placeholders disappear.

Deactivate your units and your account in “My backup” (Crashplan)

  1. Log in to Crashplan via this page: Login (crashplan.com)Here you will be able to deactivate the units that you have saved in Crashplan. When you deactivate the devices, your account is also terminated. If you have not activated any devices, your account will be terminated anyway.
  2. Log in with your umu ID: umuid@umu.se
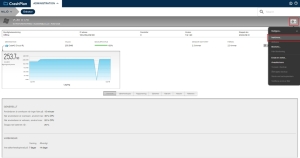
  3. Click on “Devices” and then on your computer name under “Device Name”, see the red marks:


3. In this view, click on the gear in the upper right corner and then “Disable”.


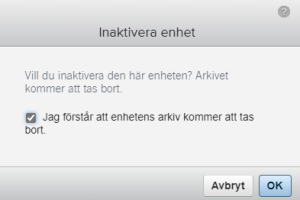
4. A box will appear asking if you want to disable the device. Check the box “I understand that the device archive will be deleted.” and then click OK and you are done!

REDCap

REDCap is a web-based service for data collection in research studies.

Blocked account due to risk use in Microsoft 365

This manual describes how to handle if your account has been banned due to suspicious activity that indicates a high risk to your account, and you are considered a risky user. To restore your account, you’ll need to reset your password.

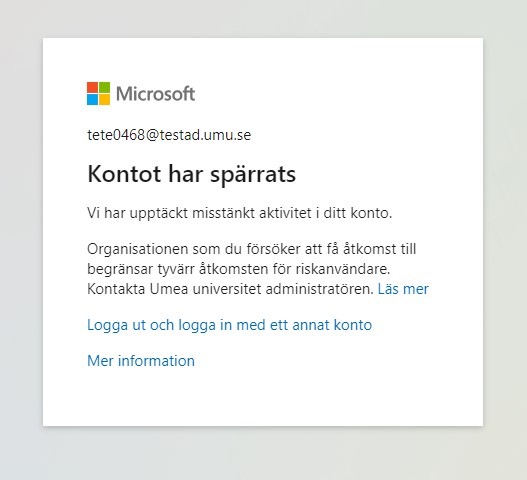
If your account is blocked due to risky usage, you will receive a block and will not be able to use Microsoft 365 with your UMU account. Then you’ll see this window below:
Image showing what it looks like when a your account is blocked

To restore your account and recieve access to it you need to reset your password:

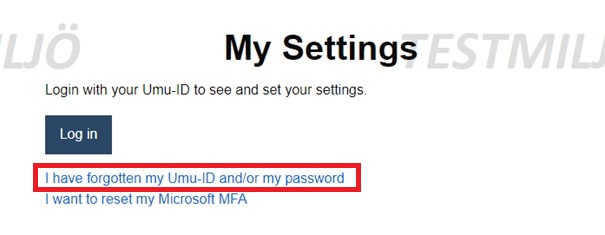
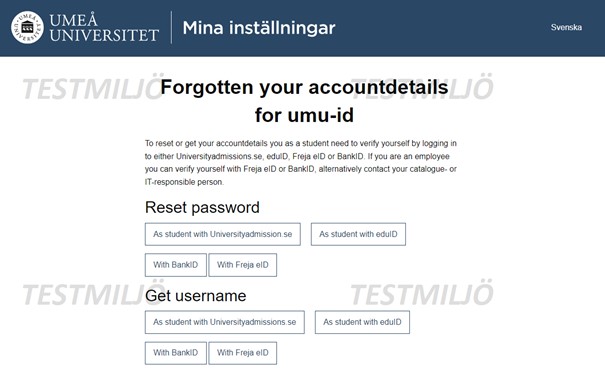
  1. Go to administrationsverktyg.umu.se/Settings. Click on “I have forgotten my Umu-ID and/or password”.
    Image showing your settings in the administrator tool
  2. Under Reset password, select the option that’s right for you.
    Image showing where to reset your password
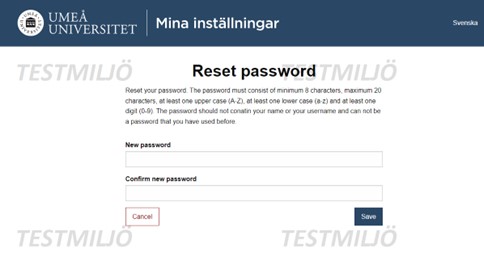
  3. Now, type in your new password, and then click Save.
    Image showing how to reset your password
  4. Done! Now you’ve reset your password and can log in to your UMU-account with your new password.

Add/remove members in a shared mailbox in Outlook (webmail)

If you own a shared mailbox, you should regularly check the members in the group. This is because members are not automatically removed from the group when someone, for example, changes departments or leaves the university. Here are instructions on how to add or remove members from a shared mailbox.

Manage via the Portal

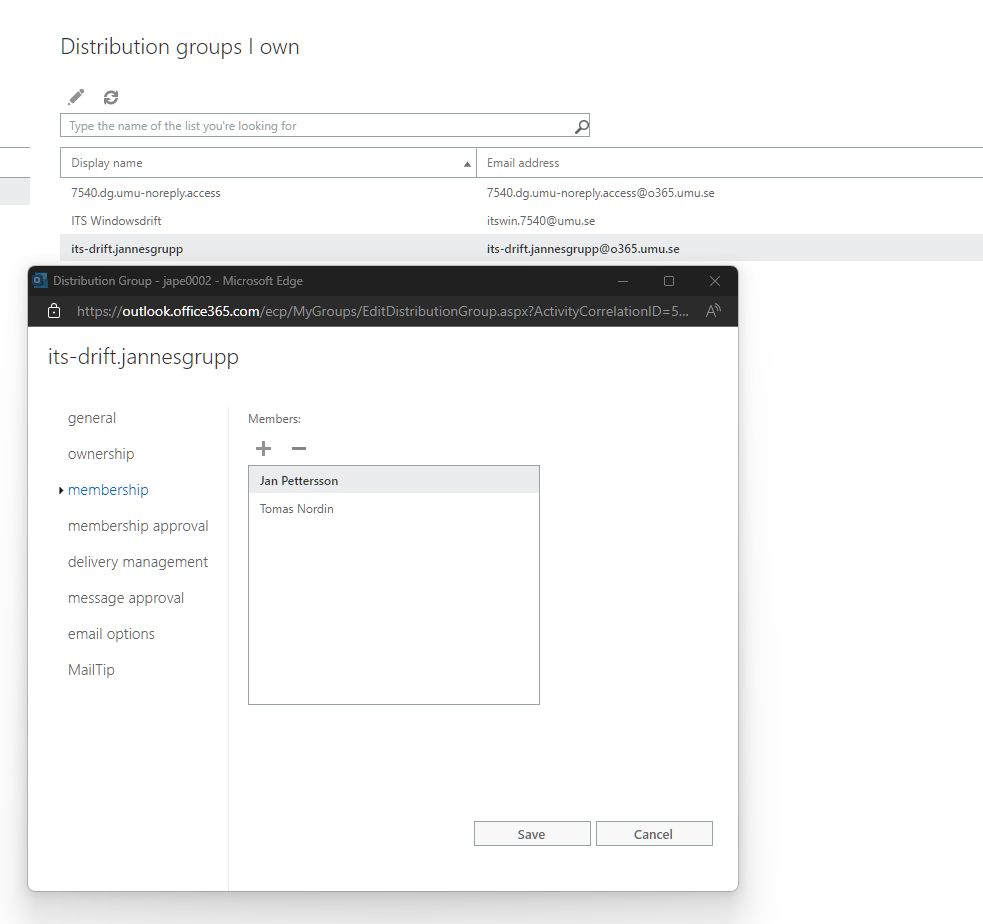
  1. Go to the portal: Distribution groups – Outlook Web App (office365.com)
  2. Under Distribution groups I own, click on the group you want to manage, the group that manages access is named orgnr.dg.lådnamn.access. Then select Membership.
  3. From this view, you can remove and add members to the shared mailbox, click on the person’s name and then + or -. Save.

Manage via Email

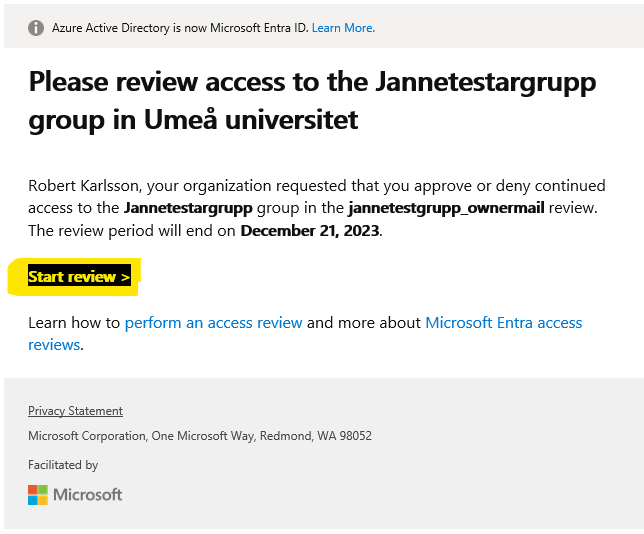
As the owner of a shared mailbox, you will periodically receive an email asking you to review the members in the group. In the email, click on Start review.

From this view, you can check a member and then Approve or Deny the member.

Version history for files in Microsoft 365

In this manual, we’ll go through where to find version history of your documents in OneDrive, Teams, and SharePoint. Version history can save up to 500 versions of a document, and a new version is created each time you make a change to the document. Below is a description of how to do this and where to find the feature.

Open a file that you’ve saved in Microsoft 365. It can be a Word-document, PowerPoint, or Excel.

  1. Click at the top of the document where the title of the file appears.
    Image showing where to find the version history
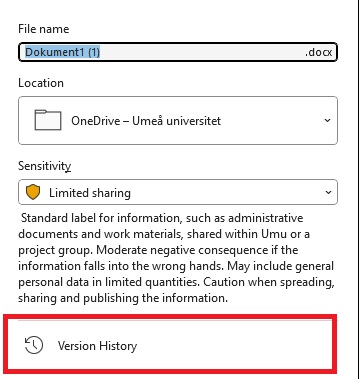
  2. In the box that appears, click at the bottom on Version history.
    Image showing where ti find the version history
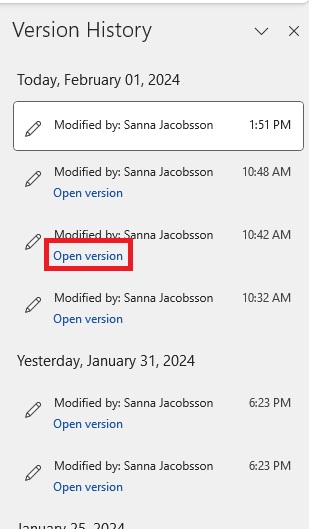
  3. You will now see a box on the right with a list of previous versions of a document. Click on Open version to see a previous version.
    Image showing how to open a previous version of a document
  4. Now you will get a new window where you can see what the document looked like before. Here you can choose to Compare with the current version or to Restore the documents to this previous version. If you do, a new version of the document will be created. If you don’t want to restore or compare, close the document.
    Image showing how to compare or revert the document

Delete or move files from your OneDrive

Sign in to OneDrive via the browser

  1. Go to m365.umu.se and log in to your account (umuid@ad.umu.se for employees and umu-id@student.umu.se for students)
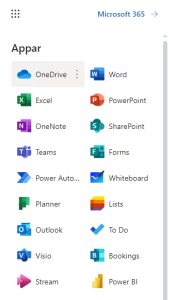
  2. Go to OneDrive via the menu at the top left.
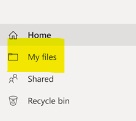
  3. Under your name to the left, clik on My files.
  4. In this view, you see your files that you have saved in your OneDrive.

Delete files in OneDrive

In “My Files” you can select the files and folders you want to delete, and then click Delete. If you do not want to delete the entire folder, you can click into the folder and select files there that you want to delete.

Empty recycle bin

Your deleted files and folders go to the OneDrive recycle bin.

First, select Recycle bin in the OneDrive left side navigation. To permanently delete files select delete in the top navigation.

Move files in your OneDrive

In the My Files view, you can select the files and folders you want to move, and then click Move To.

A window opens where in the middle under My files you can move the selected files to one of your existing folders. On the menu to the left, you can move the selected files to a team or Sharepoint. Select destination and click on Move.

If you exceed your storage limit

If you were to exceed the limit of how much you can store in OneDrive, you will end up in view mode for your documents, and your OneDrive will be read-protected, which means that you will not be able to upload, edit or sync your files in OneDrive, only view them. To fix this, you need to clear your OneDrive and delete files so that you fall below the limit of how much you are allowed to store.

Umu card

Here you can find information about the multifunction card at Umeå University, the Umu card.