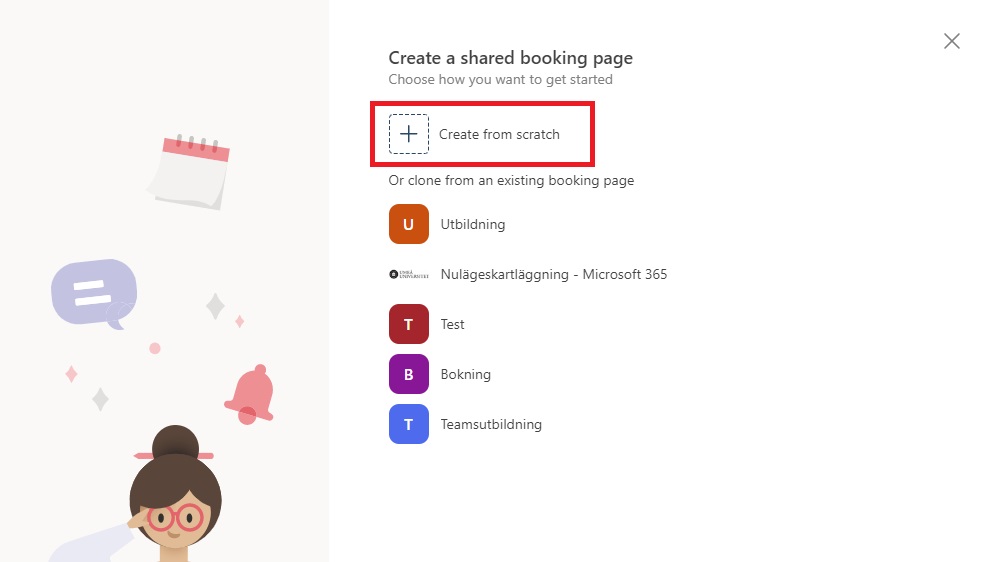
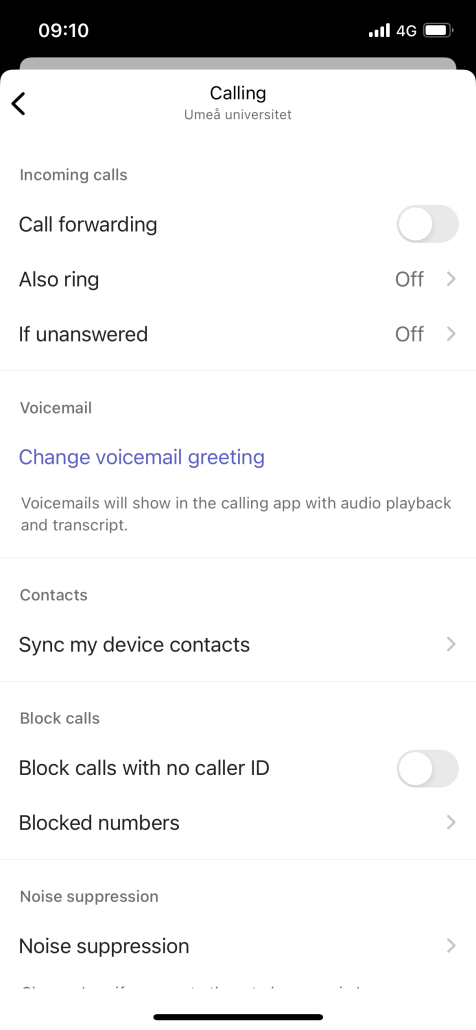
Transfer a call
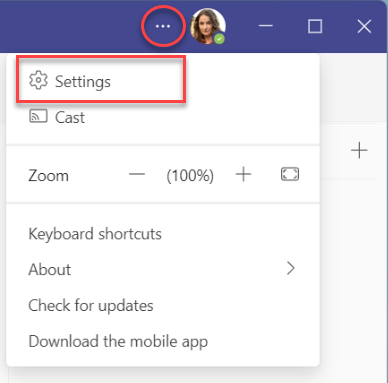
1. When you’re in a call, select More actions > Transfer in your call controls.
![]()
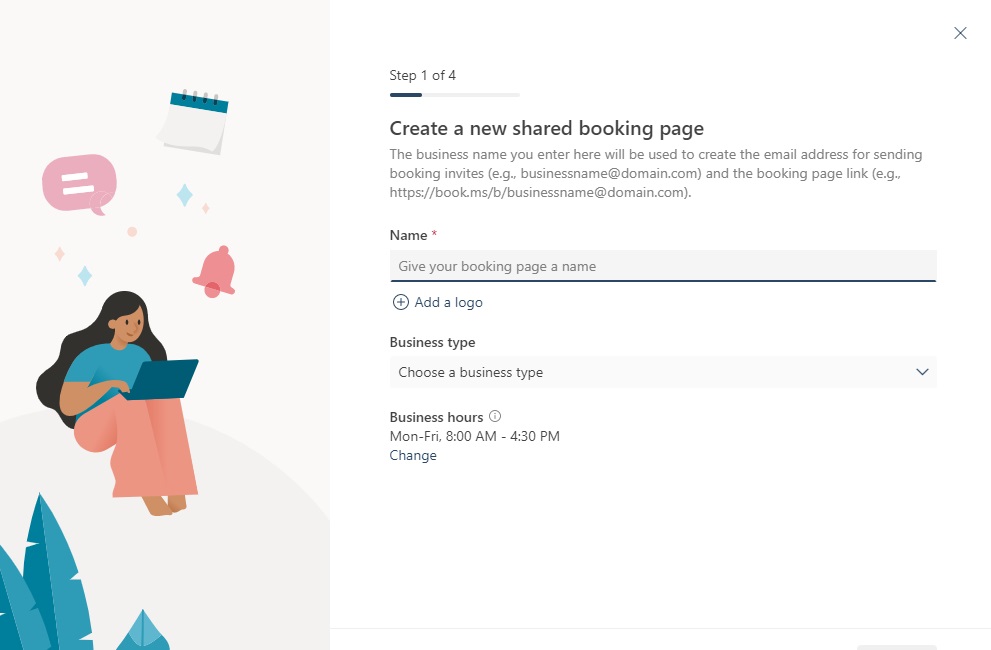
2. Start typing the name of the person or phone number you want to transfer the call to and select them when they appear.
![]()
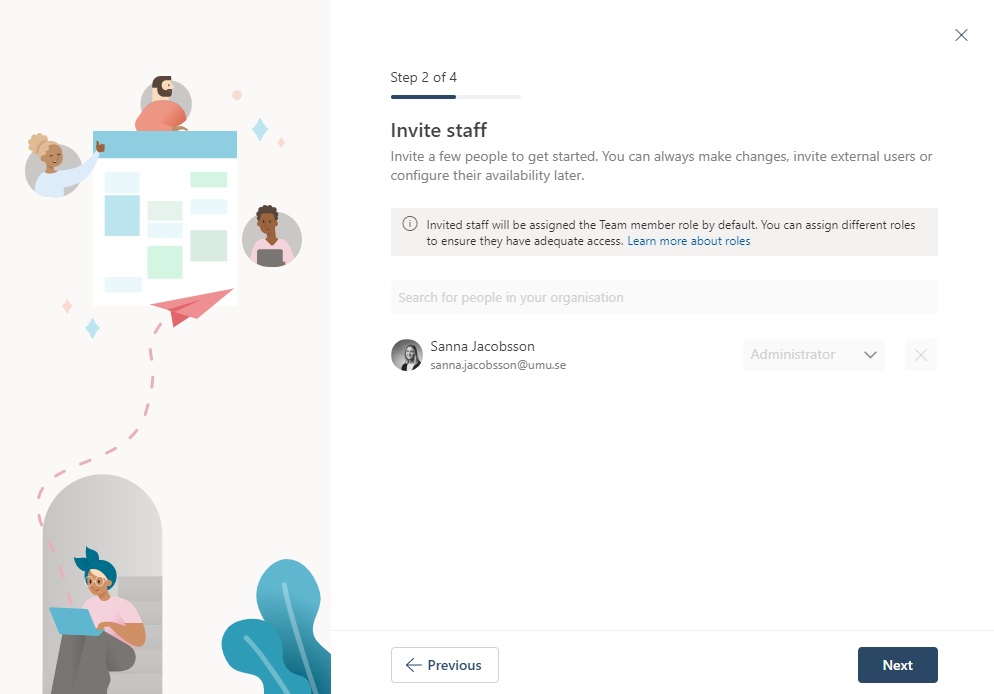
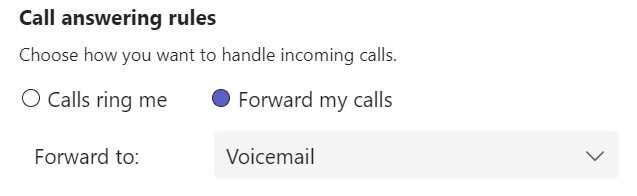
3. If you are transferring to another Teams user, turn on Ring back if there’s no answer to send the call back to you if the recipient doesn’t answer. If this setting is not turned on the call will be transferred to the recipient voicemail if there is no answer. If you get the call back the popup toast will show that the recipient was not reached.

4. Select Transfer to complete the transfer.
Consult then transfer
You may want to check in with someone before you transfer a call.
Note: Consult then transfer is not available in Teams for the web.
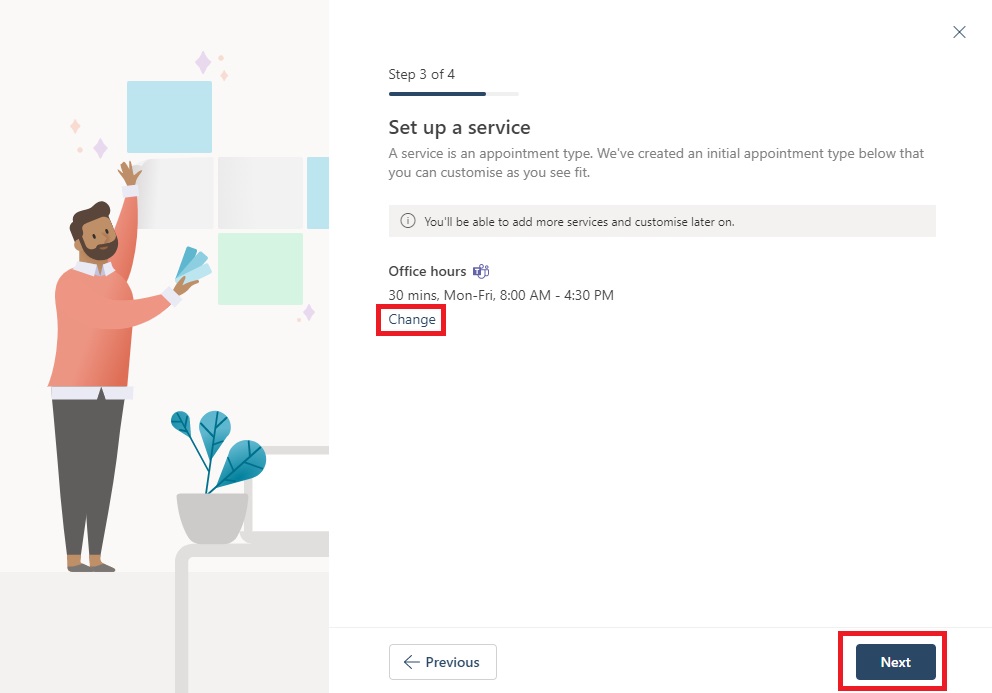
1. When you’re in a call, select More actions > Consult then transfer.
![]()
2. Under Choose a person to consult, start typing the name of the person you want to reach or a phone number and select them when they appear.
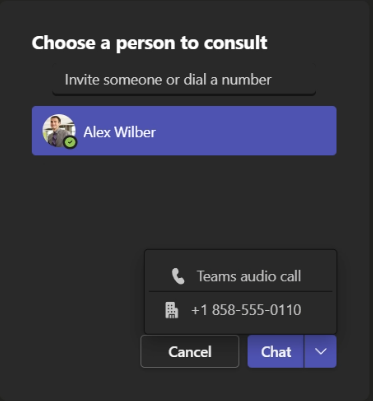
3. Consult with them by calling or using chat. Click on the chat button to start a chat, or select Teams audio call from the drop down options.
4. When you’re ready, hit Transfer to complete the transfer.
![]()