Below, we’ll describe what “Files on demand” means, and how your OneDrive files might be stored on your PC.
What is OneDrive Files on Demand?
- Files on Demand is a built-in feature in OneDrive that allows you to choose how you want your files to be stored.
- You can save space on your computer by making files available only online.
- Make sure files are always available on your device, whether you have internet or not.
- Files on demand also apply to files you’ve synced to your OneDrive from, for example, Teams, or shared libraries.
Below, you can learn more about what the different symbols mean that you can see on your OneDrive files in your explorer:
On the files and folders you see this blue cloud:  it means that the files are only available online, and do not take up space on your computer. You’ll see these files directly in Windows Explorer, but won’t download until you open them. You also need to be connected to the internet to open these files. For those of you who use a Mac, the symbol looks like this:
The files and folders where you see this green checkmark:  are files that are online files, but when you open them, they are downloaded and become a locally available file. Right-click on the file and select “free up space”. Thus, these files are both online files and files that are available locally on your device. For those of you who use Mac, you will not see a symbol next to your file.
The files and folders where you’ll see this green checkmark:  are files that you’ve actively chosen to keep on your device at all times. These files are downloaded and take up space on your device, and you can access them at any time, even without an internet connection. For those of you who use a Mac, the symbol looks like this:
Other symbols in your OneDrive
Aside from these three symbols, you may also see other symbols on your files or on your OneDrive icon on your taskbar, such as a pause icon, exclamation mark, or warning triangle. Keep an eye out for symbols on your OneDrive cloud. You can click on your OneDrive icon on the taskbar to see what the error is and how it can be resolved. Here’s what the symbols might look like:


Do you want to keep your files on your computer at all times?
If you want to keep all your OneDrive files on your computer, and thus always have access to them offline, you can right-click on the OneDrive folder in your menu on the left side of your explorer, and then select “Always keep on this device”. This is not something we recommend, as it is often better to select specific documents and folders that want to be kept on the device. That way, it won’t take up unnecessary space on your computer. Here’s how to keep your OneDrive files on your device.

Email notifications to group forms
/in Email, Employee, English, Forms, Microsoft 365, Okategoriserade, Student /by Elin SköldWhen you create group forms in Forms, and want to receive email notifications when a response is submitted in the form, you need to make additional settings than just in the form. In this manual, we describe how you can receive notifications to a group email, when you create group forms in Forms.
Get started with your personal booking page with Bookings with me
/in Bookings, Employee, English, Microsoft 365, Okategoriserade, Student /by Elin SköldBookings with me is a digital personal booking tool that integrates with your free/busy time in your Outlook calendar. The service can be used, for example, when you need to schedule employee meetings or want to offer tutoring sessions or coaching to students and colleagues. This manual guides you on how to get started with your personal booking page. If you want to know how to create and get started with a shared booking page, I recommend you to look at this page: Create a booking site in Bookings
* To create an appointment type in Bookings for me, click Create appointment type.
* To create a new shared booking page, click Create booking page.
Please note that your personal booking page is automatically added to your email signature unless you click out of it (during the selection of public and private)
1: Use my usual meeting times: Suggested times to the booker are displayed based on your availability in the calendar. If you have a gap between two bookings in your calendar, that gap will appear as an available option on your booking page.
2: Use customized availability hours: Here you specify the date range during which it should go and book alternatively if there are any special time frames. Maybe it is only on Mondays that you want it to be possible to book?
Scheduling Assistant in Outlook
/in Email, Employee, English, Microsoft 365, Okategoriserade /by Elin SköldIn this manual, we describe how to do a scheduling poll in Outlook. You can use scheduling poll to agree on a meeting time, where the meeting participants can vote on a time that suits them. This feature is available for Windows and on the web. The manual will be based on the web to also suit those who use, for example, Mac.
– Schedule when the participants reach consensus: Tick this if you want the meeting to be booked automatically in the Outlook calendar when you have agreed on a time.
– Block selected times in my calendar: Add placeholders to your calendar for all of the selected times.
– Notify me of poll updates: Receive an email when a meeting attendee casts a vote.
– Require participants to verify their identity: Participants who vote must be logged in, so it is possible to identify who voted.
– Lock poll for participants: Participants cannot propose new times. When you feel ready, click Create Poll.
7. Now you see an overview of what you send in your poll, and can write a message in the email. When you’re ready, click Submit.
8. When you send the scheduling poll, placeholders will be created in your and the recipients’ calendars, for the selected times.
9. Done! When they vote, you get an email, and if everyone agrees on the same time, a booking is added to the calendar for that time, and the placeholders disappear.
Deactivate your units and your account in “My backup” (Crashplan)
/in Employee, My Backup, Okategoriserade /by Sofia Westerlund3. In this view, click on the gear in the upper right corner and then “Disable”.
4. A box will appear asking if you want to disable the device. Check the box “I understand that the device archive will be deleted.” and then click OK and you are done!
Change the password and activate MFA on your student account
/in BankID, English, Freja eID+, Multi-factor authentication, Umu-id /by Erik ÖhmanHow your files are stored (Files on demand)
/in Microsoft 365, OneDrive /by Sanna JacobssonBelow, we’ll describe what “Files on demand” means, and how your OneDrive files might be stored on your PC.
What is OneDrive Files on Demand?
Below, you can learn more about what the different symbols mean that you can see on your OneDrive files in your explorer:
On the files and folders you see this blue cloud: it means that the files are only available online, and do not take up space on your computer. You’ll see these files directly in Windows Explorer, but won’t download until you open them. You also need to be connected to the internet to open these files. For those of you who use a Mac, the symbol looks like this:
The files and folders where you see this green checkmark: are files that are online files, but when you open them, they are downloaded and become a locally available file. Right-click on the file and select “free up space”. Thus, these files are both online files and files that are available locally on your device. For those of you who use Mac, you will not see a symbol next to your file.
The files and folders where you’ll see this green checkmark: are files that you’ve actively chosen to keep on your device at all times. These files are downloaded and take up space on your device, and you can access them at any time, even without an internet connection. For those of you who use a Mac, the symbol looks like this:
Other symbols in your OneDrive
Aside from these three symbols, you may also see other symbols on your files or on your OneDrive icon on your taskbar, such as a pause icon, exclamation mark, or warning triangle. Keep an eye out for symbols on your OneDrive cloud. You can click on your OneDrive icon on the taskbar to see what the error is and how it can be resolved. Here’s what the symbols might look like:


Do you want to keep your files on your computer at all times?
If you want to keep all your OneDrive files on your computer, and thus always have access to them offline, you can right-click on the OneDrive folder in your menu on the left side of your explorer, and then select “Always keep on this device”. This is not something we recommend, as it is often better to select specific documents and folders that want to be kept on the device. That way, it won’t take up unnecessary space on your computer. Here’s how to keep your OneDrive files on your device.
Download your OneDrive files to your device
/in Microsoft 365, OneDrive /by Sanna JacobssonIn this manual, we’ll tell you how to download all your OneDrive files to your computer, so you can use the files even when you don’t have access to internet.
REDCap
/in Employee, English /by Erik ÖhmanREDCap is a web-based service for data collection in research studies.
Open a shared mailbox in webmail
/in Email, Employee, Okategoriserade /by Erik ÖhmanBlocked account due to risk use in Microsoft 365
/in Employee, Microsoft 365 /by Sanna JacobssonThis manual describes how to handle if your account has been banned due to suspicious activity that indicates a high risk to your account, and you are considered a risky user. To restore your account, you’ll need to reset your password.
If your account is blocked due to risky usage, you will receive a block and will not be able to use Microsoft 365 with your UMU account. Then you’ll see this window below:
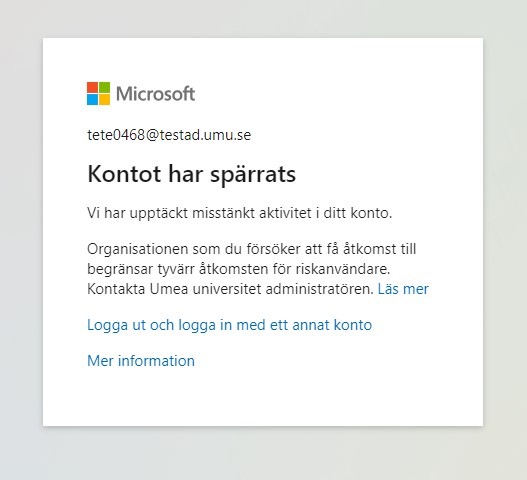
To restore your account and recieve access to it you need to reset your password: