Scheduling Assistant in Outlook
In this manual, we describe how to do a scheduling poll in Outlook. You can use scheduling poll to agree on a meeting time, where the meeting participants can vote on a time that suits them. This feature is available for Windows and on the web. The manual will be based on the web to also suit those who use, for example, Mac.
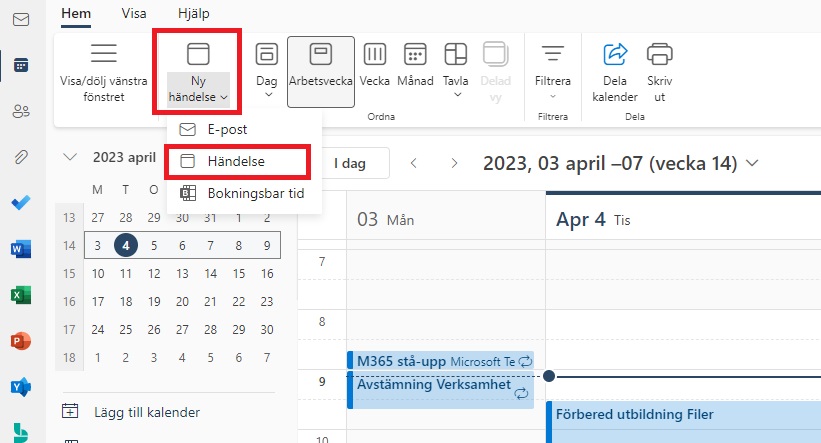
- Go to the portal (m365.umu.se) and open Outlook.
- Go to the calendar and click New Event, and select Event.
- Now you get a box where you invite the meeting participants and set a title for the meeting.
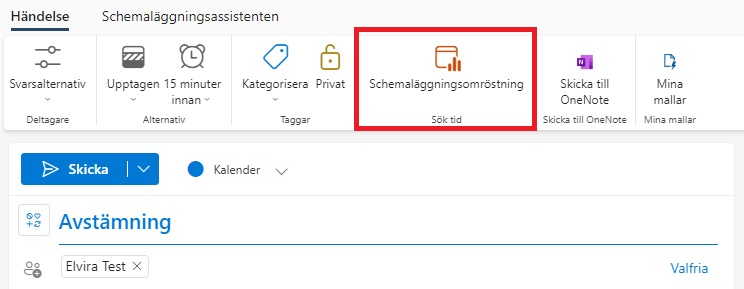
- Then go to Scheduling Poll in the menu bar
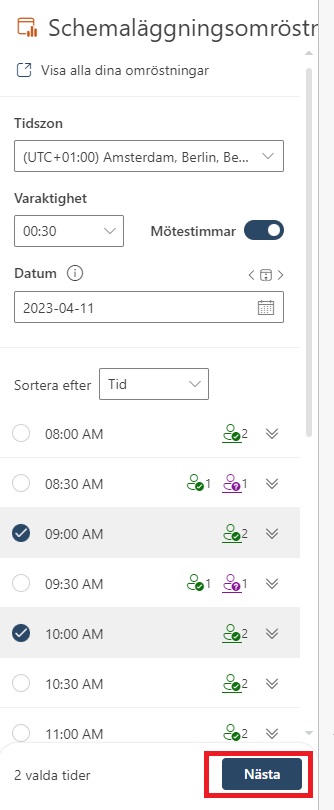
 Now you get a box on the right. Here you can choose how long the meeting should be, and what date it is. Below you can see suggestions for times when it would suit all meeting participants, or one of the meeting participants. Once you have selected which proposals you want to send out, click Next.
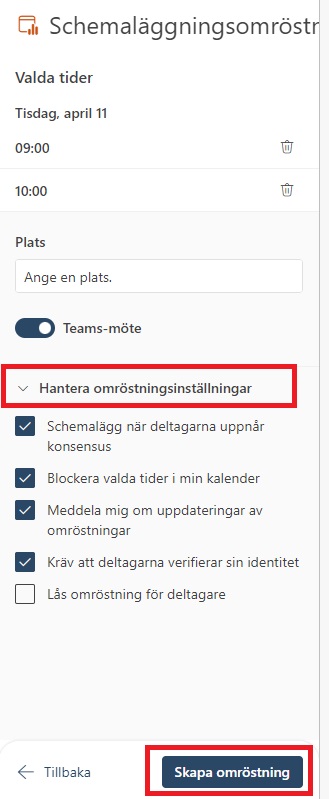
- Now you see a box with an overview of the times you selected. Here you can also choose a place, or check in Teams meeting. Under “Manage voting settings” you get options you can choose to check or uncheck:
– Schedule when the participants reach consensus: Tick this if you want the meeting to be booked automatically in the Outlook calendar when you have agreed on a time.
– Block selected times in my calendar: Add placeholders to your calendar for all of the selected times.
– Notify me of poll updates: Receive an email when a meeting attendee casts a vote.
– Require participants to verify their identity: Participants who vote must be logged in, so it is possible to identify who voted.
– Lock poll for participants: Participants cannot propose new times. When you feel ready, click Create Poll.
7. Now you see an overview of what you send in your poll, and can write a message in the email. When you’re ready, click Submit.
8. When you send the scheduling poll, placeholders will be created in your and the recipients’ calendars, for the selected times.
9. Done! When they vote, you get an email, and if everyone agrees on the same time, a booking is added to the calendar for that time, and the placeholders disappear.