Engelska kategorin för studentinformation.

Confirm your group study room booking in TimeEdit as a student

As a student you need to confirm your group study room bookning no sooner than 30 minutes before and no later than 15 minutes after the start of the booked slot. Unconfirmed bookings will automatically be removed.

To confirm the bookning visit either the page My group study room booknings or the bookning page Book group study room in TimeEdit. Scan the QR-code outside a room that is bookable by students and it will take you directly to the booking page where you can confirm your booking.

Read more

Book a group study room in TimeEdit

To login and book you need a Umu-ID and you need to be registered to a course at Umeå University.

Login via https://cloud.timeedit.net/umu/web/ and select Booking for students.

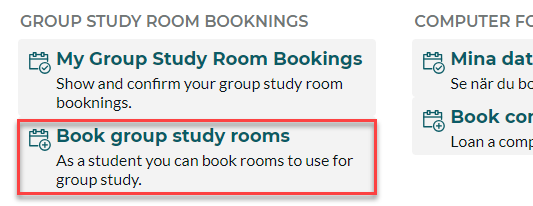
Then select Book group study rooms.

Start by filtering rooms. You can use free text search (1), filter (2) by Campus or Building. Click show filter (3) for additional filters if needed.

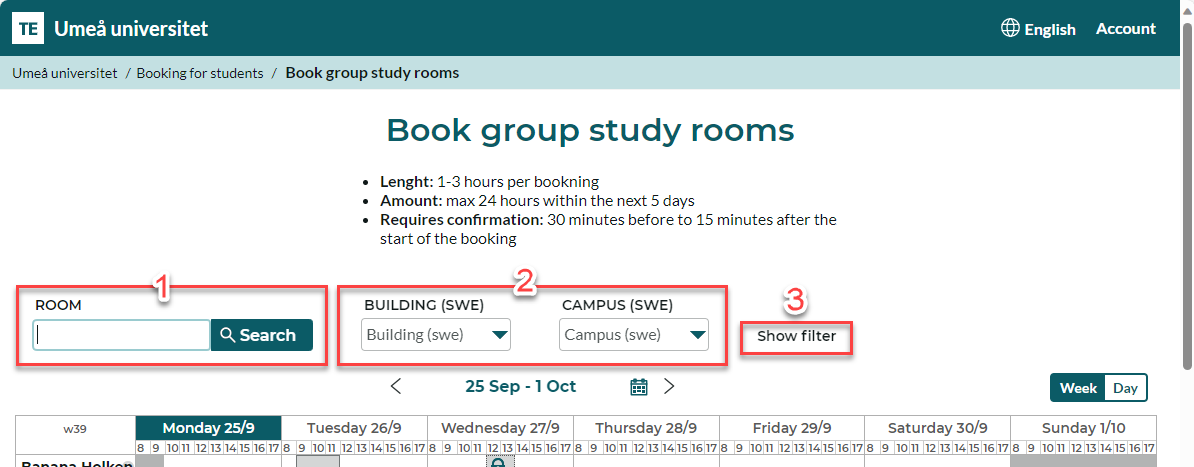
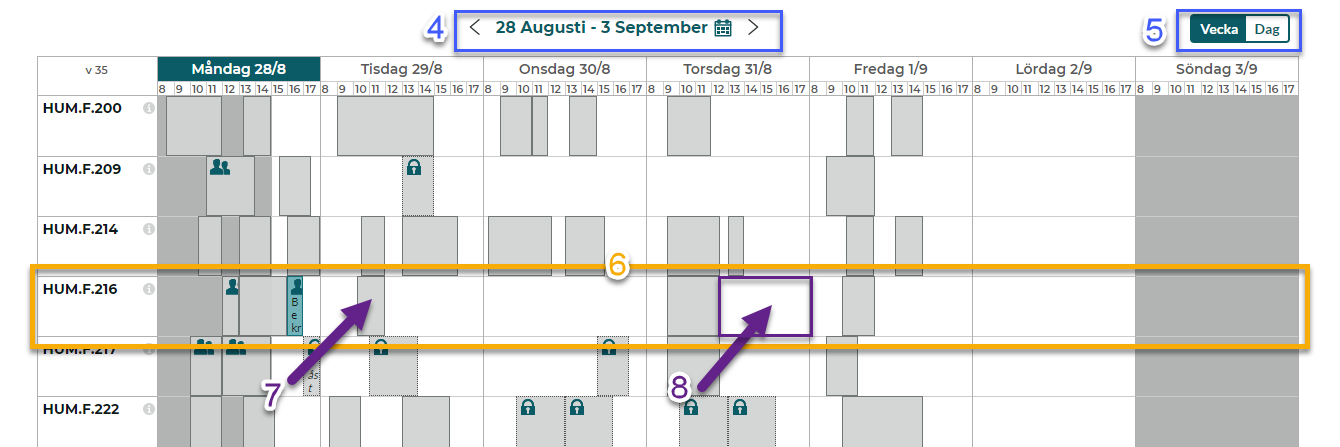
Under the search section and above the calendar is the date selector (4). The date range used in the calender is also displayed here. You can page backwards and forwards with the arrows. Click on the date to open the date selector. To the left you find buttins to switch between week or day view (5). You can also switch to day view by clicking a date in the week view.

Each row (6) in the Booking calendar represents a room and shows the availability for the room. A grey field (7) means that the room is occupied while white (8) means that it is available for bookning.

In the day view move the mouse cursor over the room and time you want to book. I green booking indicator is shown. Click to select the room and time. On mobile you can touch the screen where you want the bookning.

After you have clicked to select the room and time a bookning window opens. Here you can adjust the start and end times.

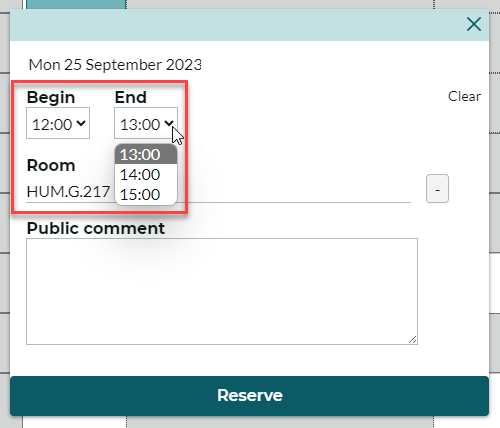
Select Reserve to complete the bookning.
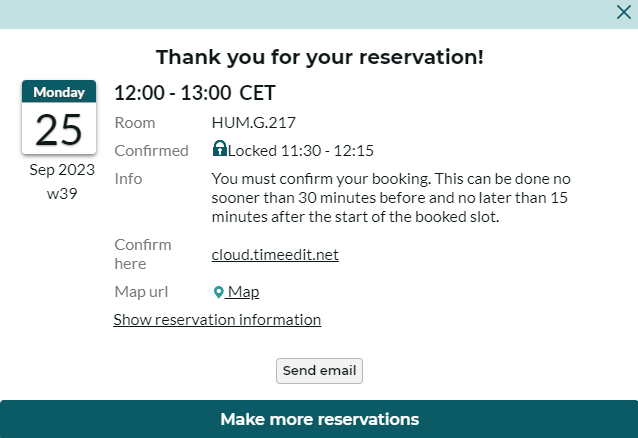
Your bookning is now made and information about the bookning is displayed. By the text Confirmed you see when the bookning needs to be confirmed if you want to keep it. You can also send info about the bookning by email.

Book a computer for a digital examination

During a digital examination in the writing hall, you have the option to book a computer to borrow. A loaned computer makes it smooth and convenient for you to take a digital examination in our writing halls. The computer will be prepared for you in the examination hall. You will be directed to your seat […]

Block or release quarantined email

When an email has ended up in the spam filter,  you will receive an e-mail from the sender noreply@umu.se that you have an email in quarantine. If you believe the message to be safe, you can choose to let it through so it ends up in your inbox. If the message is spam, you don’t need to do anything, it will be automatically deleted in 30 days. 

 This is what the message looks like: 

Select Release to send the message to your inbox.

Select Block sender to block the sender. 

Select Review Message to review the message to decide whether or not to let it go through. You will then see this view: 

Select the message and whether you want to release or delete it.

Inspera – Sign off your submission

When an e-exam is signed off in Inspera, your submission will be removed from the system and cannot be recreated.

VIKTIGT

Make sure to download your submission, comments and marks before you sign off your submission.

Log in to Inspera and click on ”Archive” and then on ”See more details” for the exam that you wish to sign off.

You can view your submission without downloading it by clicking the “View submission” button (1).

Download your submission as a PDF-file by clicking the ”Download as PDF” button (1).

Inspera - Sign off submission

Make sure to download your submission, comments and marks before you sign off your submission.

VIKTIGT

If you need to request a rectifying or reassessment of you exam, you should not sign off your submission.

To sign off your submission and remove it from Inspera. Click on the ”Remove submission” button (2).

A dialog box will now open where you can confirm that your exam will be removed from the system.
Click “Yes” to confirm the sign off/deletion.

Record meetings in Teams

In this manual, we describe how to record digital meetings in Teams, and where to find the recording when the meeting is over. Please note that it is important that you notify the participants in the meeting beforehand so they can decide whether it is okay to be recorded.  

Think before you record a meeting 

Ideally, avoid recording meetings unless you absolutely have to. Rather, write memos to document the meeting. If you still want to record a meeting, you should: 

  • Inform the participants in the meeting before so they can decide whether it is okay to be recorded. 
  • Ensure that the information recorded does not contain sensitive data. 

Join a Teams meeting

  1. After you start or join a teams meeting, click More, and then  click Record and Transcribe.
    Image showing how to record you meeting
  2. Now you will bring up another box, click Start recording when you are ready. Here you can also choose to Start transcription, if you want to transcribe the meeting.
    Image showing how to start recording your meeting
  3. When you want to end the recording, do the same as when you started recording. You go to More and then Record and Transcribe, then click Stop recording.  Recording also stops automatically when the meeting ends.
    Image showing how to stop recording your meeting
  4. Now you have made a recording of your Teams meeting. It may take a few minutes for the recording to be saved. The recording will be automatically saved in the meeting chat after the meeting is finished. Depending on the type of Teams meeting you recorded, the recording will be saved in different places 
    Channel meeting: The recording is saved in a folder under “Files” in the channel’s SharePoint, where all members of the team have access to it.  
    Regular meeting: The recording is saved in the “Recordings” folder on OneDrive for the one who started the recording. 

Automatic recording 

Before the meeting begins, you can choose to have it recorded automatically. Go to Meeting Options, and then check Record automatically. If you choose to do this, it is important that the participants in the meeting agree before the meeting starts that it is okay to be recorded.
Image showing meeting options in Teams

Install VPN client

Manuals that describe how to install the VPN client on different systems/devices.

DiVA: Register student thesis