Make a branch in Forms
When you create your forms and tests, you can choose to branch questions. This means that the current questions belongs or depends on another questions in the quiz.
- Open the form where you want to make a branch.
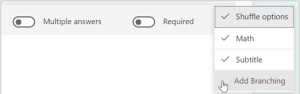
- Choose the questions that you want to branch, click on the three little dots and then Add Branching.
- Click on the arrow. In de accordion menu that pops up, choose which question you want to branch the question with.
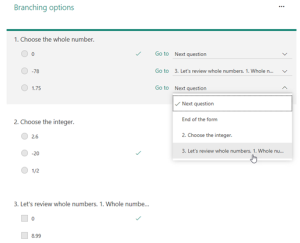
- When you’ve chosen, click on Back to keep editing other question or to finish.
Customize settings for files, maps and library in Sharepoint
This manual describes how you as an administrator or owner of a library, list, or survey, can change permissions to let the right people access the data they need while restricting others.
Adjust access to files and maps in SharePoint
If you are the owner of a SharePoint Website you can adjust the settings on maps and files.
- Go to the library in SharePoint where you want to adjust the settings.
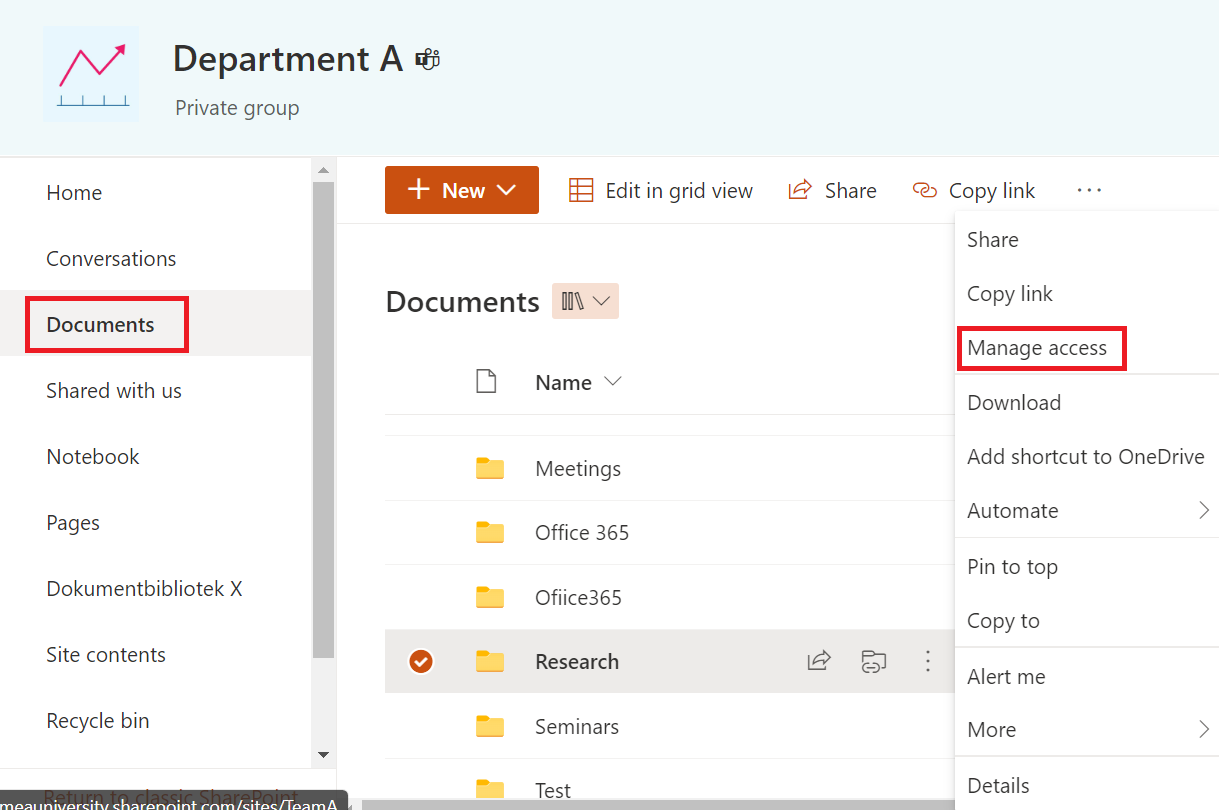
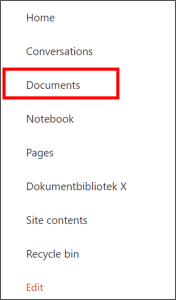
- Click on documents in the left menu.
- Mark the files/maps where you want to adjust the settings.
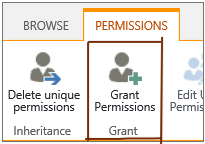
- Click on the three dots and then Grant access.
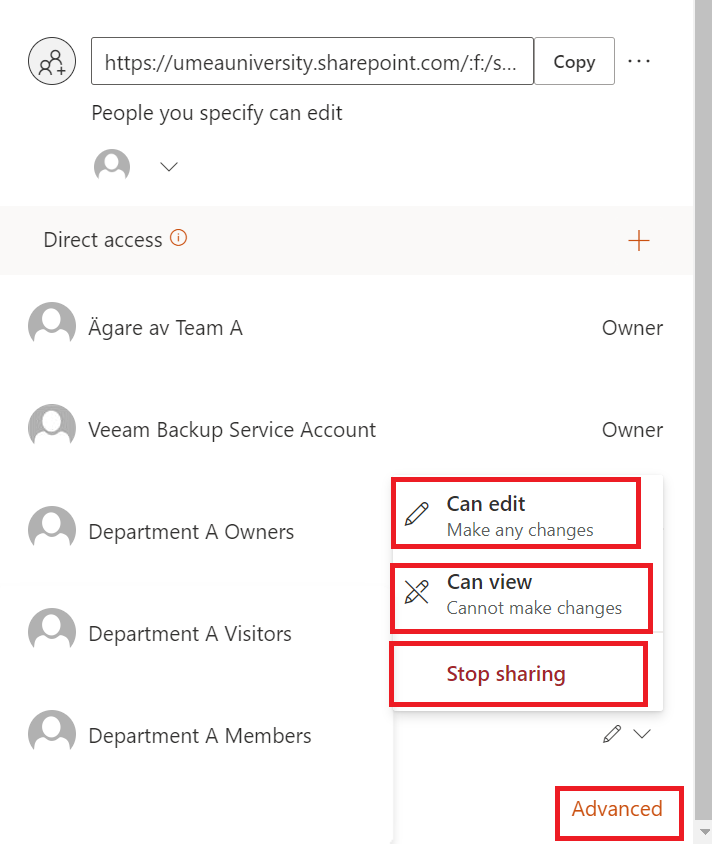
5. A menu to the left will be shown. Scroll down and click on Members and then the arrow.
6. Choose Can edit if you want the members to be able to make changes.
7. Choose Can see if you don’t want the members to be able to edit. The members can only see.
8. Choose Stop Share if you want to remove their access to the files or maps.
9. Choose Advanced if you want to setup advanced settings (For example if you want some of the members to be able to edit, but some of them should only be able to see).
How to setup advanced settings
As administrator or owner to a document library you can adjust the settings on a whole document library so that the right people have access and can edit but the rest who shouldn’t is not able to.
- Go to the library where you want to control the settings.
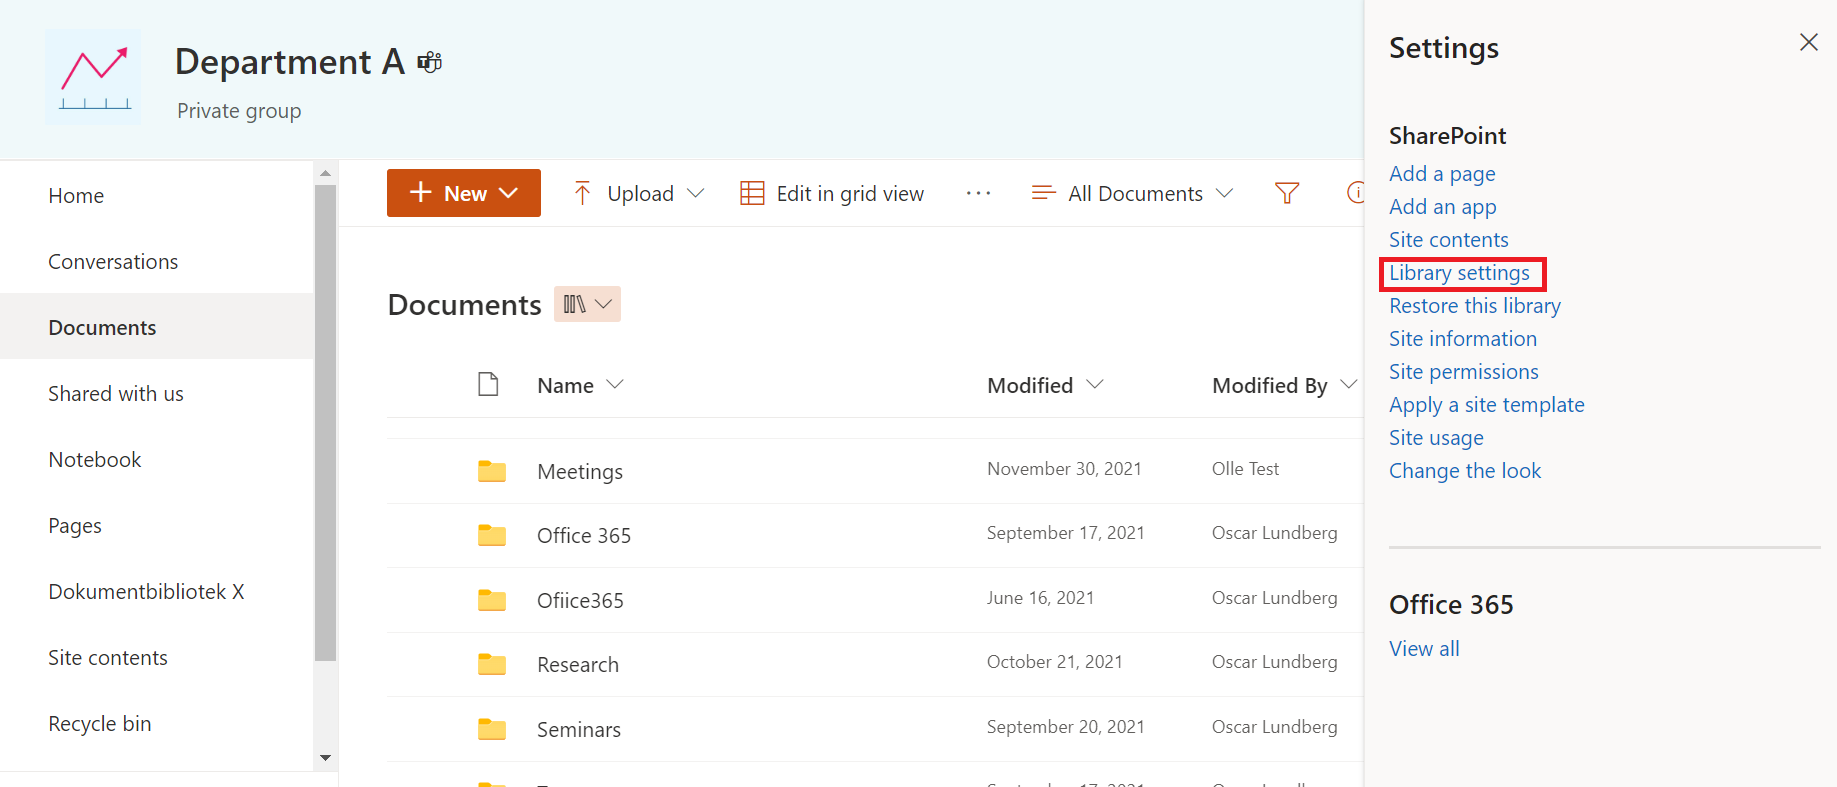
- Click on the settings wheel in the right corner and choose Library settings.
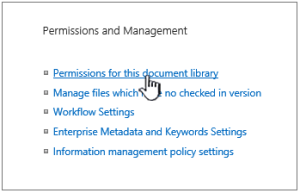
- Under Permissions and management, chose Permissions for this document library.
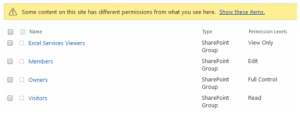
- You will then be sent to the site Permissions.
- A yellow message might pop up. Here we list what the messages mean:

Some objects in this list may have unique permissions that’s not controlled from your page. Choose This means that one simple object has earlier been shared with others. If you click on Show these objects you will see a list of these objects. You can click on Handle access if you’re the owner and then make the changes that is necessary.
• There are members with limited access on this site. The members may have limited access if an object or document under the site has been shared with them. This means that if an object has been shared with users, but not the entire list or library, the members permissions is limited to the object that’s been shared with them. Click on Show users to see who they are.
• When you share an object with a user they will get limited access to the webpage to get full access to the object. If you stop share the object the user will still have limited access to the website (and you will see this message), but they don’t have access to any objects that’s not shared with them.
• This library inherits permissions from the superior level (name of the library will be shown). This means that the inherit still hasn’t been broken for the list or library. More information on how you do this will follow in this manual.
Stop inheriting permission in Sharepoint
When you break the inherit permissions for a list, library or survey and then define new permission settings for the library, the library will then inherit the objects in it. The objects under the superior object till now get the same settings for permissions and access as the superior object. Do these steps to break the inherit and to share unique permissions instead.
- Go to Permissions with help from the steps above.
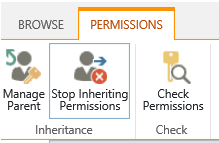
- If you want to break the permissions from the superior object, choose Stop inherit permissions.
- A safety box will pop up. Click OK if you want to succeed, or click Stop if you’ve changed your mind.
- You have now stopped inheriting the permissions for this document library. The menu Permissions will now get more options.
- Click on Delete unique permissions in the same menu if you want to reinstall inherit permissions again.
Assign unique permissions in SharePoint
You need to break inheritance from the superior site before you can grant unique permissions. Once you’ve broken inheritance like we showed above, you follow these steps to grant unique permissions.
- Open the library where you want to assign unique permissions.
- Go to the site Permissions with help from the steps above.
- Choose Grant permissions. (If the list/library inherit from the superior object, this choice will not be shown).
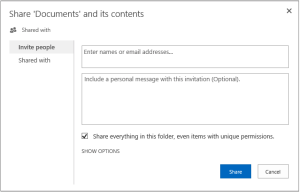
- In the Share dialog box make sure the header Invite people is selected. Then you can start to type the names of the people or group you want to grant access to. You can add a personal message if you’d like. Check or uncheck the box Share everything in this folder, even items with unique permissions depending if you want to limit or grant the access to the objects that you already set unique permissions for.
- By default, they will get the access to edit. Which means that the people you invite can make changes in the library. If you want to give them another permission level, click on Show options and then Select a permission level. An e-mail will be sent to everyone that’s named in she square Invite people. If you don’t want everyone to receive an email, click on Show options and then uncheck the box Send an email invitation.
- When you’ve made all the choices in the Share dialog box, click Share.
Change permissions settings in SharePoint
You need to break the inherit from the superior site before you can change unique permissions. Once you’ve broken the inherit like the steps above you follow these steps to change unique permissions.
- Open the library where you want to change permission levels.
- Go to the site Permissions for the library.
- In the list Names, check the boxes next to the name of the users/group that you want to change access for.
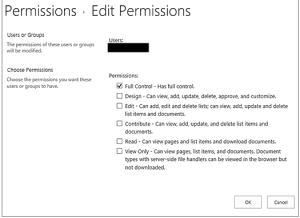
- When you’re done, click on Edit user permissions.
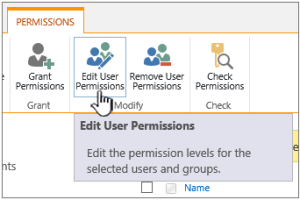
- Under Permissions, mark the box for the permission level you want for the users/groups you’ve chosen.
- Click OK when you’re done.
Remove user permission in SharePoint
To remove permissions from users or groups that you have granted access to, follow these steps.
- Go to the library where you want to remove user permissions.
- Go to the site Permissions for the list or library (see above if you don’t remember how to).
- In the list Name, mark the box next to the name of the user/group that you want to remove permission from.
- Choose Remove user permission.
- The permission site will be updated and show that the user/group will no longer have permission to the lists.
Get started with the new Whiteboard
Find Whiteboard
- Open your browser and go to www.m365.umu.se.
- In the panel to the left, click on the icon at the bottom More applications.
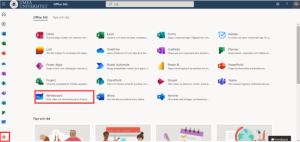
- Choose Whiteboard.
Whiteboard portal
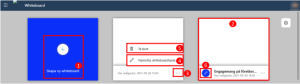
After you’ve clicked on Whiteboard you will get to Whiteboard portal. You’ll se all of your current Whiteboards.
- Click on Create a new Whiteboard to create a new.
- If you have made Whiteboards before, you can click on them to keep working on them. On the Whiteboards you’ve worked on before, if you click on the three dots you can Delete it or change name.
- If you have a whiteboard with a little blue circle at the corner, you’ve shared the Whiteboard with more people.
Whiteboard settings
- Click on the settings wheel in the upper corner on a whiteboard.
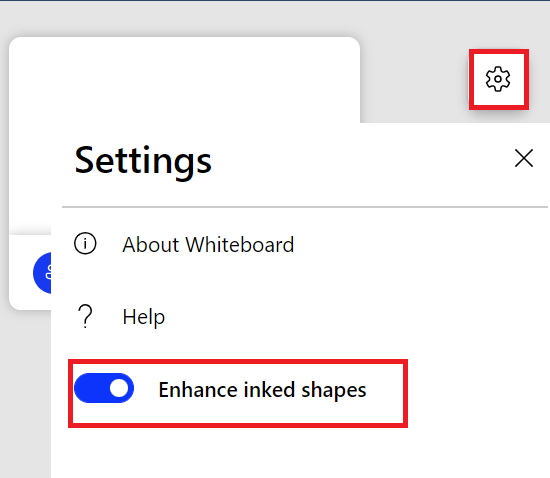
2. Choose Improve the shape of pens automatically (example if you draw a circle, the circle will be adjusted no a nice form automatically).
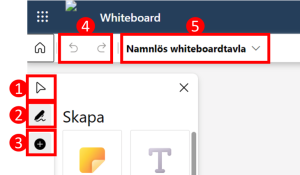
Whiteboard settings in the left head menu
Before you start using whiteboard it’s good to be familiar with the settings and icons. Here are some of the most used settings.
- The arrow is the standard choice. You can move around the canvas, mark and move the objects you’ve created.
- If you click on the pen you can choose between different pens on your canvas.
- If you click on the + the menu Create will be shown. Here you can choose between different objects that you can place on your canvas. (These will be explained longer down in this manual).
- The two arrows next to the little house menas that you can regret something you’ve done. Go backward and then forward if you regret your regret.
- Here you can change the name of your Whiteboard.
Whiteboard right menu: Share and settings
In the right corner under your profile there are two icons.
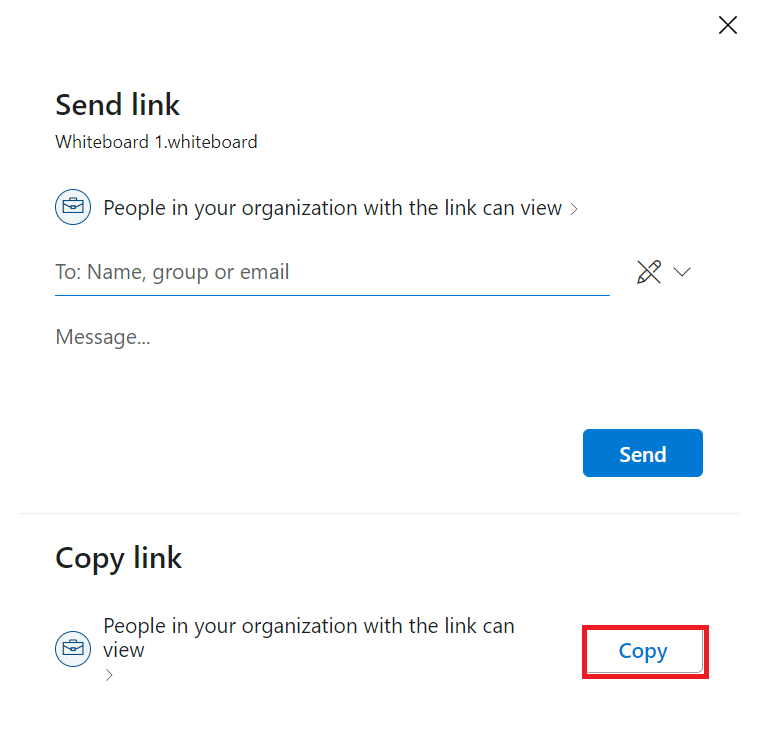
- Click on the Share icon to create a link that you can share.

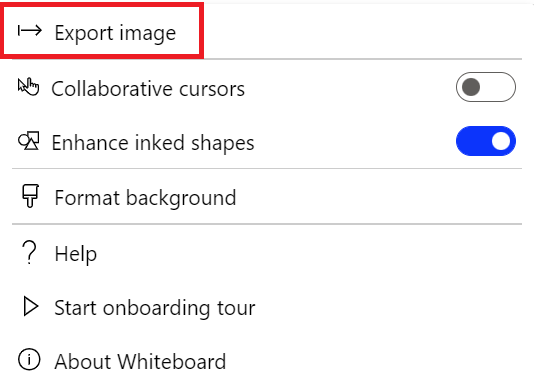
2. Click on the wheel to see settings. In the menu that pops up if you click on the wheel, you can export your whiteboard as a picture, click on or of automatically lines, change if the participants can edit and more.

Use pen notes
- Choose the black pen to make black notes.
- Choose the red pen to make red notes.
- Choose the multicolored pen to make notes with many colors.
- Choose the yellow pen to underline.
- Choose the gum to delete your notes..
- Choose the ring to mark objects or notes that you want to delete.
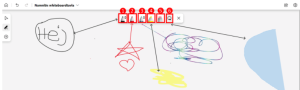
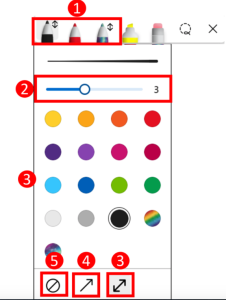
Change size, color and create arrows with your notes
- Double-click on some of the left pens.
- Change size on your notes.
- Change color.
- Create a one-way arrow
- Create a two-way arrow
- Stop the arrow.
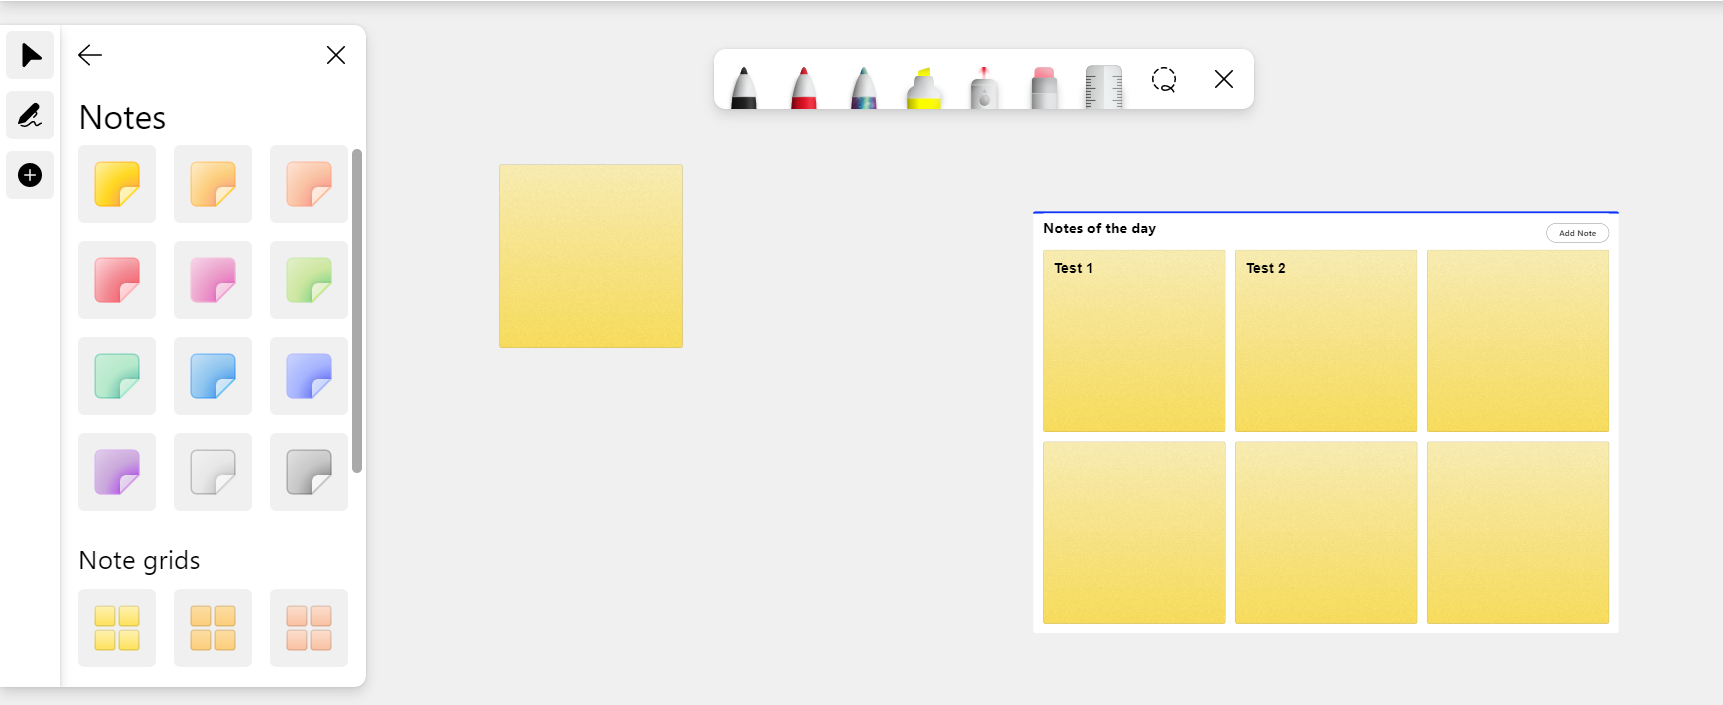
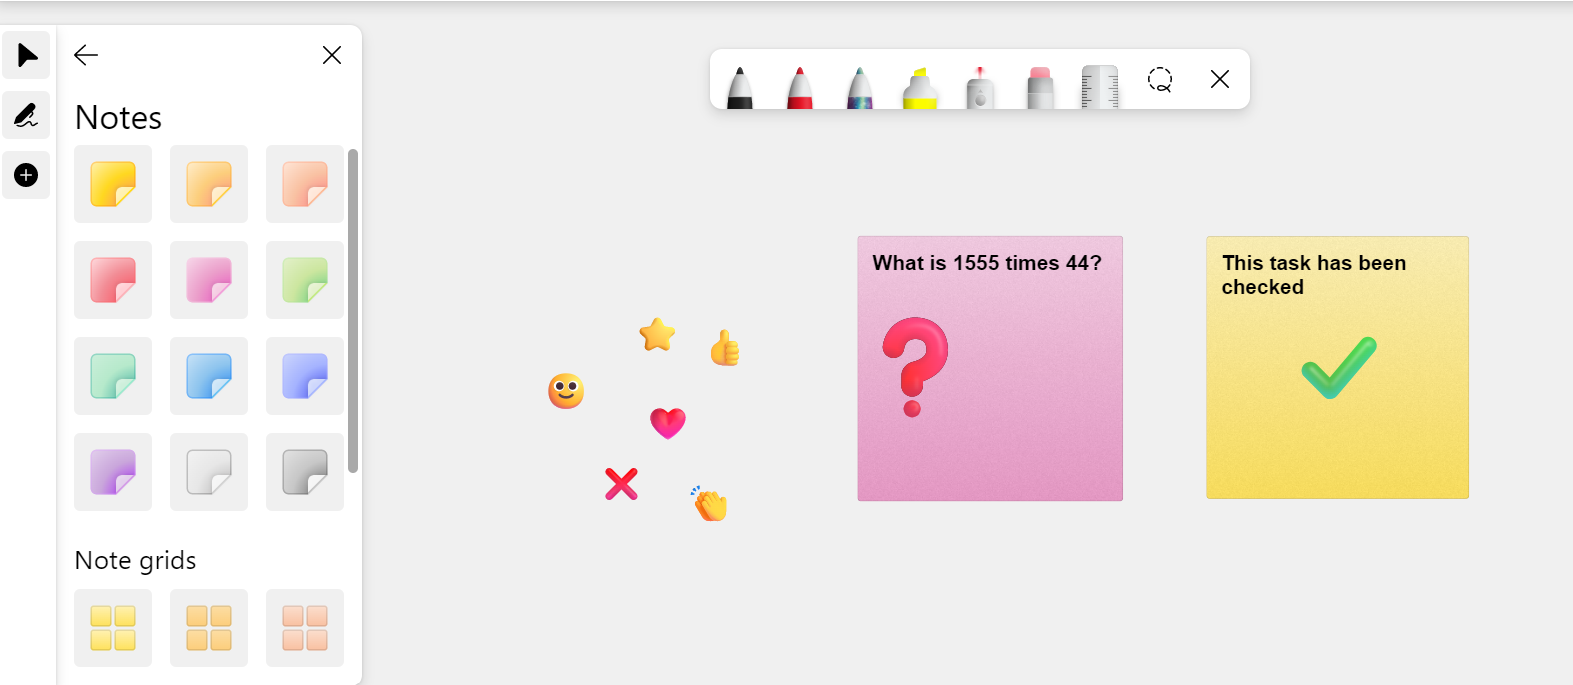
Create post-it
Go to the right menu, click on the icon to Create and choose Notes.
- You can choose simple post-it notes with different colors.
- You can create post-it notes in grid with different colors.
- Click on Add notes to create more post-is within the grid.
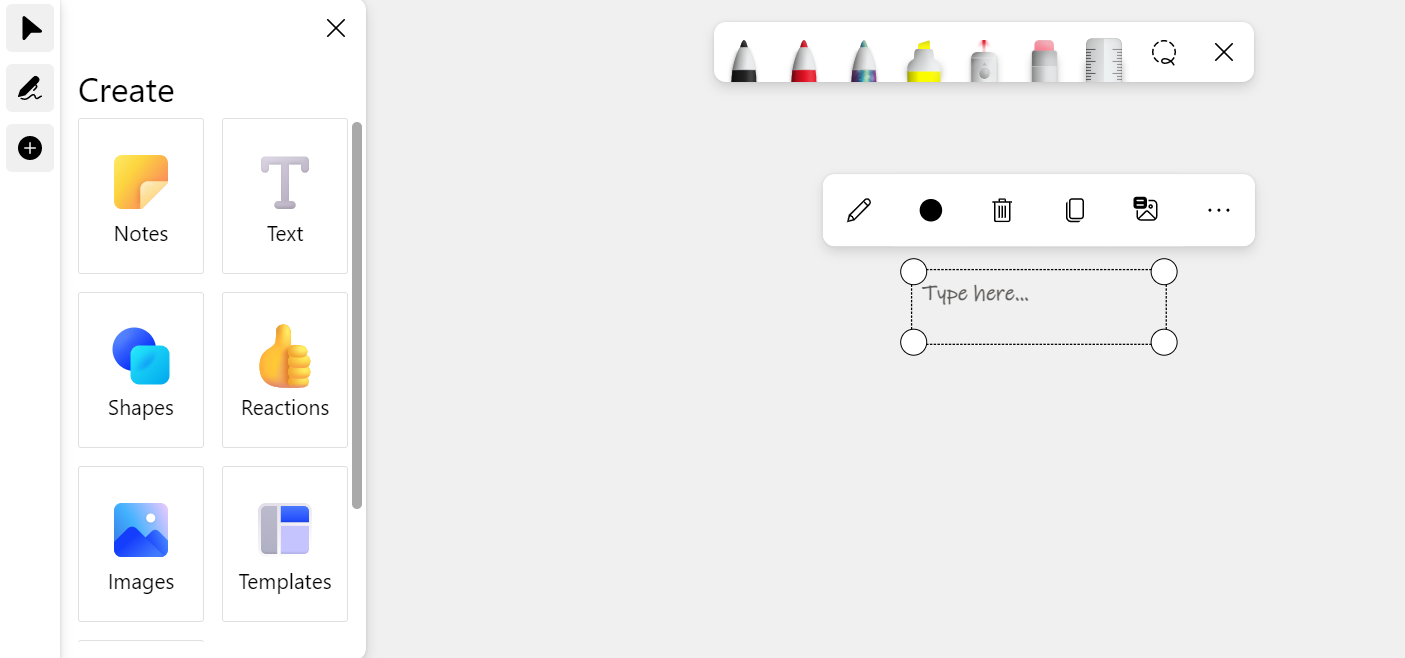
Create text
Go to the right menu, click on the icon for Create and choose Text.
- Write your text in the square.
- Pull in the lines to make the square bigger or smaller.
- Mark the square to:
-Write in it
-Change color of the text
-Delete it
-Write a text that explains the text in the square
-Click on the three dots to place the text forward or backward.
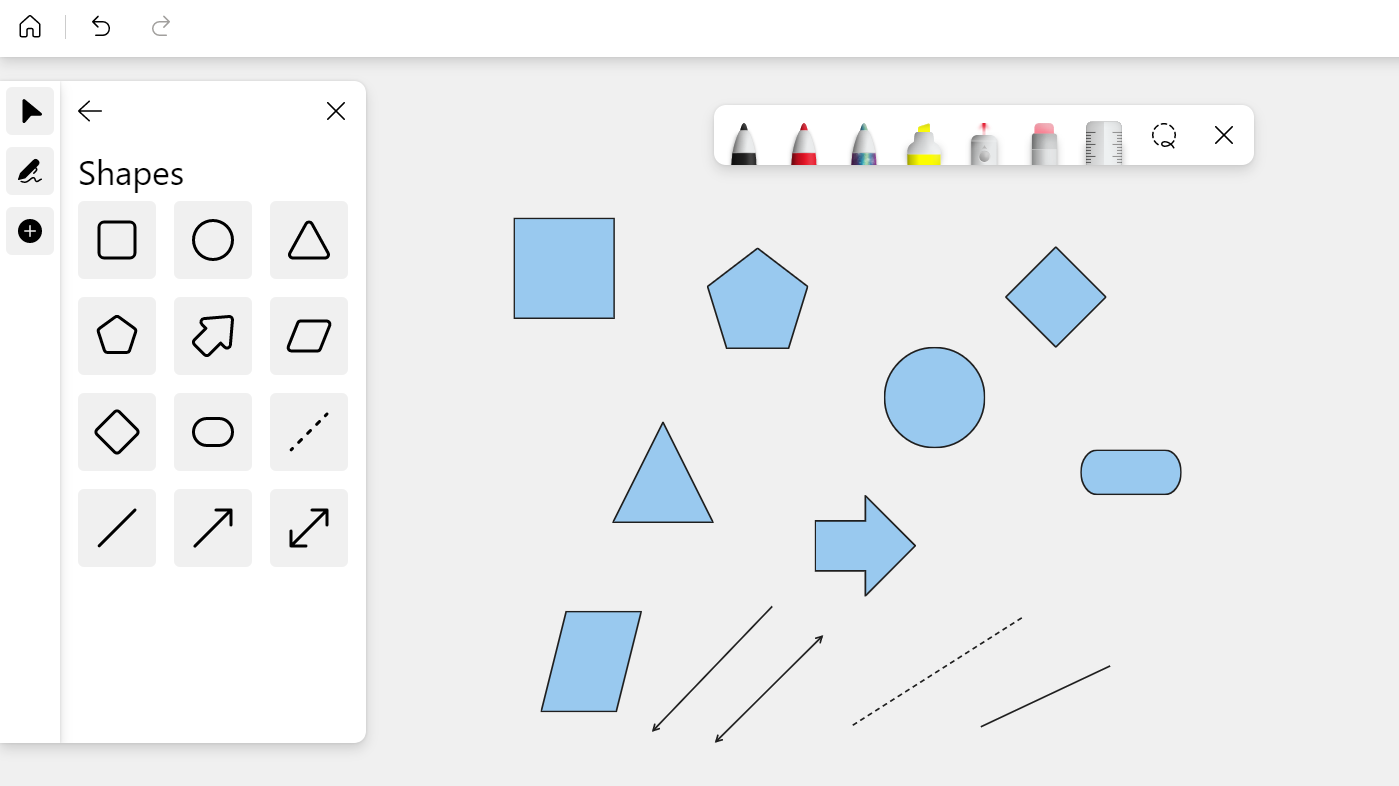
Create forms
Go to the right menu, click on the icon for Create and choose Forms.
- You can choose between 12 different kind of forms.
- Pull in the lines around the form to make the form bigger or smaller.
- Mark form to:
-Change color
-Delete lines
-Delete form
-Write a text to explain the form
-Click on the thee dots to place it forward or backward.
Create reactions
Go to the right menu, click on the icon for Create and choose Reactions.
- You can choose between 8 different kinds of reactions.
- Pull in the line to make them bigger och smaller.
- Mark the reaction to:
-Delete it
-Write a text to explain the reaction
-Click on the three dots to place it forward or backward.
Tip! Use reactions to react on post-it notes.
Upload photos
Go to the right menu, click on the icon for Create and choose Photos. Then you’ll choose a photo from your computer.
- Pull in the lines to make the photos bigger or smaller.
- Mark the photo to:
-Delete it
-Write a text to explain the photo
-Click on the three dots to place it forward or backward.
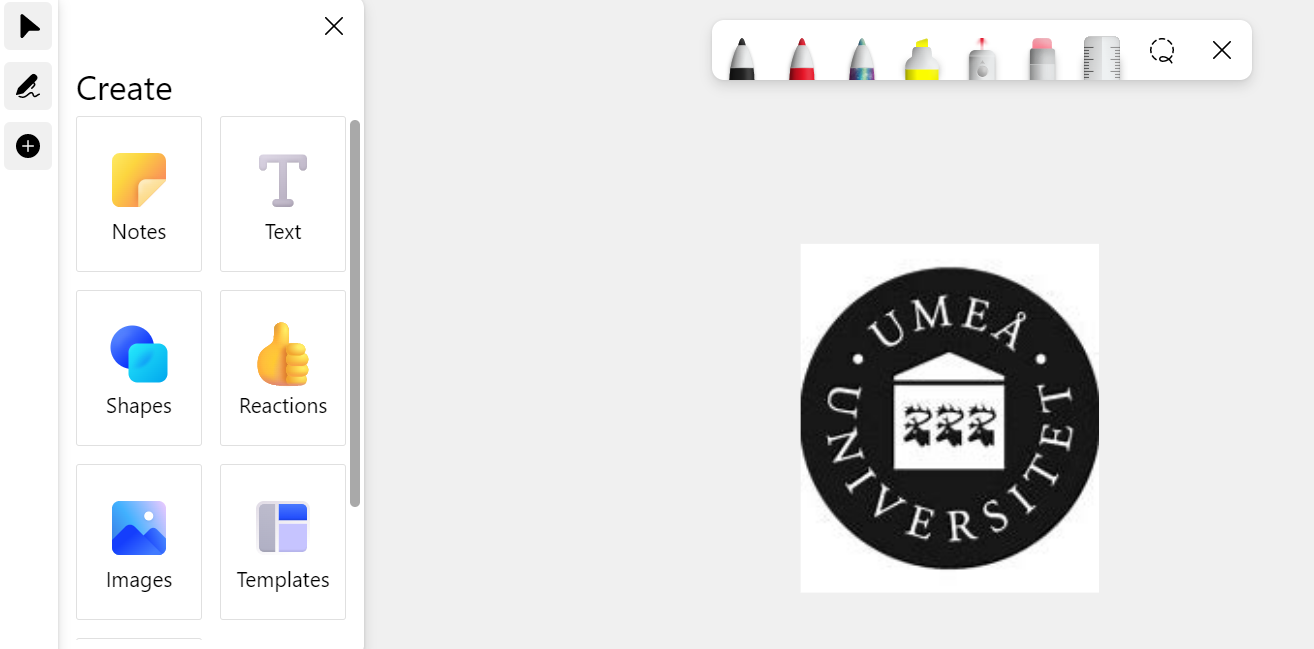
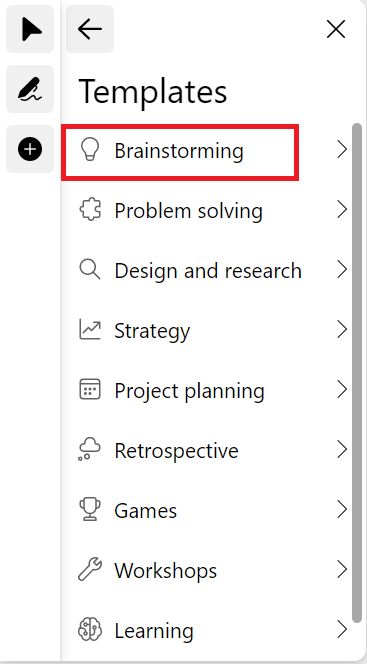
Use templates
Go to the right menu, click on the icon for Create and choose Templates.
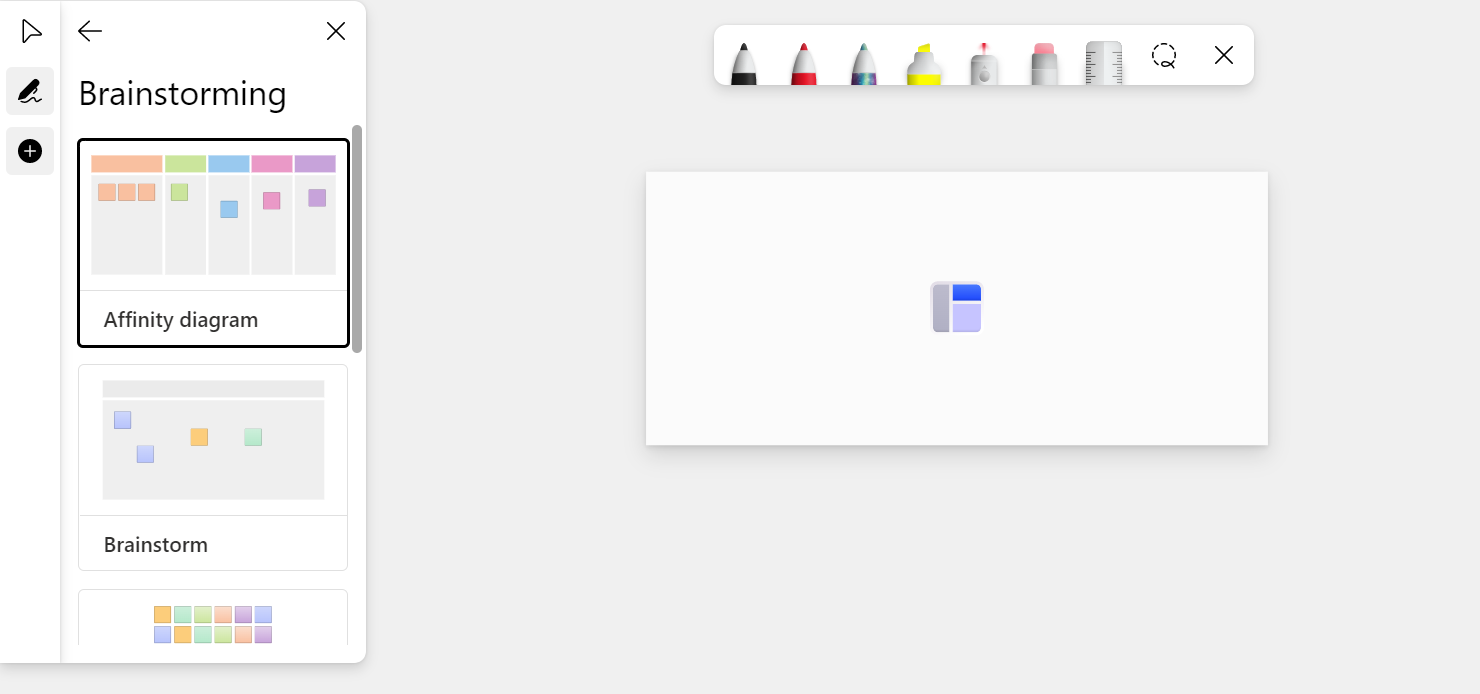
- Choose what kind of category you want for your template. You can choose between 9 different categories, and then between 5-10 templates within every category.
- Scroll down to se different templates within the category.
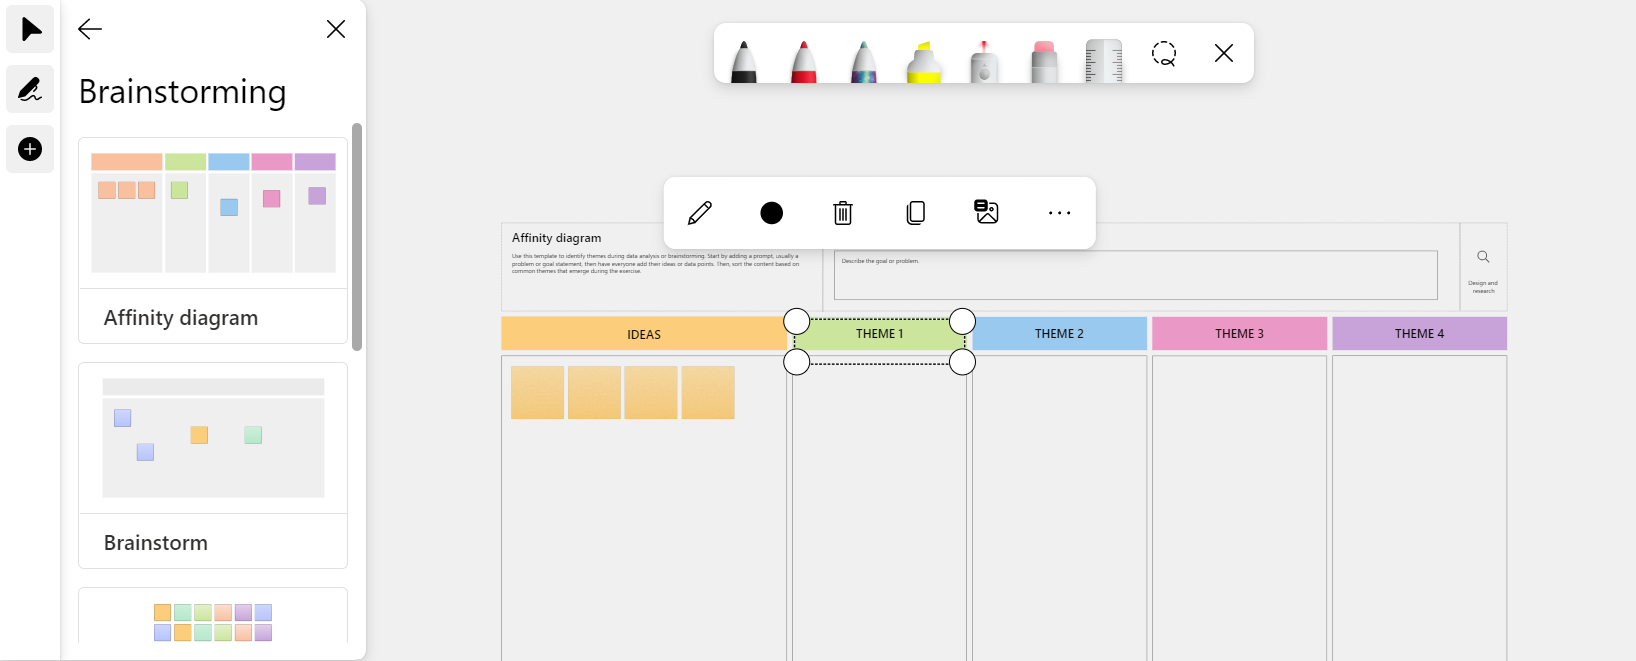
- When you’ve chosen the template you want, place it on the canvas.
Tip for when using templates
- Use the template as a starting point. You can always edit objects like text and colors by mark the object you want to change.
- Add object to your template like post-its, text, reactions and forms.
- Scroll on you mouse to make the canvas bigger or smaller. You can’t make the whole template bigger och smaller.
- Mark an object on your template and press on the delete-button on your keyboard.
Add documents
- Go to the right menu, click on the icon for Create, and choose Documents.
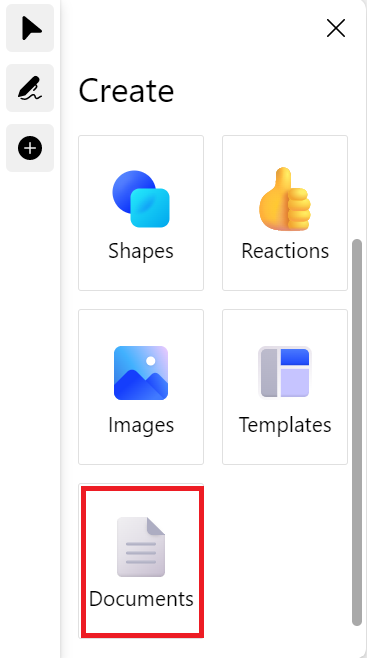
2. A dialog square will show. Here you choose what kind of document you want to upload.
3. Click on My files to choose files from your OneDrive.
4. Click on Latest to choose among recent edited files.
5. Under Quick Access choose what Team/SharePoint document library you want to upload a document from (You can only upload a Powerpoint or PDF).
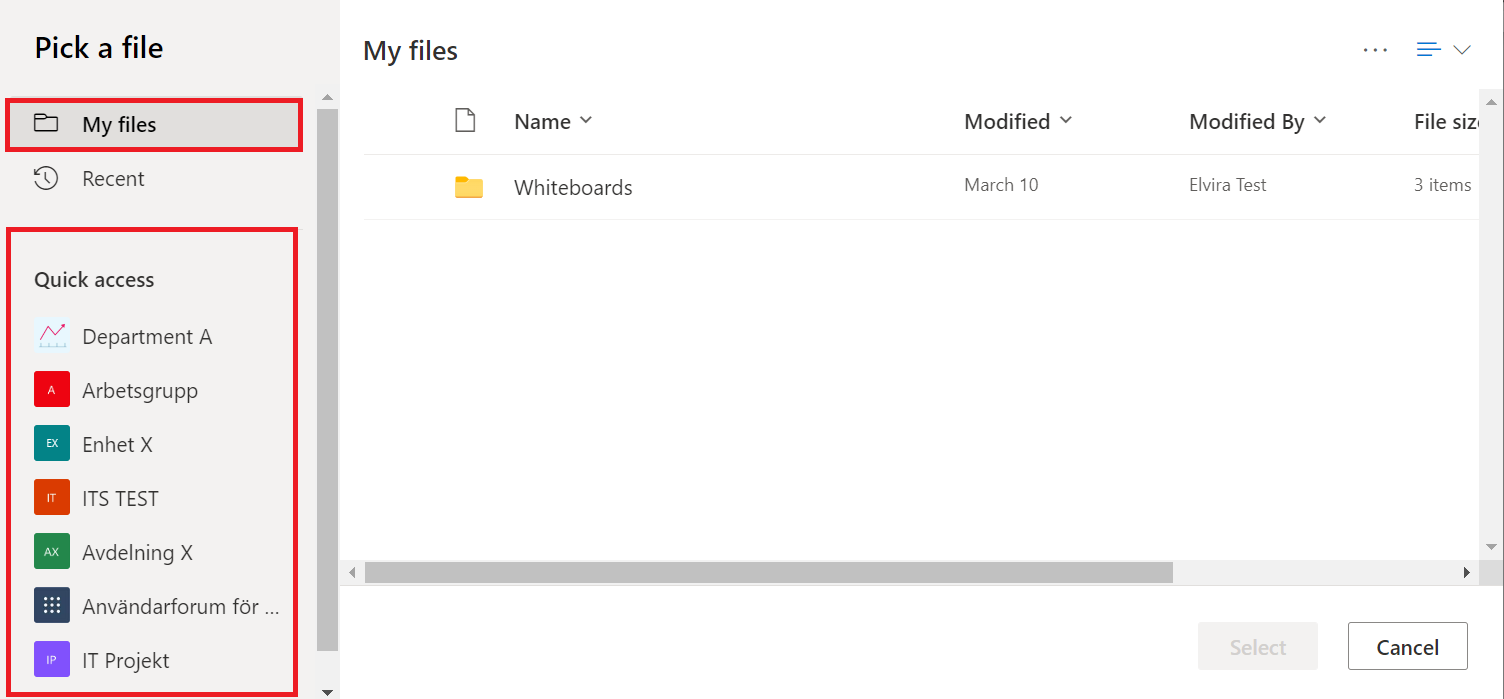
6. For example, this might look like if I have chosen to upload a PowerPoint file on my Whiteboard. (Note you can only upload PowerPoint, PDF documents).
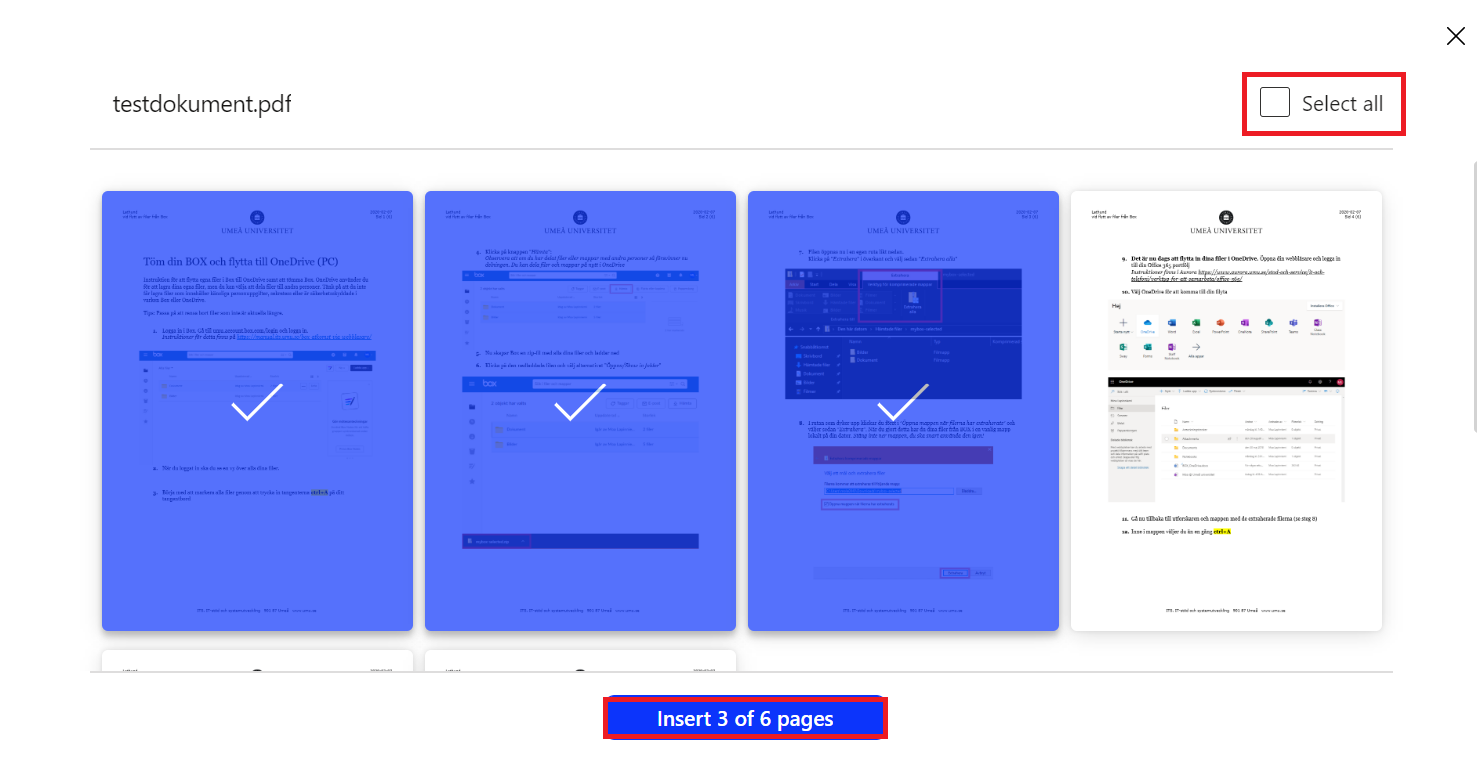
7. Select the slides you want to upload.
8. Click Select All to upload all slides.
9. Click Insert.
Create a new site in a current SharePoint webpage
This manual describe how to create a new site in a current SharePoint webpage.
- Go to the SharePoint webpage where you want to create a new site.
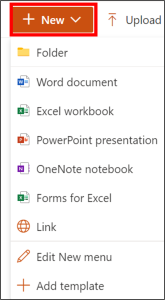
- Click on +New and then site.
- Choose a form and then Create site.
Build your SharePoint site
Here we show you how to build your SharePoint site and how to adjust header, sections and webb.
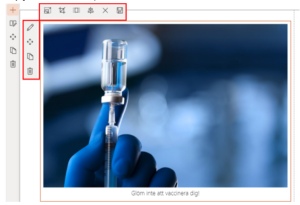
Adjust header
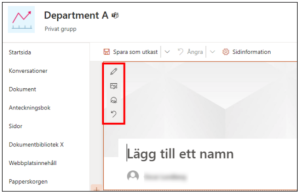
- Mark the text header to edit it.
- Hover your mouse on the header and four choices will show.
- Choose the first icon (a pen) if you want to edit the header. Choose picture to choose a new picture. You can also choose a new focus for the picture.
- Choose the second icon (picture) to change picture on the header.
- Choose the third icon (focus) to adjust the focus of the picture in the header.
- Choose the fourth icon (return) to restore to the standard format of the header.
Adjust your layout
- Go to the vertical menu to the left on SharePoint.
- Click on the plus if you want to add a section and choose the layout you want. You can create more avsnitts, you do that by click on the + under the created avsnitt.
Add to Webb parts
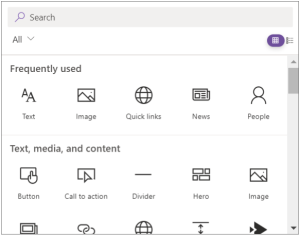
- Click on + within the created section and choose Web parts.

- There are more web parts to choose among, for example text, picture, files, videos. Search for a part in the search bar or scroll down to see what parts you want to choose.
- When you’ve chosen a web part you can edit or adjust if how you want.
- In the left menu:
- Choose the first icon (pen) to edit the web part.
- Choose the second icon (navigation) to move web parts by drag and drop.
- Choose the third icon (duplication) to copy a web part.
- Choose the fourth icon (trashcan) to delete a web part.
5. In the right horisontal menu:
- Choose the first icon to adjust size on the web part.
- Choose the second icon to crop the web part.
- Choose the third icon to adjust length and width.
- Choose the fourth icon to adjust the place of the web parts.
- Choose the fifth icon to restore a web part to how it looked from the beginning.
- Choose the sixth icon to save a web part.
When your done with your site choose Publish or Save as draft if your now ready to publish yet. If you want to keep edit, click Edit.
Whiteboard Frequently asked questions
Who can use Whiteboard?
Whiteboard is currently available to all students and employees. Externals are currently unable to participate in a Whiteboard.
Can I collaborate on Whiteboard?
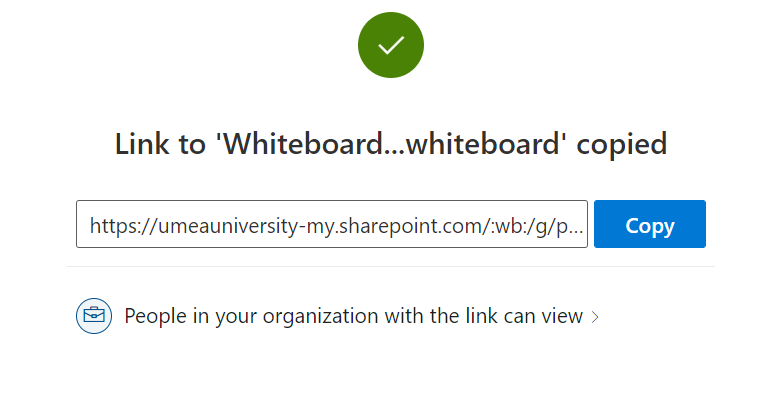
Yes, you can! Open the Whiteboard you want to collaborate on. In the right corner, click the Share Icon. Then you can type in the name or email of the person you want to share and collaborate with, or choose to copy the link, and send to the person.
Observe that users can currently only collaborate with others within their organization. Microsoft will add options to collaborate with guests outside your organization in the future.
Can I export the result?
Yes, you can export the result to a PNG or SVG. You can also choose to publish to a Team, send to a OneNote, or to an email.
What is the difference between the Whiteboard app and web interface?
Whiteboard has recently been updated. There are no differences between the web and the app.
Where can I find Whiteboard?
There are three ways to find and use Whiteboard. Via the deskapp, the web or integrated in teams. You can find more information in the manual: Download and install whiteboard app
How do I save my Whiteboard?
All your Whiteboards are automatically saved in your Whiteboard Portal. Go to the Office 365 portal and select Whiteboard.
Can I use templates in Whiteboard?
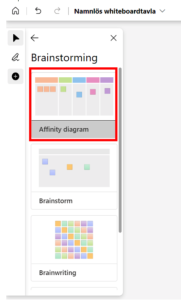
Yes, templates are available in Whiteboard. Templates makes it easier for you and others to work together in Whiteboard. You can open templates by clicking the Templates button in the left menu. This will display the template gallery, where you can select a template.
The following categories are available with more to add as you go:
- Brainstorming – exploring creative ideas
- Problem solving – analyzing and solving problems
- Design and research – deepen customer focus
- Strategy – move from strategy to execution faster
- Project planning – increase productivity and results
- Retrospective – get an overview over different catagories
- Games – engage and energize groups
- Evaluation – reflecting and improving
- Workshops – inspire and facilitate groups
- Learning – teflecting, comparing and brainstorming
Can I use my fingers to use Whiteboard?
Yes, Whiteboard is compatible with touch, computer mouse, and keyboard.
Can I add pictures to the Whiteboard?
Yes, you can insert pictures on your Whiteboard. Click the Create icon, and then click pictures. Unfortunately, you can’t copy and paste pictures into the Whiteboard you have to save the image to your computer and then upload.
Can I react to sticky notes or text boxes?
No, however, you can create reactions and drag and drop them on your sticky notes or text boxes. On the rightside menu, select reactions. Then you can choose heart, thumbs up or down etc. Drag and drop them in the appropriate place to react to text or sticky notes.
Can I zoom in and out of my Whiteboard?
Yes, you can – the surface is infinite. With the mouse – scroll up and down. With your fingers – pull together or outwards with two fingers.
Can I rename my Whiteboard?
Yes, by going to the Whiteboard portal and then tapping the three dots of the Whiteboard that you want to rename.
Can I remove Whiteboards?
Yes. Go to your Whiteboard portal, click on the three dots of the Whiteboard you want to delete, and then select Delete.
How do I use ink in Whiteboard?
Digital ink is available to everyone, whether you’re using your mouse or pen. The Pen toolbar contains 15 pen colors, 15 highlighters, pen arrows, and different thicknesses.
Features:
- Select a pen to see the color and thickness in the drop-down list.
- Select arrow mode from the drop-down list to turn your ink strokes into arrows.
- To draw straight lines, hold down the Shift key while you make ink.
- To convert things you draw to shapes, select your ink and select the shape icon from the shortcut menu.
How do I create straight lines?
The previous ruler has been removed. In Whiteboard, you can add straight lines using shapes in the gallery. You can also hold the shift key while you’re drawing to create a straight line.
How do I use mouse and keyboard in my whiteboard?
You can use your mouse and your keyboard by doing one of the following:
- To pan the workspace, click it, and then drag the canvas with your mouse. You can also hold down the Ctrl key on the keyboard and use the arrow keys.
- To quickly zoom in on the workspace, scroll the mouse wheel up or down (if applicable).
- To select an item, click it with your mouse. You can also press the Tab key multiple times until the desired item is selected.
- To insert an object, such as a picture or text, click the + icon on the toolbar, and then click on the item you want to add. You can also use the shortcut menu by clicking Shift+F10. Use the arrow keys to select the item you want to add, and then press Enter.
- To draw or delete ink, click the ink icon on the toolbar, select a pen or eraser, and then use the mouse to draw on the canvas or remove ink strokes. To use the keyboard to select tools, press the Tab key several times until the pen icon is selected on the toolbar.
- To move the ruler when it appears, click it, and then drag the ruler with your mouse. To use the keyboard, click the ruler, and then move it with the arrow keys.
- To change the angle of the ruler, hover over the ruler, and then use the scroll wheel — or click to select the ruler, and then hold the Alt key while you press one of the arrow keys on the keyboard.
How do I select, move, and resize content?
- When finger painting mode is turned off, you can move objects by selecting it with your finger and easily moving around the canvas.
- Select content with your finger or pen — or use the Lasso Selection tool on the toolbar to select multiple items at once. Turn on lasso selection and use the pen to circle the content you want to select. When finger painting mode is enabled for devices that are passive or don’t have a pen, you can turn on Lasso Select and use your finger to dial in content.
- If the active pen has a cylinder button, hold down the button to temporarily switch to Lasso Select mode and circle the content to be selected.
- When the content is selected, you can move it with your finger or pen. To resize, use two fingers to stretch or minimize the content.
Can I use Whiteboard in the classroom?
Yes, Whiteboard has been designed both for remote learning and in the classroom. In the classroom, students can leave class with a digital version of the whiteboard so they can focus on listening and learning instead of copying content from the whiteboard during class. Teachers can hold more interactive lessons with a shared whiteboard where students can add content or react to content added by others. Whiteboard is a fantastic tool for group projects. All project members can get involved and teachers have the opportunity to observe and provide feedback.
Can I share a Whiteboard where no one else can edit it?
Yes, if you choose whiteboard presentation mode (read-only mode) in Teams meetings, the meeting organizer can choose how to interact with the board. If you choose read-only mode, all other participants will see the whiteboard but without being able to edit. At any time during the meeting, the meeting organizer can switch between read-only mode or allow collaboration from others from the settings menu.
Can I use Whiteboard in a Team meeting?
Yes, Whiteboard is integrated into Teams but can also be used in other digital meeting tools such as Zoom.
Find, create, and delete team sites in SharePoint
This manual describes how to find, create and delete team sites in SharePoint. Note, if you have a Team in Microsoft Teams, you and your team members already have a team site in SharePoint. Team Site=Team
Find SharePoint teams sites
- Open your browser and go to the address www.m365.umu.se
- Find your way to the panel on the left with all applications. Click at the bottom More applications.
- Choose SharePoint
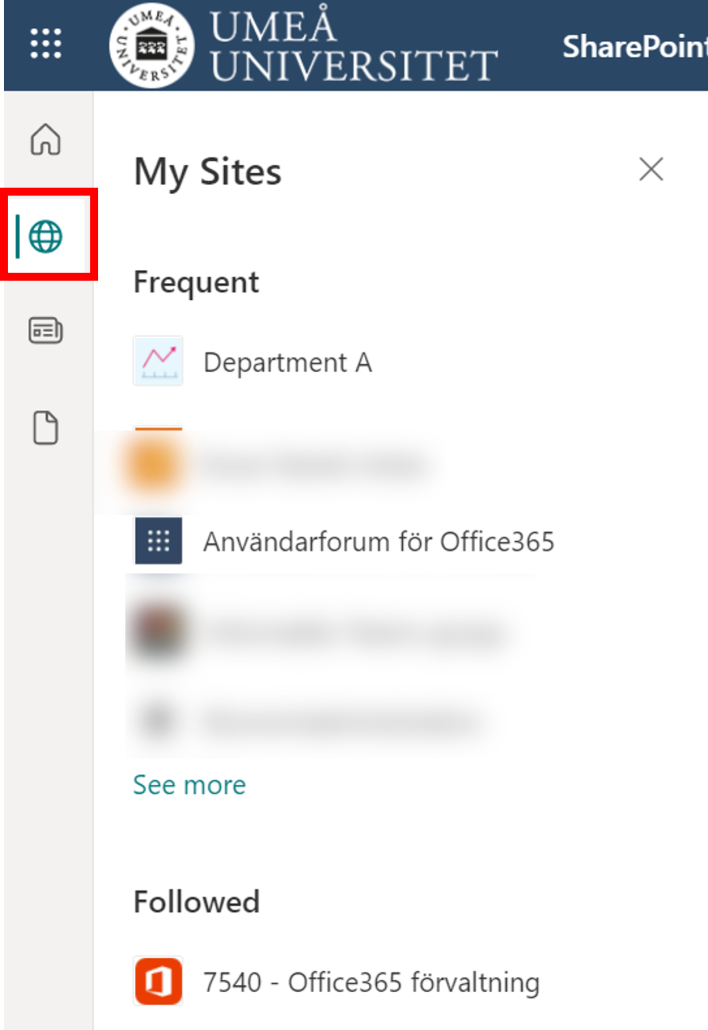
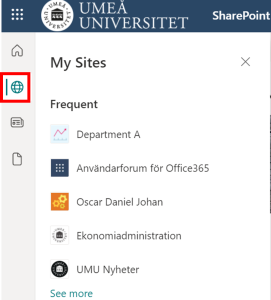
- In the menu on the left, click the globe (My Sites). In the list, you’ll see your Team sites.
Create Team site in SharePoint
- In the left upper-corner click on the house icon, and than click + Create Site.

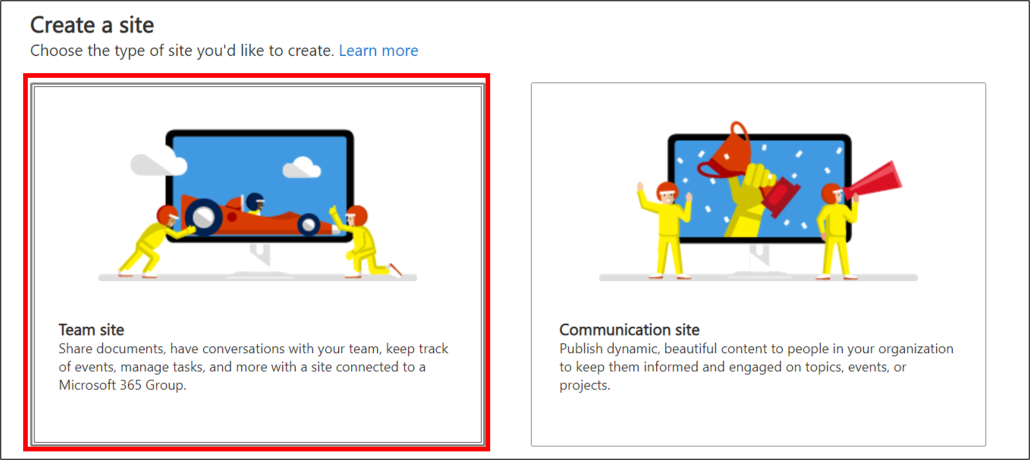
- There are two different types of websites you can create. If the purpose is to create a collaboration area for, for example, a workgroup or project, select Team Site.
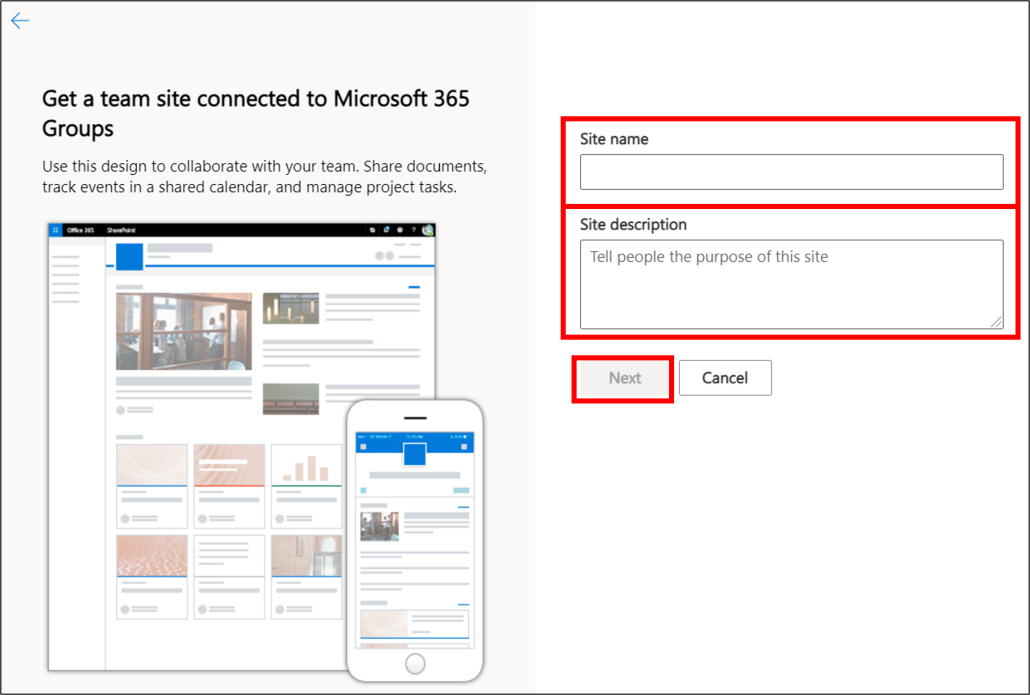
- Next, enter the name and description for the team site. Here you also choose whether the site should be private or public and at the bottom which language should be the primary.
- Please note that in a private group, you invite the people who will be involved in working on the site. In a public group, everyone at Umeå University can visit the document website. This means that all affiliates, employees and students can connect to public websites without invitation.
- Invite members and add any additional owners to your team site. You also have the option to do this later.
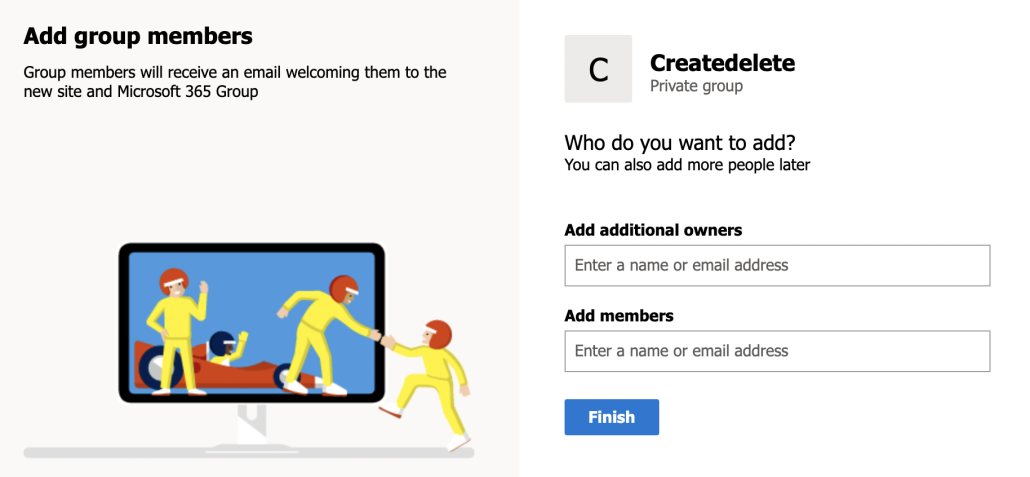
- Your Team site is created.
Delete team site
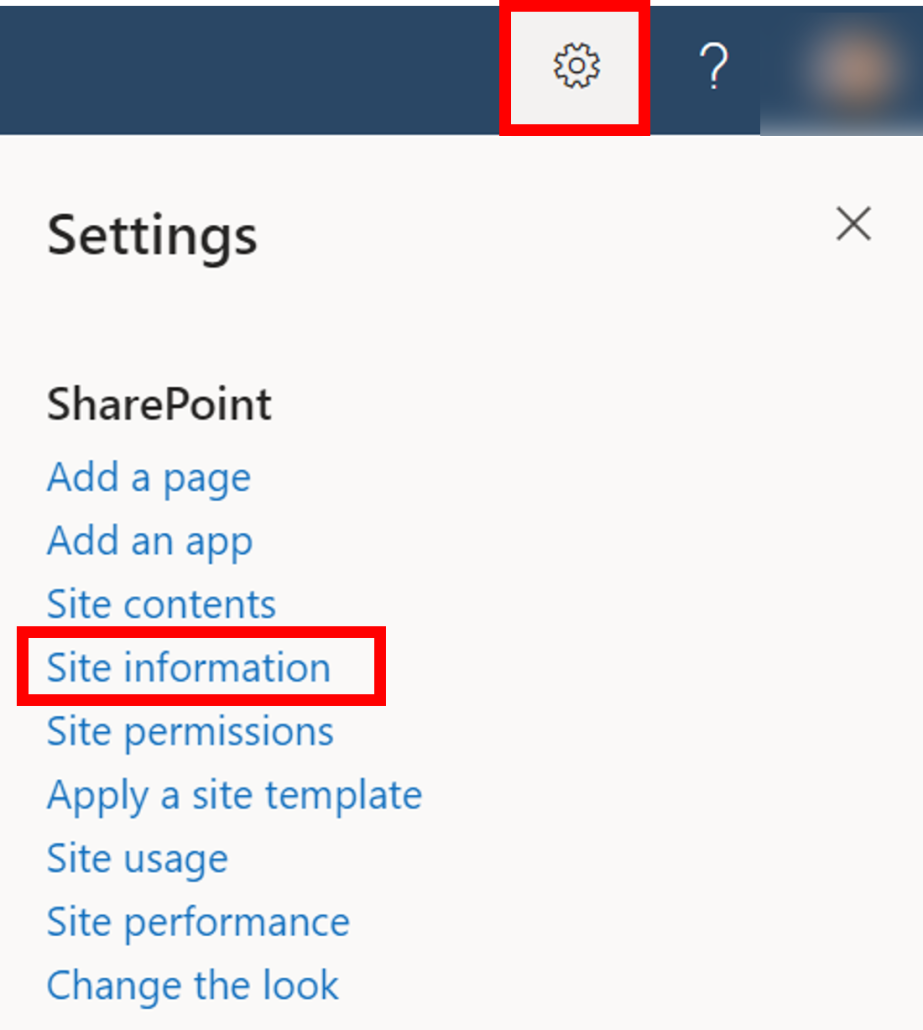
- Go to the site you want to delete. Click the gear wheel in the right corner and select Site information.
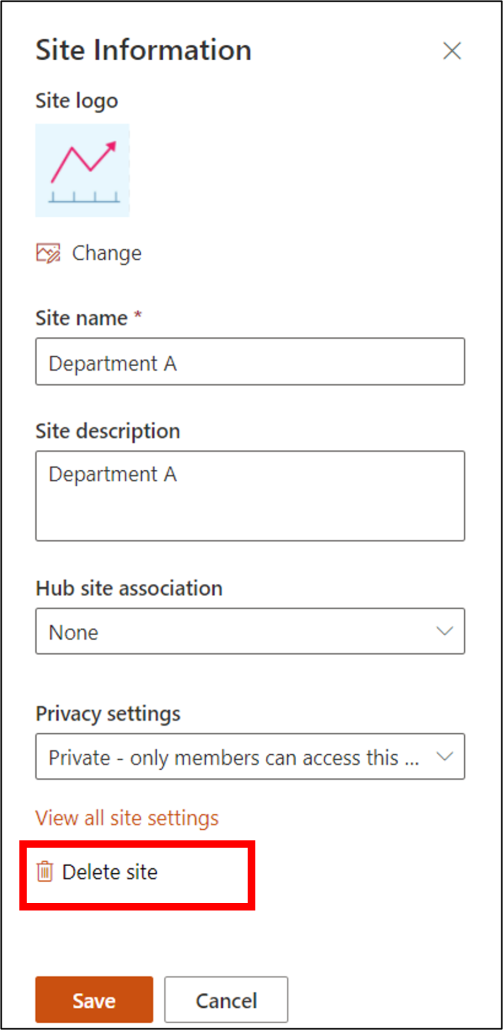
- A dialog box on the right appears. Select Delete Site.
- A security box appears warning that you are about to delete a SharePoint page. Check the box under “Yes, delete this group and all associated resources” and than click Delete.
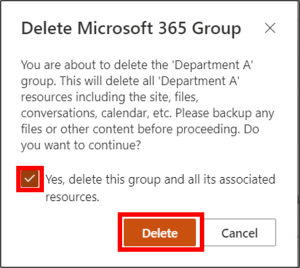
- The SharePoint team site has now been deleted.
Create files and maps in SharePoint
This manual describes how you create new documents, files and maps in a current SharePoint group website.
- Open your browser and go to www.m365.umu.se.
- Search for SharePoint among all the applications in the panel to the left. Click on More applications if you don’t see the app.
- Click on SharePoint.
- Click on the globe, My Applications, in the menu to the left. In the list that pops up you’ll se all of your group websites. Click on the group website that you want to create maps and files in.
- When you’re in the group website that you’ve chosen, click on Documents in the menu to the left.
- Click on the button New to create a new map or file.
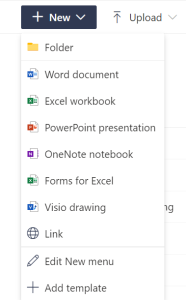
- Here you can choose what kind of file you want to create (for example Word, Excel or PowerPoint) or if you want to create a map.
Work with multiple organizations in Teams
If you work in multiple organizations that use Teams (for example Umeå University and Region Västerbotten) and want to use Teams for each organization, these are instructions that may facilitate your work.
One way to make it easier when you’re a member of multiple organizations is to use different interfaces for different organizations. For example, you can use the Teams app on your computer when you work in the organization Umeå University and the web interface for Teams when you work in the organization Region Västerbotten. This will make it easier to keep the two organizations separated. You need to be signed in to both of your accounts at the samt time for this to work.
Sign in to the organization Umeå University on your computer.
- Open Teams on your computer. If you haven’t installed Teams yes, go to o365.umu.se to install it.
- Sign in with your Umu-id (umu-id@ad.umu.se) and password.
- You can now work in Umeå Universitys organization in your desktop app.
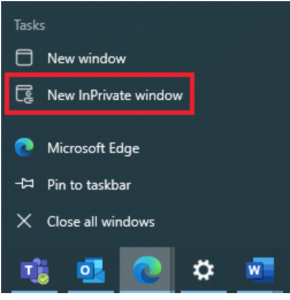
Sign in to another organization in the web interface
- Open a new incognito/InPrivate window in your browser by clicking on your browser and select New InPrivate window or New Incognito window (depending on which browser you use).
- Go to www.office.com and sign in with your e-mail and your password.
- Select Teams and use it via the bowser when working on your secondary account.
Work as a guest of a team in an external organization
If you’ve been invited as a guest to a team that belongs to an external organization, for example Region Västerbotten, you will not see these teams among your teams that belong to the organization Umeå University. You need to switch between the different organizations to work with teams that belong to an external organization.
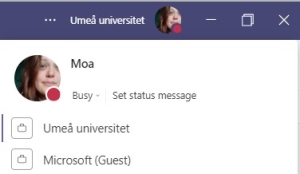
- Click on your profile picture in the upper right corner.
- You will now see a list of the organizations you’ve been invited to. In the example below you can see what it looks like if you’re a member in both Umeå University and Microsoft.
Move or copy files in SharePoint
In this manual, we decribe how to move and copy files within and between SharePoint websites.
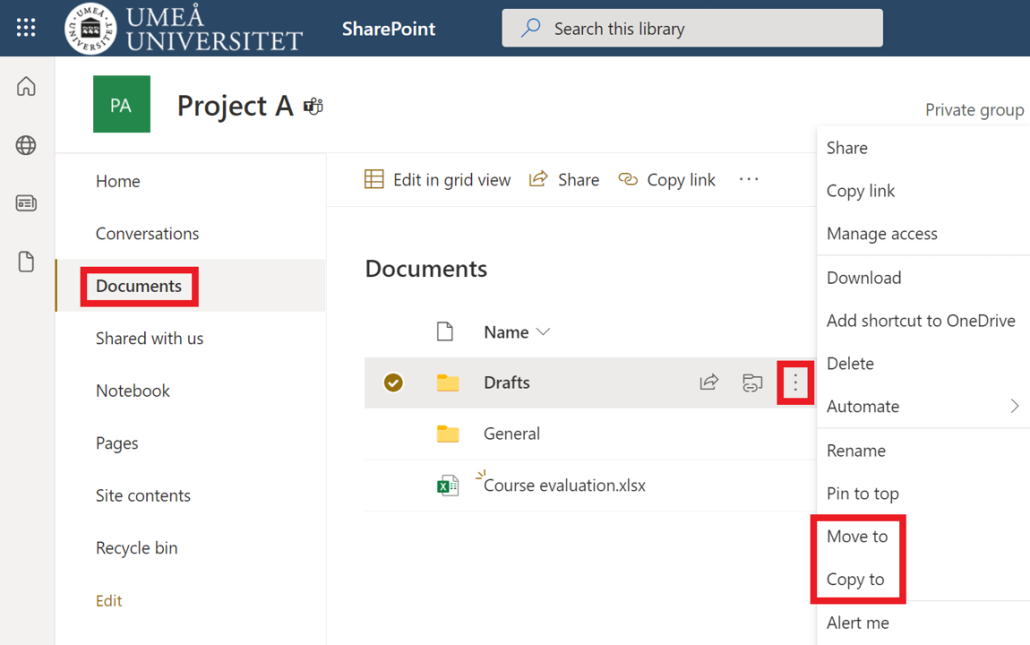
- Open the SharePoint website and select Documents in the left menu.
- Hover the pointer on the file/folder you want to move or copy to see a hidden menu.
- Select the three dots.
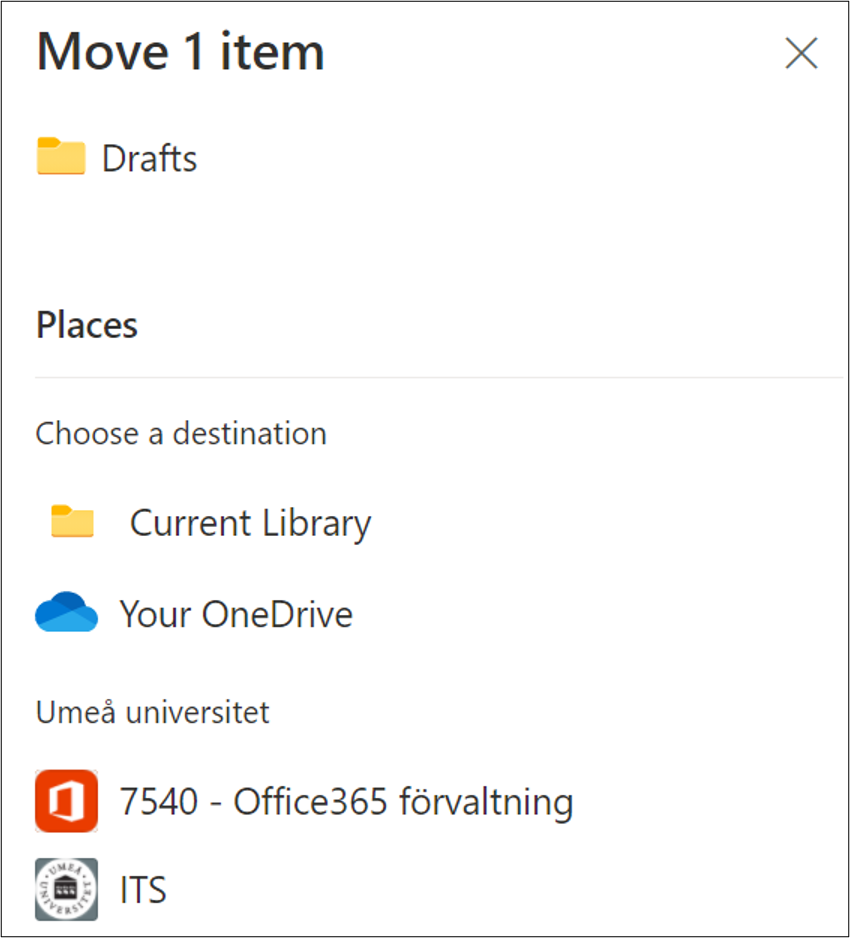
- Select Move to if you want to move the file to another place (the file will be deleted from existing place).
- Select Copy to if you want to move and copy the file to another place. (the file will remain on the existing place).
- A menu will open to the left of the screen, select where you want to move or copy the file/folder to and then click Move here.