Engelska kategorin för studentinformation.
Send from alias in your e-mail in Microsoft 365
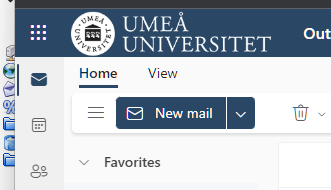
- Create new mail
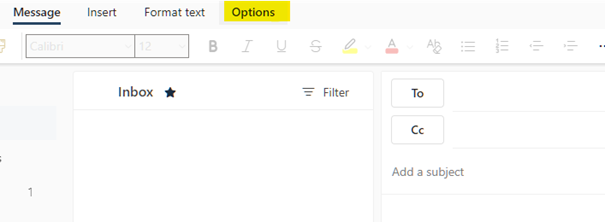
- Choose Options.
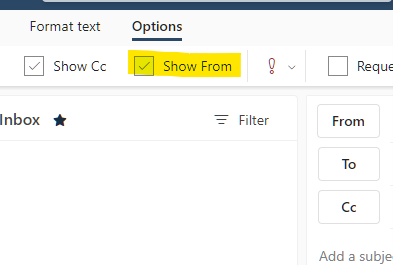
- Choose Show from, this field is then added.
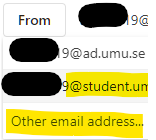
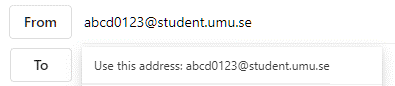
- Click on From in the mail.If it is your first time doing this, you need to state you student e-mail adress. Choose From, and then choose another e-mail adress and state your studentmail in the format: umuid@student.umu.se.Next time the mail adress is going to be avaliable as an option when clicking on From.
Create a board view in Microsoft Lists
Lists is a tool in Microsoft 365 where you can create, share, and track lists. In this manual we describe how you create a board view.
Observe that the appearance can differ whether you are using Mac or Windows.
Create board view
- Go to your chosen list in Microsoft Lists you want to create a board view in.
- Choose All objects in the menu bar and then Create new view.
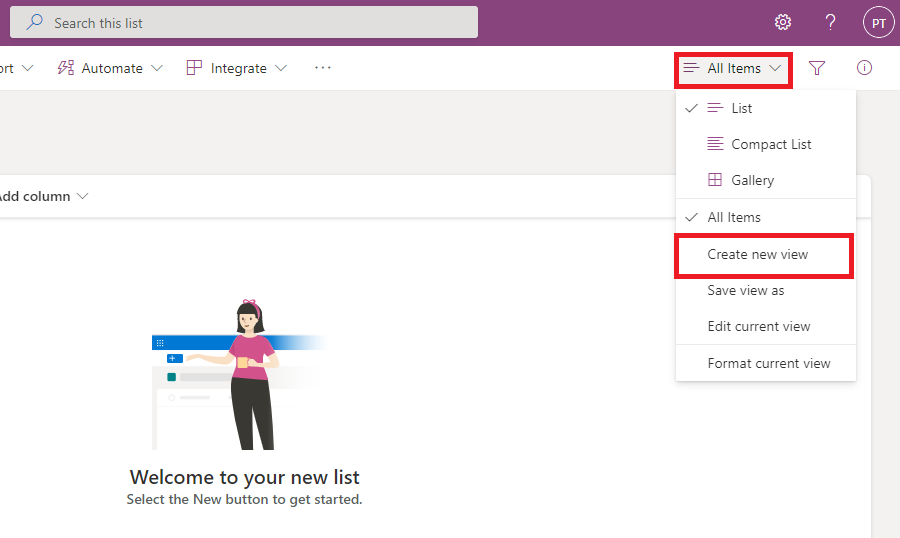
- Now you see the window where you can edit and create you new view:
1. Add the name you want for your board view.
2. Then choose Board
3. Choose how you want to organize your board by clicking the arrow to the right in this field. If you don’t already have any completed columns, it will automatically create a column that is named choice1. If you have completed columns, choose the column you want to organize you board view by (Example: by location, status, or date). Your board view will then be sorted and structured by how you have organized your board.
4. If you want your list to be public for others, you tic this box. If you want it to be private, you keep this box empty. If you choose to make it private, you are the only one who can see and edit the board.
5. When you are ready, click Create.

- Now your Board view is showing, and here you can Add new buckets and manage your current buckets. You can place your objects to the bucket they belong to and add more object by clicking the Plus-sign in the right corner of each bucket.

Download and install Microsoft 365
Information on how to download and install the Microsoft 365 desktop suite.
Outlook 365 email forwarding
Guides users on how to forward emails from Outlook 365.
Email for students FAQ
An FAQ about the student email.
Install eduroam manually
A collection of guides for different operating systems on how to connect to eduroam manually.
Inspera – Settings during an exam
This guide goes through the settings that are available to you as a student during an ongoing digital exam in Inspera.
Student interface
The image below shows the student’s interface during a digital exam in the locked browser Safe Exam Browser.

- Settings during the current exam. More about these further down on this page.
- Student response box. The example above shows an essay question.
- A navigation bar is displayed at the bottom of the page. Pages with information only, are indicated by an “i”. In the example above, we can also see that we are now on question 14 of 19.
- Navigate forward to the next question.
- Navigate back to the previous question.
- In the example above, there is a PDF resource linked to the exam. The PDF opens in a new window.
- The button at the far right of the navigation bar goes to overview. It shows if all tasks have been answered and here is also the button to submit your exam.
Settings during exam
By clicking on the button marked (1) in the image above, you can access settings and additional functions during an ongoing digital exam.

- Possibility to switch the interface language between Swedish and English.
- Function for displaying the exam content in high contrast mode.
- If you have applied for and received Text to speech granted as an aid, it is possible to activate this.
- The text size can be set in three levels: Normal, Large and Extra large.
- Submit a blank digital.
- Save submission as file is used if a student is unable to reconnect to the network. Submission in offline mode is handled manually by an invigilator.
- Possibility to hide or show the remaining time for an exam.
- Link that leads back to the overview page.
Spell check settings
If spelling check for answering essay questions is enabled, settings for this are displayed at the bottom right of the answer box.
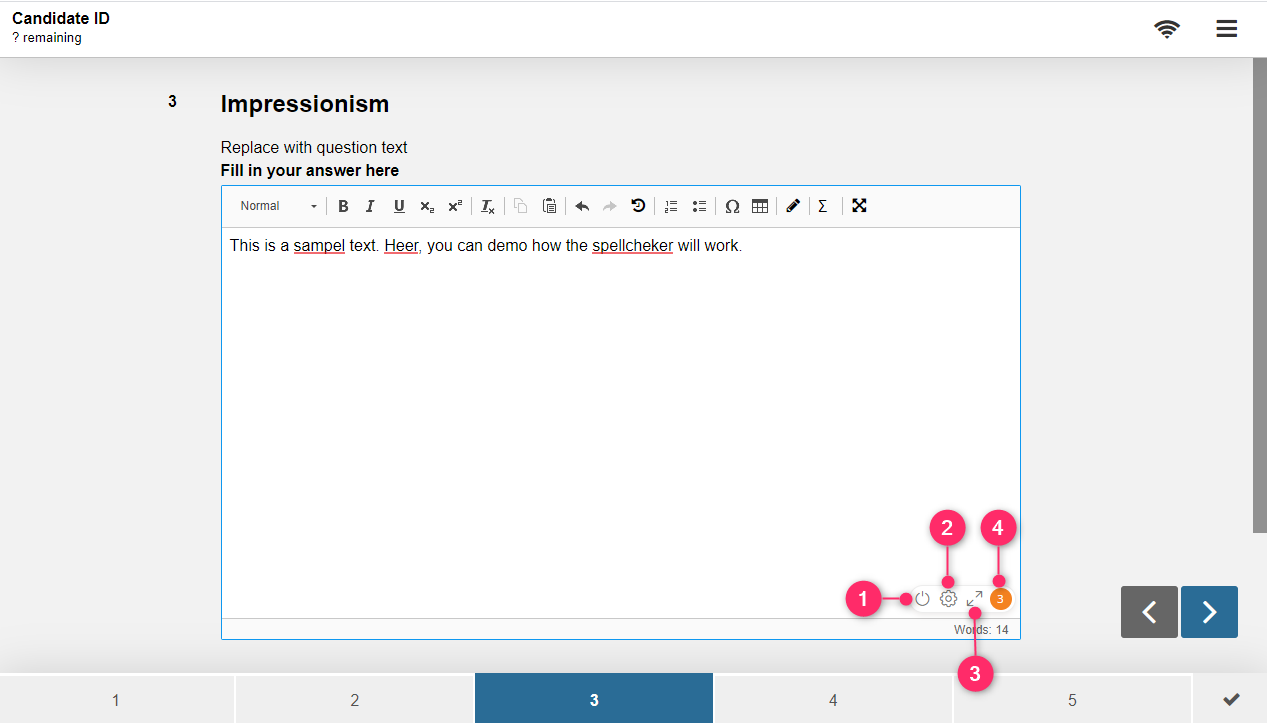
- Click (1) to disable the spell checker.
- Click (2), the settings icon, to display the set language and additional spell check settings.
- Click (3) to open a window with all the suggestions for spelling corrections.
- (4) indicates how many spelling errors the automatic check has detected.
Change language for automatic spelling check
Click the settings icon marked with (2) in the image above to open language settings.

- Language is set to “Automatic Detection” and can be changed to, for example, Swedish or English by clicking the down arrow.
- In the box marked (2) there are four setting options for deactivating the spelling checker.
Inspera – Get your results
This guide describes how to view your results on a completed digital exam in Inspera.
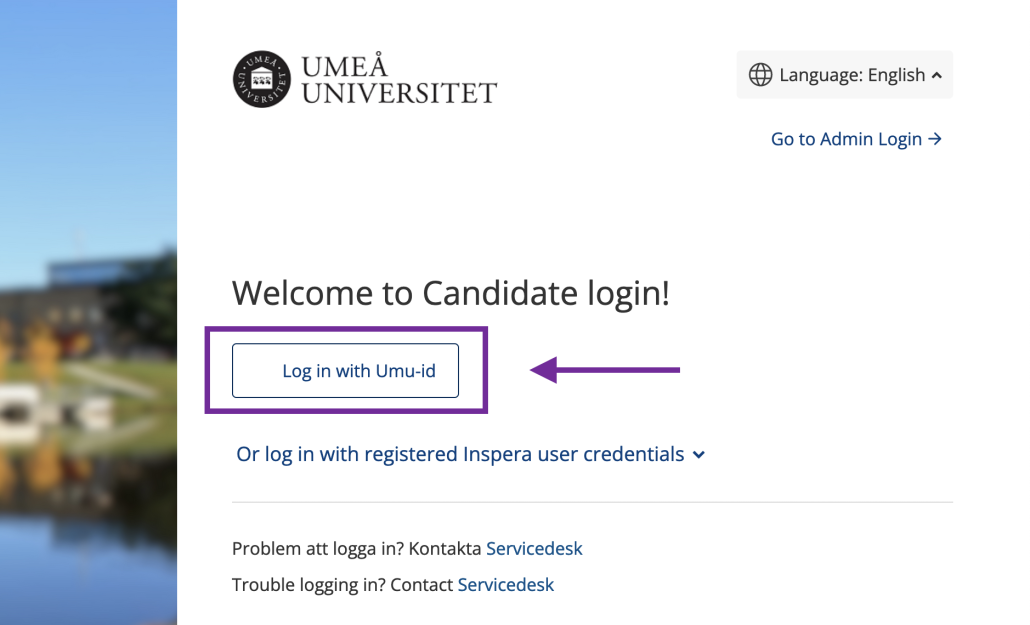
- Open a browser and navigate to the adress https://umu.inspera.com/
- Log in with your Umu-id
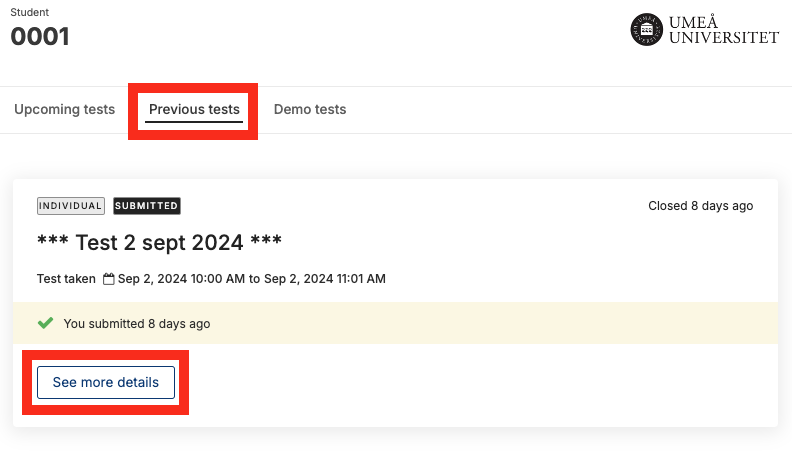
- Click on ”Previous tests” (1) and then on ”See more details” (2) to see grades, points and
submitted answers.
- Here you can view your submission. Click on “View report” to see more information (grade, feedback, marks) for your test.
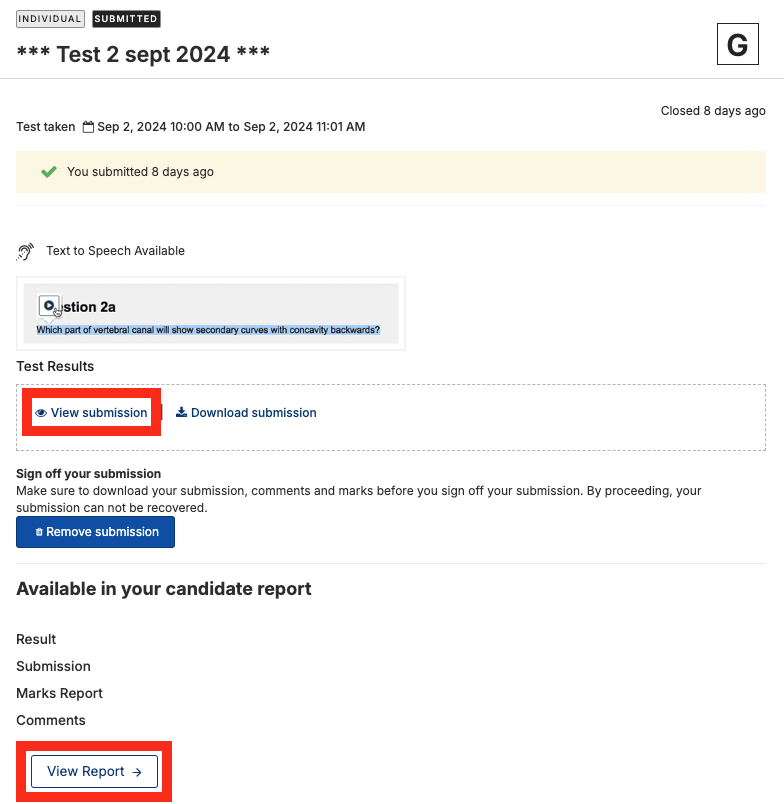
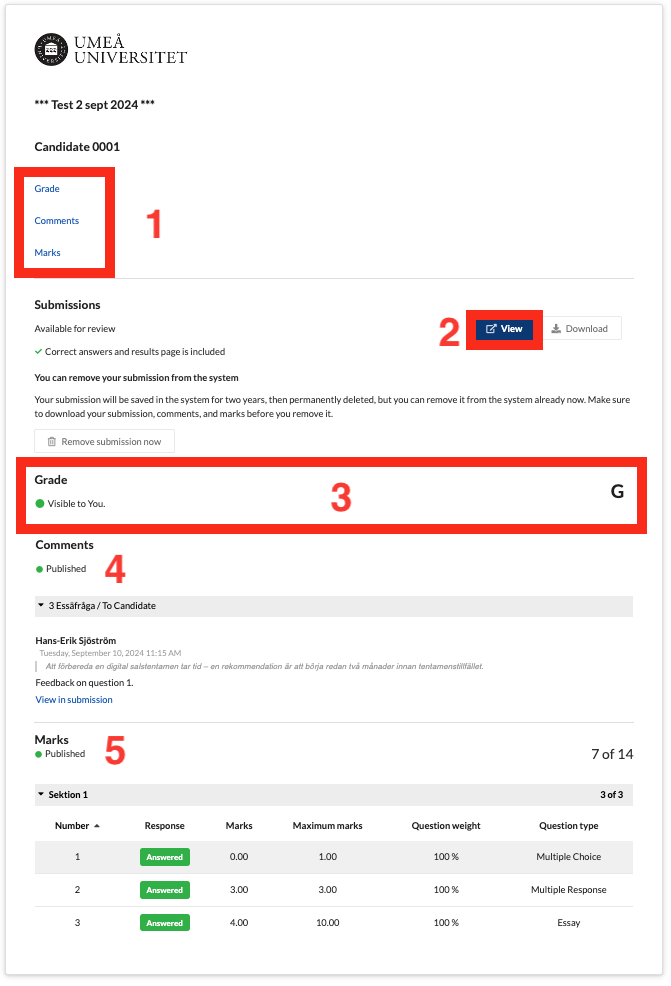
- In the results overview, a summary of your assessed exam is displayed. Here you will find quick links to Grade, Comments, and Marks (1). By clicking the ‘View’ button (2), you can see your submitted answers, (3) shows your grade, under the ‘Comments’ heading (4) any comments from the assessor are listed, and at (5) you can see the total score and marks per question.