Sign in to OneDrive via the browser
- Go to m365.umu.se and log in to your account (umuid@ad.umu.se for employees and umu-id@student.umu.se for students)
- Go to OneDrive via the menu at the top left.
- Under your name to the left, clik on My files.
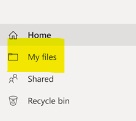
- In this view, you see your files that you have saved in your OneDrive.
Delete files in OneDrive
In “My Files” you can select the files and folders you want to delete, and then click Delete. If you do not want to delete the entire folder, you can click into the folder and select files there that you want to delete.
Empty recycle bin
Your deleted files and folders go to the OneDrive recycle bin.
First, select Recycle bin in the OneDrive left side navigation. To permanently delete files select delete in the top navigation.
Move files in your OneDrive
In the My Files view, you can select the files and folders you want to move, and then click Move To.
A window opens where in the middle under My files you can move the selected files to one of your existing folders. On the menu to the left, you can move the selected files to a team or Sharepoint. Select destination and click on Move.
If you exceed your storage limit
If you were to exceed the limit of how much you can store in OneDrive, you will end up in view mode for your documents, and your OneDrive will be read-protected, which means that you will not be able to upload, edit or sync your files in OneDrive, only view them. To fix this, you need to clear your OneDrive and delete files so that you fall below the limit of how much you are allowed to store.

Add/remove members in a shared mailbox in Outlook (webmail)
/in Email, Employee, Okategoriserade /by Elin SköldIf you own a shared mailbox, you should regularly check the members in the group. This is because members are not automatically removed from the group when someone, for example, changes departments or leaves the university. Here are instructions on how to add or remove members from a shared mailbox.
Manage via the Portal
Manage via Email
As the owner of a shared mailbox, you will periodically receive an email asking you to review the members in the group. In the email, click on Start review.
From this view, you can check a member and then Approve or Deny the member.
Run-time error 53 on Office 365 for Mac
/in Adobe, English, Mac, Microsoft 365 /by Jonas SundströmEvery time that I open either Word or PowerPoint, I get the Run-time error ’53
Word
PowerPoint
Version history for files in Microsoft 365
/in Employee, Microsoft 365, Sharepoint, Student /by Sanna JacobssonIn this manual, we’ll go through where to find version history of your documents in OneDrive, Teams, and SharePoint. Version history can save up to 500 versions of a document, and a new version is created each time you make a change to the document. Below is a description of how to do this and where to find the feature.
Open a file that you’ve saved in Microsoft 365. It can be a Word-document, PowerPoint, or Excel.
Send files securely with protected attachement (Skyddad bilaga)
/in English, Skyddad bilaga /by Erik RolenBefore you use protected attachment (Skyddad bilaga)
The service Skyddad Bilaga (protected attachment) is intended for employees to send and receive files via an encrypted transfer. Encrypted transfer is significantly more secure than sending files as an attachment in a regular email.
Before you use protected attachments, its important that you have read the information about what you need to keep in mind before you use Skyddad bilaga.
Note that the password you choose is only allowed to be shared verbally or through SMS to the reciever.
Send files with protected attachment
Receive files with protected attachment
Delete or move files from your OneDrive
/in Employee, Student /by Elin SköldSign in to OneDrive via the browser
Delete files in OneDrive
In “My Files” you can select the files and folders you want to delete, and then click Delete. If you do not want to delete the entire folder, you can click into the folder and select files there that you want to delete.
Empty recycle bin
Your deleted files and folders go to the OneDrive recycle bin.
First, select Recycle bin in the OneDrive left side navigation. To permanently delete files select delete in the top navigation.
Move files in your OneDrive
In the My Files view, you can select the files and folders you want to move, and then click Move To.
A window opens where in the middle under My files you can move the selected files to one of your existing folders. On the menu to the left, you can move the selected files to a team or Sharepoint. Select destination and click on Move.
If you exceed your storage limit
If you were to exceed the limit of how much you can store in OneDrive, you will end up in view mode for your documents, and your OneDrive will be read-protected, which means that you will not be able to upload, edit or sync your files in OneDrive, only view them. To fix this, you need to clear your OneDrive and delete files so that you fall below the limit of how much you are allowed to store.
Install eduroam on Windows
/in eduroam, Employee, English, Student, Wireless network /by Erik ÖhmanManual that helps you to connect to eduroam on Windows.
Umu card
/in Employee, English, Student /by Erik ÖhmanHere you can find information about the multifunction card at Umeå University, the Umu card.
Clear the Teams client cache
/in Employee, English, Teams /by Erik ÖhmanIf you’re experiencing issues that affect Microsoft Teams, clearing the cache on your device may help.
How to use Copilot Chat
/in Employee, Microsoft 365 /by Elin SköldThe chat is available to all employees of the university and to those affiliated with an A5 license.
Confirm your group study room booking in TimeEdit as a student
/in English, Student, TimeEdit /by Mikael KohkoinenAs a student you need to confirm your group study room bookning no sooner than 30 minutes before and no later than 15 minutes after the start of the booked slot. Unconfirmed bookings will automatically be removed.
To confirm the bookning visit either the page My group study room booknings or the bookning page Book group study room in TimeEdit. Scan the QR-code outside a room that is bookable by students and it will take you directly to the booking page where you can confirm your booking.
Read more