Switch between public and private team

You can choose between two privacy settings in Teams – public or private team. This setting controls who can view and join your team. This instructions will show you how to change a public team to a private, or the other way around.  

Two types of privacy for teams

Public team
A public team is available to everyone at Umeå University. This means that when someone searches for teams, they can find your team in a list and join it without your approval. All files and content in a team is searchable for members of a team.
 Both students and staff can see and join public teams.

Private team
A private team is only available to the people you invite or approve. In most cases, you should choose a private team.


How to do:

  1. Go to your team and click on the three dots to the right of the teams name. Select Edit team.
  2. To switch between public and private – use the menu that says Privacy.
  3. Click on the arrow to the right and select a new option.
  4. Select Update.

Set up your notifications in Teams

When you want to set up and adjust your notifications settings in Microsoft Teams, there are two options: for the entire application or for each channel.

Set up notifications for the Teams application

  1. Click on the three dots next to you profile picture in the upper right corner in Teams.
  2. A menu will appear, select Settings.
  3. Select Notifications and set up the different notifications under each heading.

If you’ve chosen to receive a notification via email – please note that you will unfortunately not receive this notification if you are signed in or have the application open in the background. This is because you are considered as active and will therefore only receive notifications in the application.

Set up notifications for a channel in Teams

  1. Go to the channel where you want to adjust your settings, and click on the three dots.
  2. Select Channel notifications.
  3. In the next menu, you can choose how you want to be notified when something happens.
  4. Select Custom to get more options for the notifications.
  5. Select the level of notifications
    1. Click on the arrow 
    2. Select Banner and feed if you want both an purple banner in the left corner of the screen when recieving an and an number sign in the activity clock. (see decription below)
    3. Select Only show in feed if you want notifications only in the acitivty clock. (see decription below)
    4. Select Off if you want to turn off the notifications for that teams channel.
    5. Select Include all replies if you want notifications if someone replies on your channels posts.
    6. Click Save
      change channel notifications in teams - chose notification level

Banner = Purple box with little decription of what has happened.

banner notification

Feed = Red numbers on activity and under team

feed notification

**Note** that these settings only apply to you and the specific channel, not the entire team. For example, if you are interested in what’s happening in some of the Teams channel enable notifications on them and disable notifications on the other.


Make a spontaneous poll with Forms in a Teams meeting

In this manual we describe how to make a spontaneous poll with Forms in an ongoing Teams meeting. This method is suitable when you are a presenter or organizer of a meeting and spontaneously want to create a poll. If you want to make a planned poll before a meeting, see our other manual.  

Create a new poll

  1. When you’re in the meeting, click on Apps.
  2. Select Forms. If you can’t fint it in the list, you can search for it.
    Image showing where to find the Forms app in a teams meeting
  3. In the window that appears, click on Save.
    Image showing where to save the poll
  4. A new icon (Polls) will be added among the meeting tools. Click on it.
  5. Select New poll.
    Image showing where to find the new poll in a teams meeting
  6. In the next window, you can choose between three types of polls:
    • Multiple choice – when you want to know what people in the meeting think about a particular topic.
    • Quiz – questions where there is a right or wrong answer.
    • Word Cloud – if your want to ask questions that will allow the participants to answer in text.
    • Rating – if you want to collect trhe respondents insights
    • Ranking – If you want to allow the respondents to rank items
      Image showing the different types of poll-questions
  7. Once you’ve selected a type of poll, a new window will open. There you can enter your question, add or remove answers options, edit the settings for your poll and decide if it should be possible to choose multiple answers. Read more about qestiontypes and question settings here
  8. Select Launch now or Save as a draft when you’re done. Then ypou can find your questions under Polls, either as a draft or as a open poll.
  9. When saved as a draft you can edit your poll, or launch it.
  10. If you want to add more questions, select Create new.
    Image showing how to create a question

Edit a question

  1. Click on the arrow next to Launch.
    Image showing where to edit a poll
  2. You will now get two options. Select Edit poll to edit your question or select Delete poll to remove the question from the poll.
  3. Make your changes and select Save when you’re done.

Publish a question in the meeting

  1. Make sure you’re satisfied with your settings. Otherwise – edit you poll.
  2. When you want to publish you question in the meeting, select Launch.
  3. The question will be marked as Live.
  4. The meeting participants will now see the question on their screens and receive a notification.
  5. The answers of the poll will be shown in percentage.

End the poll

  1. Select the arrow next to View options.
  2. Select Close poll.

See results from polls

Results in Teams
  1. Go to Teams and select Chat in the left menu.
  2. Search for the meeting where the poll was held.
  3. Select the Polls tab.
Results on m365.umu.se
  1. Go to m365.umu.se.
  2. Select Forms in the left menu.
  3. You will find your most recent polls Recent. If you can’t see your poll there, select All my forms.

Make a planned poll with Forms in a Teams meeting

In this manual we describe how to make a poll with Forms before, during and after a meeting in Teams. This method is suitable when you in advanced have planned to do a poll. This manual also shows how you can edit or delete a question and how to close your poll. 

Add the poll as a tab

  1. Book a meeting in Teams.
  2. Go to your calendar in Teams and select the meeting where you want the poll.
  3. In the meeting view, click on the + to add a tab.
  4. Select Forms to create a tab for the poll.

Create a new poll

  1. Select the tab Polls.
  2. The first time you create a poll, select Create new poll.
  3. In the next window, you will choose between two types of question:
    • Multiple choice poll – when you want to know what people in the meeting think about a particular topic.
    • Multiple choice quiz – questions where there is a right or wrong answer.
    • Word Cloud Poll – if your want to ask questions that will allow the participants to answer in text.Make a planned poll with Forms in a Teams meeting - questiontypes

Multiple choice poll

Multiple-choice polling is an alternative question perfect for easily gathering information. To create your multiple choice question, follow these steps:

  1. Select Question and enter your question.
  2. Select the Options box and enter the option you want.
  3. Click Add Options to add more options
  4. Select options and click on trashcan to delete options.
  5. Check Multiple Answers to allow participants to answer with multiple options.
  6. Select Share results automatically after voting if you want all participants to see the results after they have voted.
  7. Select Keep the answers anonymous if you want the answers from the participants to be anonymous.
  8. Select Allow others to co-author if you want participants to be able to see the questions, create questions, edit questions in advance. Please note that if you choose this, the participants will receive a notice that you have created questions and they can see, edit and create questions in advance before the meeting.
  9. Click Save when done.
    Make a planned poll with Forms in a Teams meeting - multiple choice poll

Multiple choice quiz

Multiple choice quiz is a type of question that allows you to put the right answer to a question. You should use this type of question if you want to do a competition or quiz.

  1. Select Question and enter your question.
  2. Select the Options box and enter the option you want.
  3. Mark right answer on question, by check of the small box on the left side of the optionspane so it turns green.
  4. Click Add Options to add more options
  5. Select options and click on trashcan to delete options.
  6. Check Multiple Answers to allow participants to answer with multiple options.
  7. Select Share results automatically after voting if you want all participants to see the results after they have voted.
  8. Select Keep the answers anonymous if you want the answers from the participants to be anonymous.
  9. Select Allow others to co-author if you want participants to be able to see the questions, create questions, edit questions in advance. Please note that if you choose this, the participants will receive a notice that you have created questions and they can see, edit and create questions in advance before the meeting.
  10. Click Save when done.
    Make a planned poll with Forms in a Teams meeting - Multiple choice quiz

Word Cloud Poll

Word cloud Poll is a question type that allows participants to write an answer with text. The answers will pop up on the screen in the form of word clouds hence the name.

  1. Select Question and enter your question.
  2. Check Multiple Answers to allow participants to answer with multiple options.
  3. Select Share Word cloud with respondents if you want all participants to see the results after they have voted.
  4. Select Keep the answers anonymous if you want the answers from the participants to be anonymous.
  5. Click Save when done.
    Make a planned poll with Forms in a Teams meeting - word cloud poll

Manage, create new, edit, delete questions

When you have finished your questions, they are saved as drafts. This means that participants can not see your questions (unless you chose co-author). From this view you can manage your questions.

  1. Click Create New to create more questions
  2. Click the arrow to edit or delete the question.
  3. Drag and drop and drop the question and place it in the order you want to ask them.
    Make a planned poll with Forms in a Teams meeting - Manage, create new, edit, delete questions

Publish a question in a meeting 

  1. Make sure that you’re satisfied with your settings. Otherwise – edit your poll.
  2. Select Launch. You can do this before, during or after the meeting.
  3. Your will now be marked as Live.
  4. The meetings participants will now get a notification liked this.
  5. The answers of the poll will be shown in percentage.

End the poll

  1. Select the arrow next to View options.
  2. Select Close poll to end the poll.

See results from the poll

  1. Go to o365.umu.se
  2. Select Forms in the left menu.
  3. You will find your most recent polls under Recent. If you can’t see your poll there, select All my forms.


Move files between channels or teams in Teams/Sharepoint

This manual will show you how you move individual files in Teams, how to move multiple files or folders and how to move files from a private channel.

Move individual file directly in teams:

  1. Find the file you want to move.
  2. Click on the three dots and select Move.
  3. A new window will appear where you can choose where you want to move your file. By clicking on the arrow you can browse folders, channels or select another team that you have access to.
  4. Select Move. Done!

Move multiple files or folders:

You need to use SharePoint when you move multiple files och folders.

  1. Go to the team where the files you want to move are located. Select Files.
  2. At the top right, click Open in SharePoint.
  3. Select the files of folders you want to move.
  4. Select Move to.
  5. Now a new window will appear to the right. There you can choose where you want to move your files or folders. If you want to move the folders to another channel in the team – click on Current library and select the folder you want to move them to. If you want to move the folders to another team – choose the team you want to move them to.
  6. Done!

Move files from a private channel:

You need to use SharePoint when you move from a private channel.

  1. Go to the private channel where the files you want to move are located. Select Files.
  2. At the top right, click Open in SharePoint.
  3. Select the files you want to move, click on the three dots and select Move to.
  4. If you want to move the files to another team, then select that team. If you want to move the files to another channel in the current team, then select the current team (in this case Project A) and click on the channel you want to move the files to. Note that you should not select “Current library” as it means the private channel.

  5. Select Move here. And you’re done!

Frequently asked questions about Forms

How do I find Microsoft Forms?

  1. To access Forms go to www.m365.umu.se.
  2. Sign in with your Umu-ID.
  3. Select Forms in the left menu. If you cannot find it there, select All applications and then Forms.

What is the difference between a form, quiz, and poll?

A form is a traditional survey where you collect data on people’s opinions and experiences.

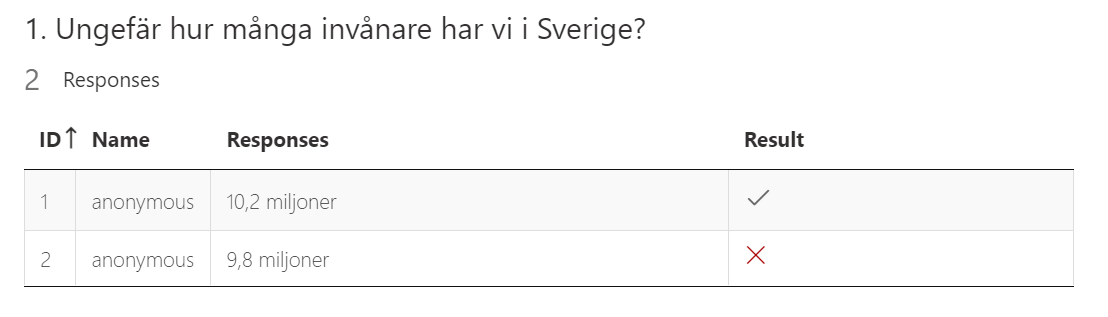
A quiz reminds of a survey but allows you to choose right or wrong answers for the questions.

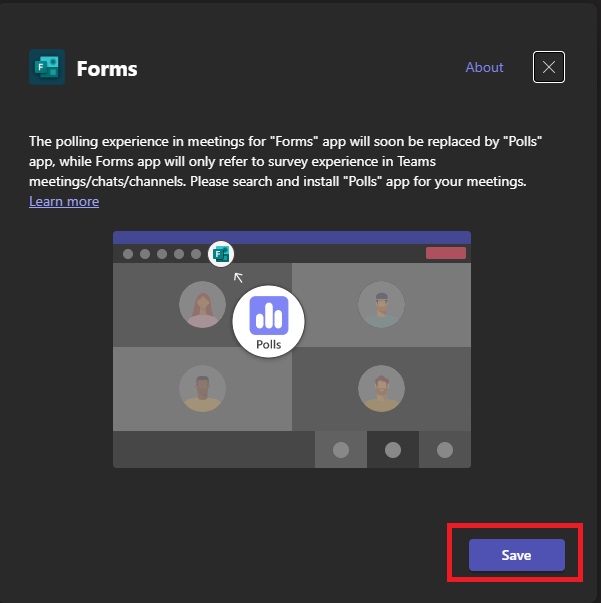
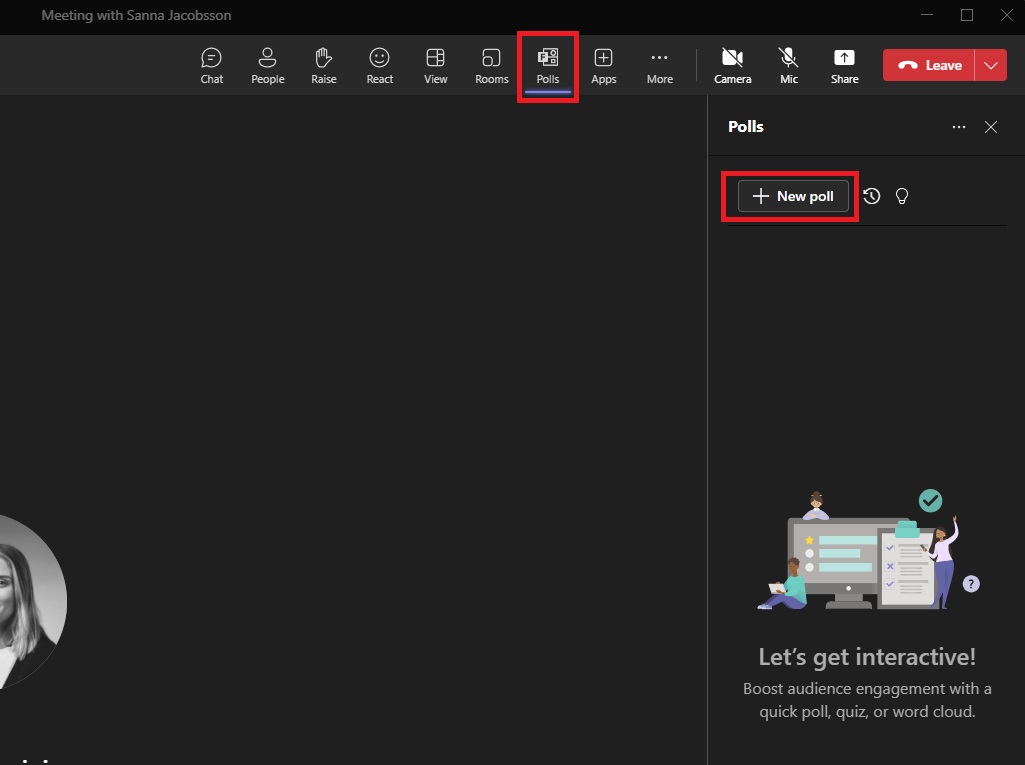
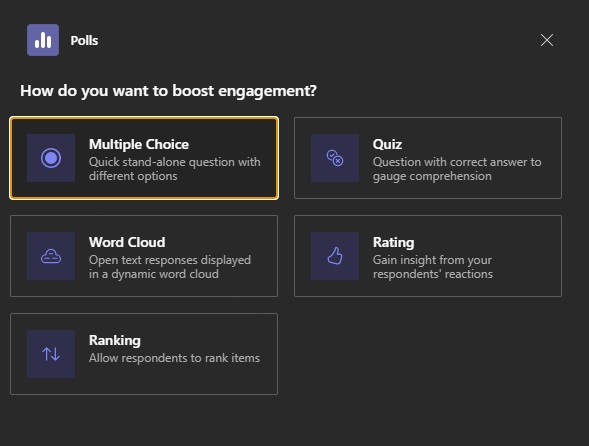
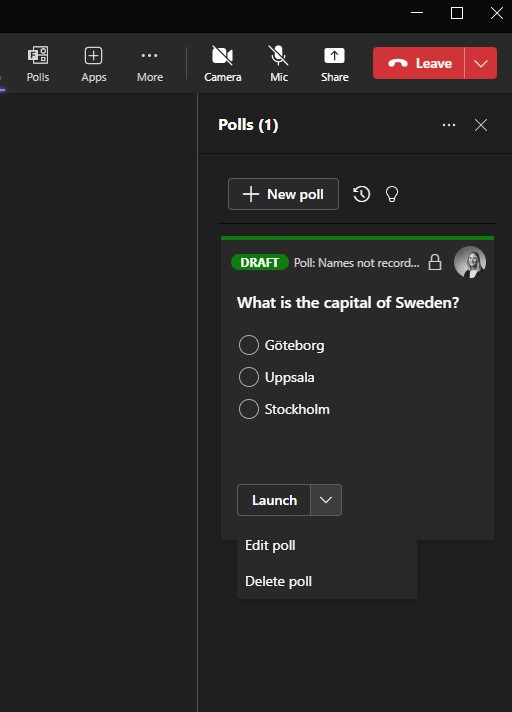
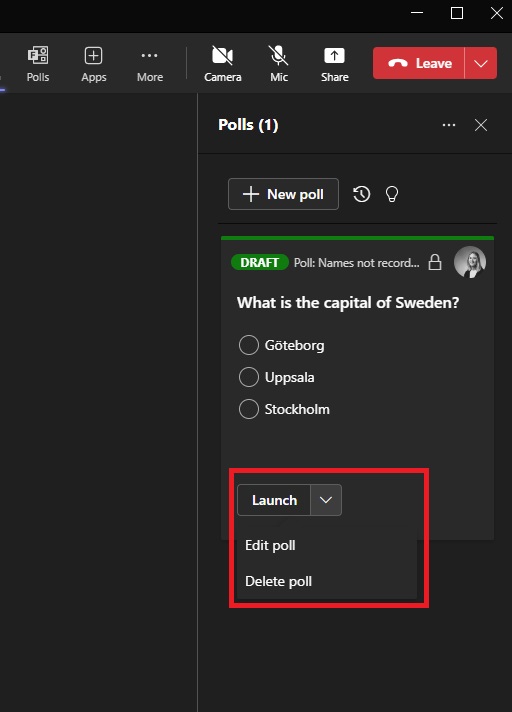
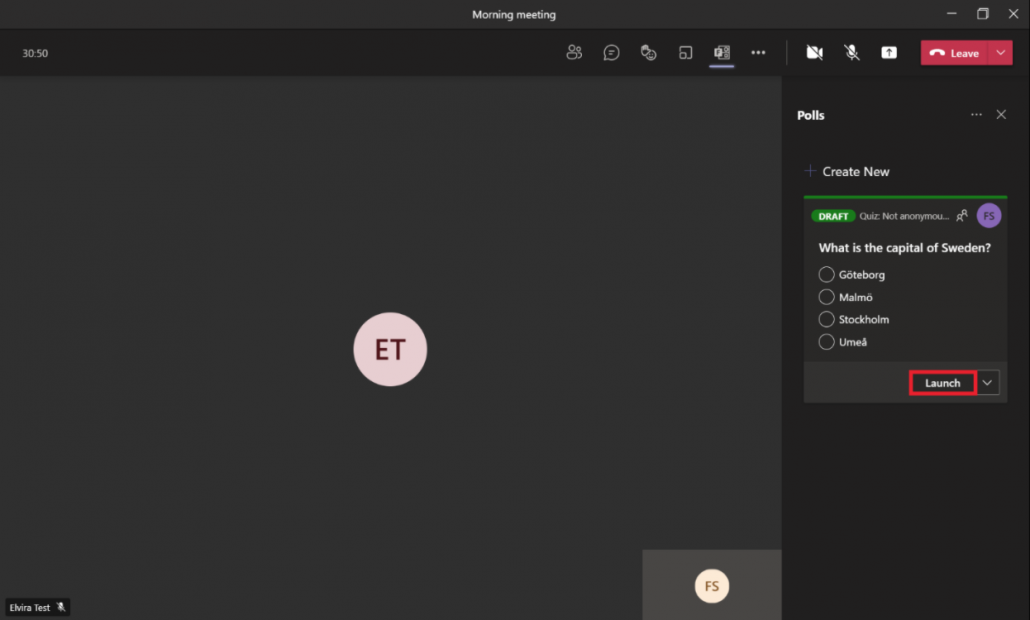
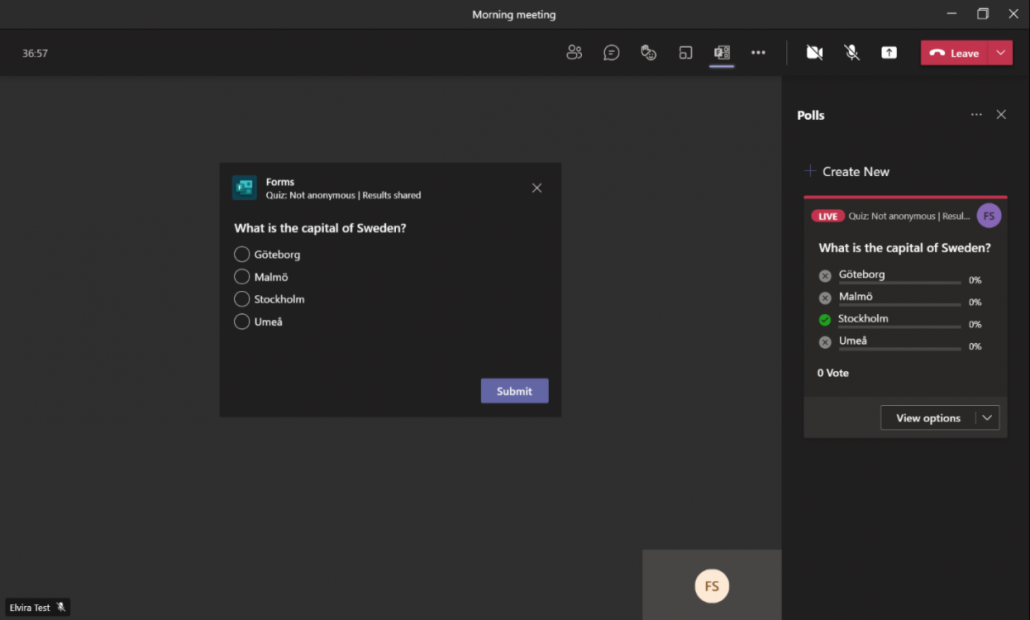
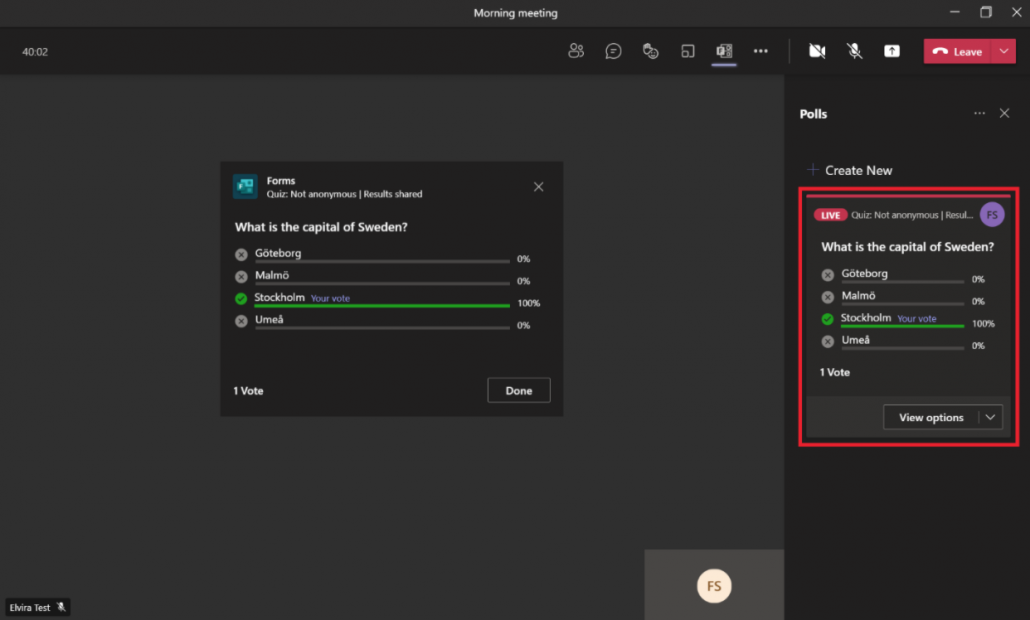
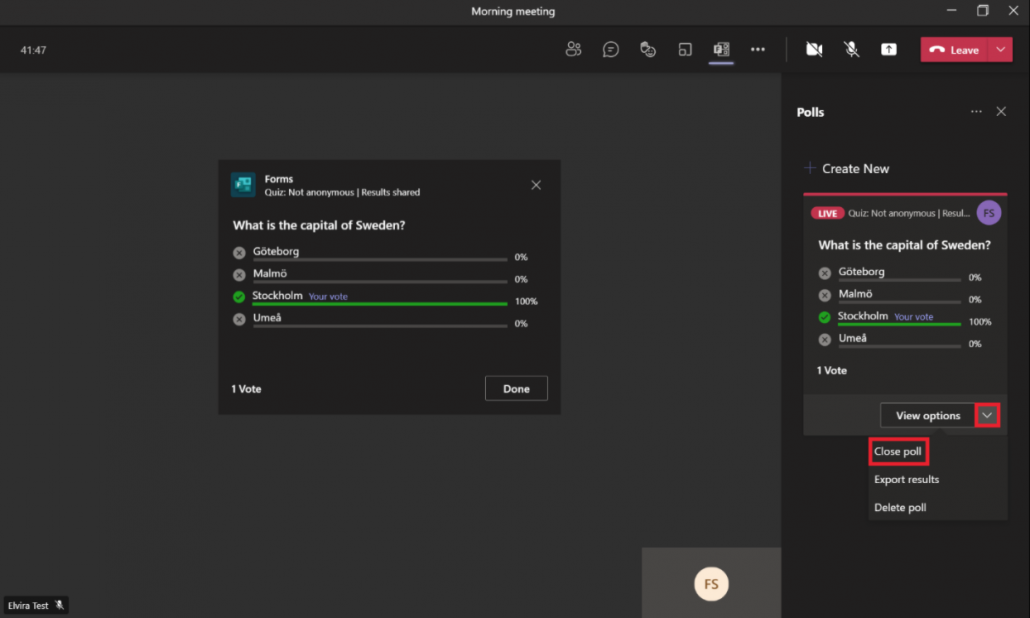
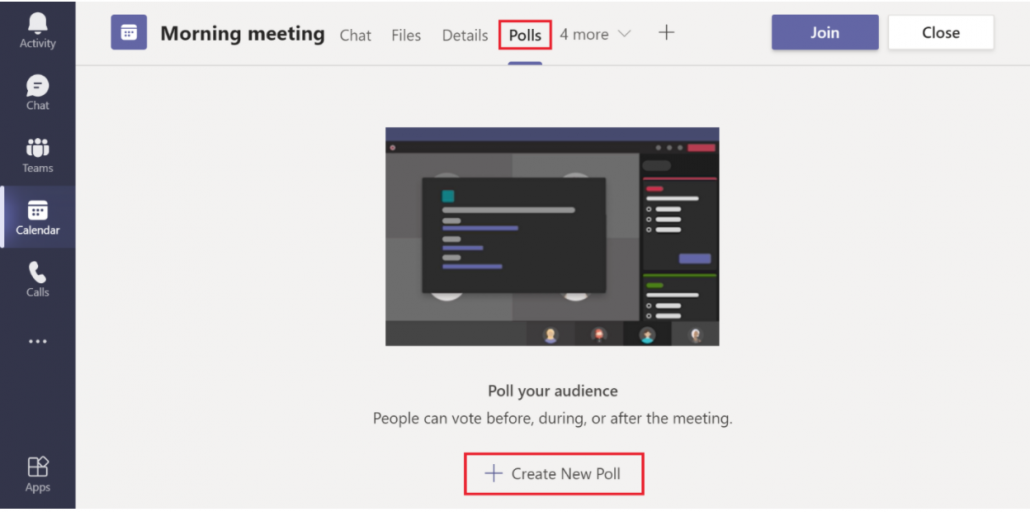
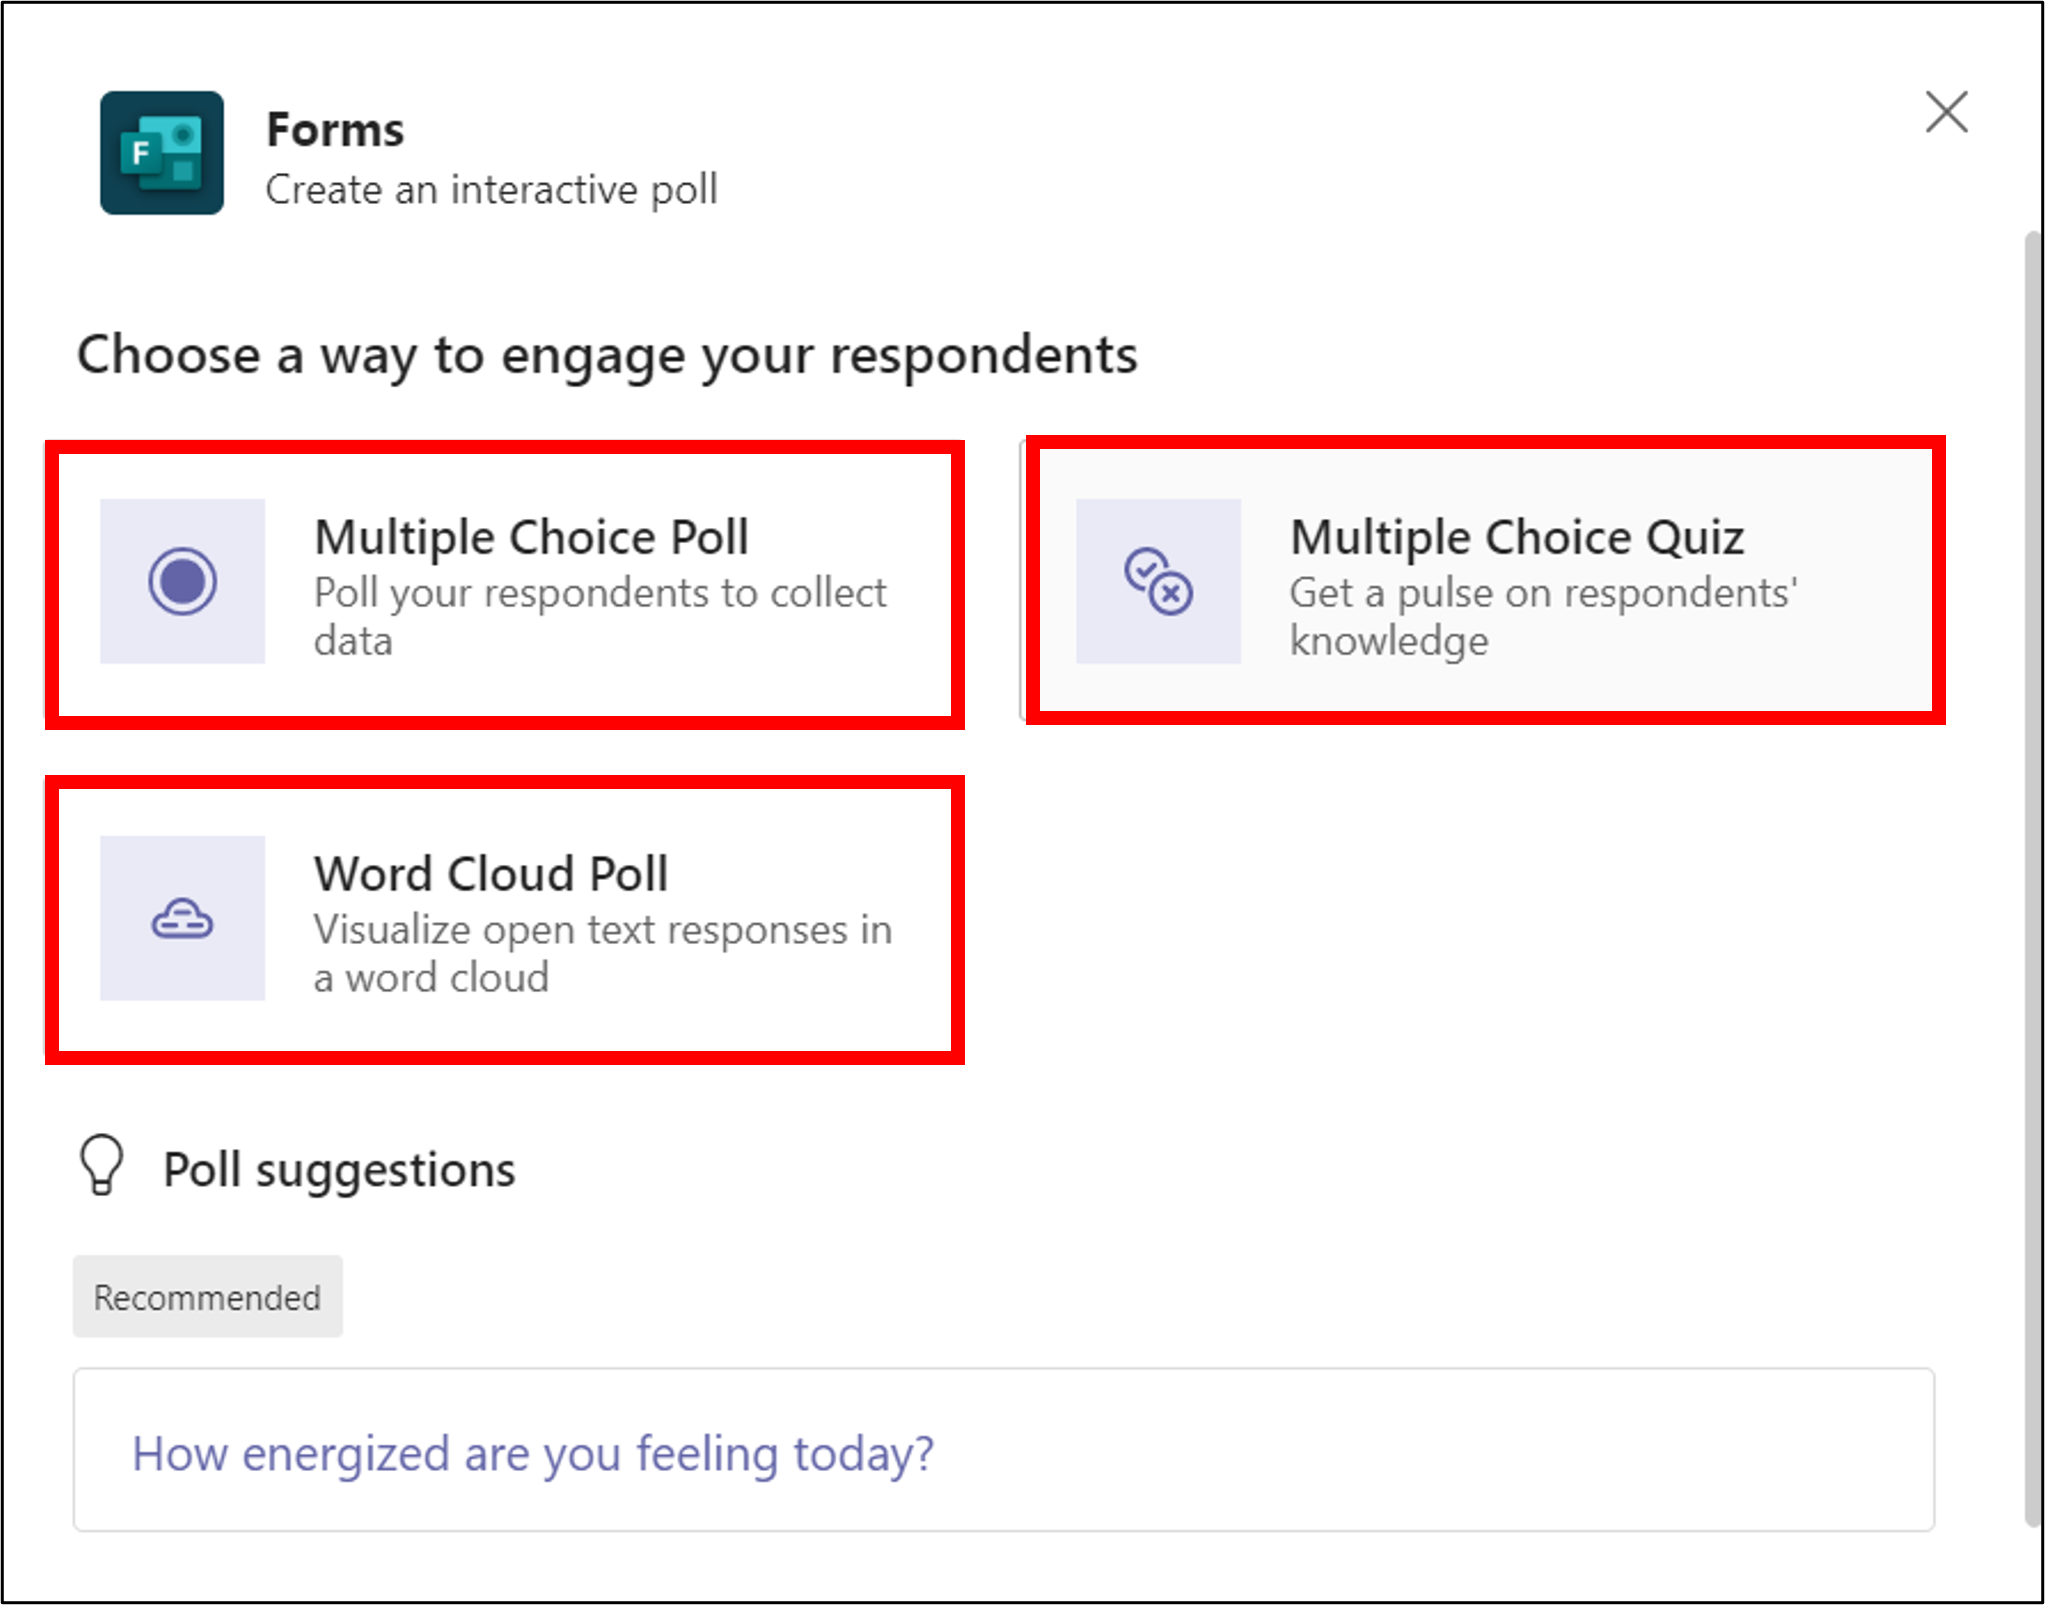
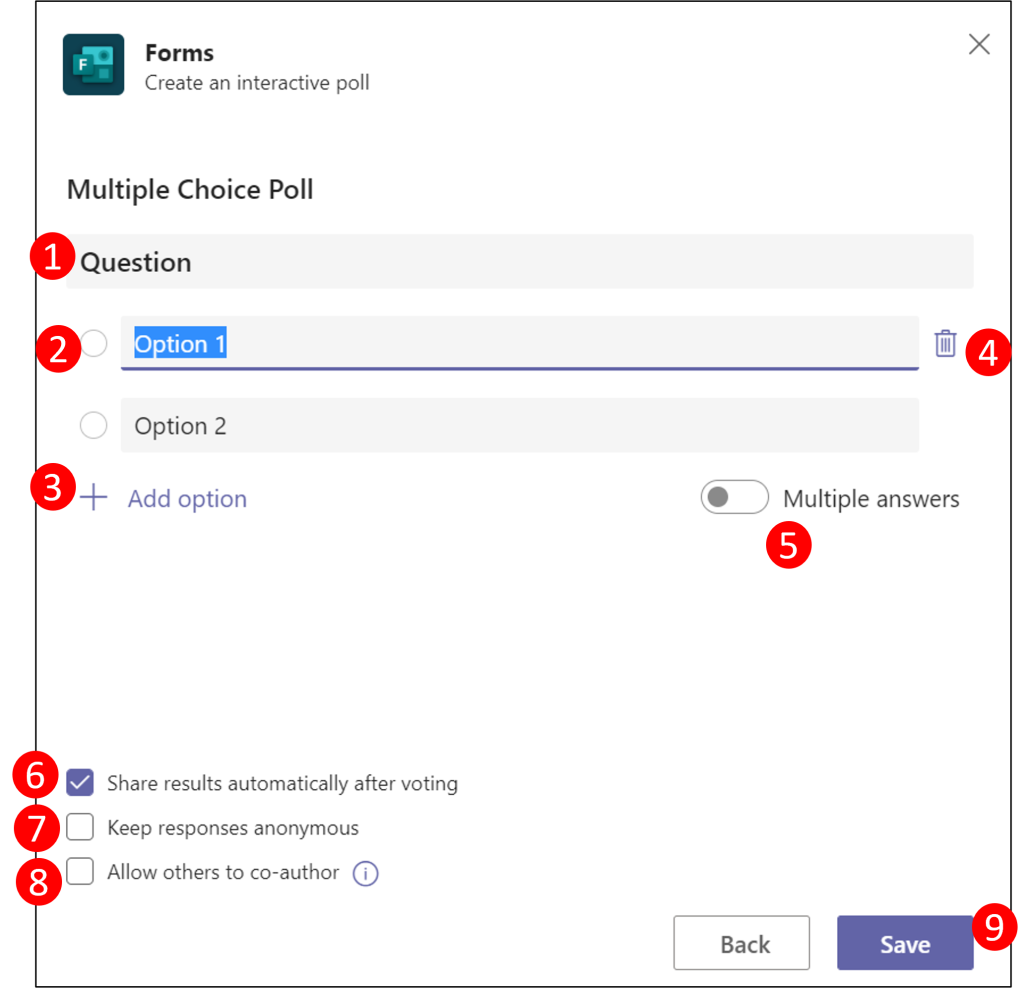
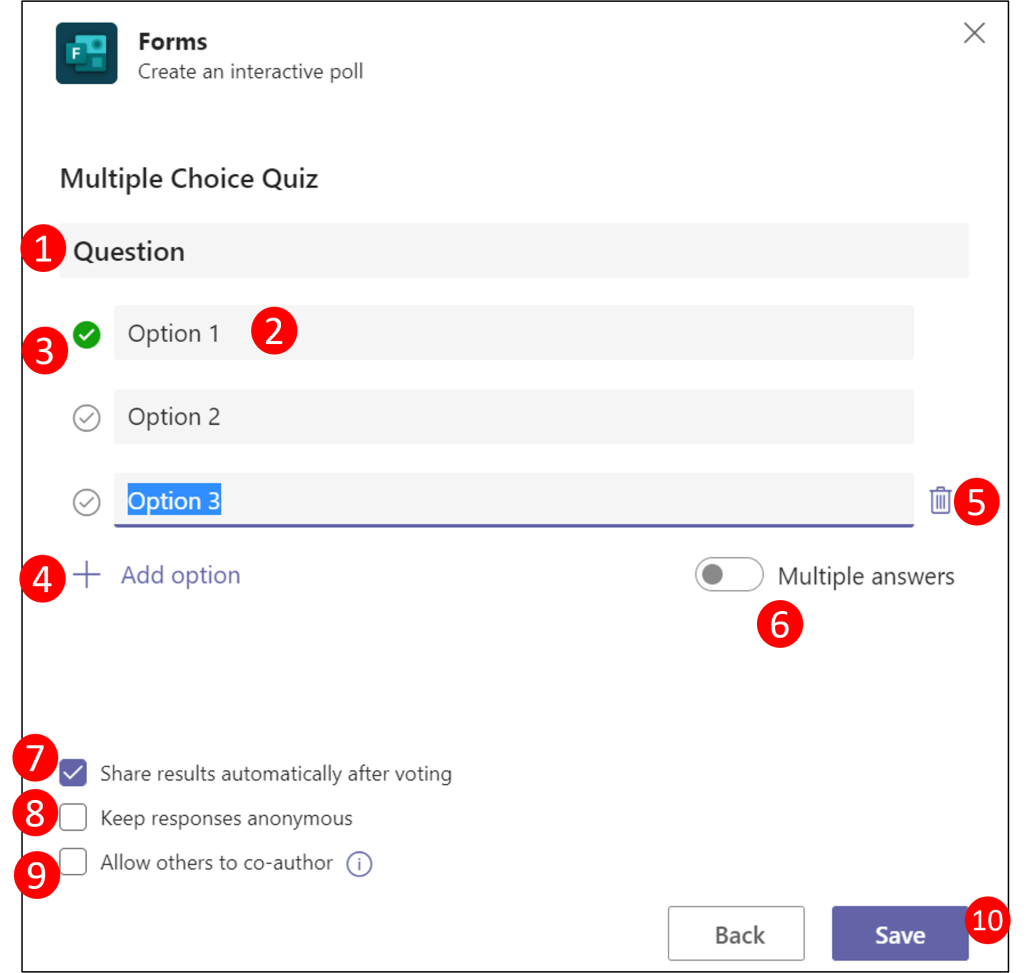
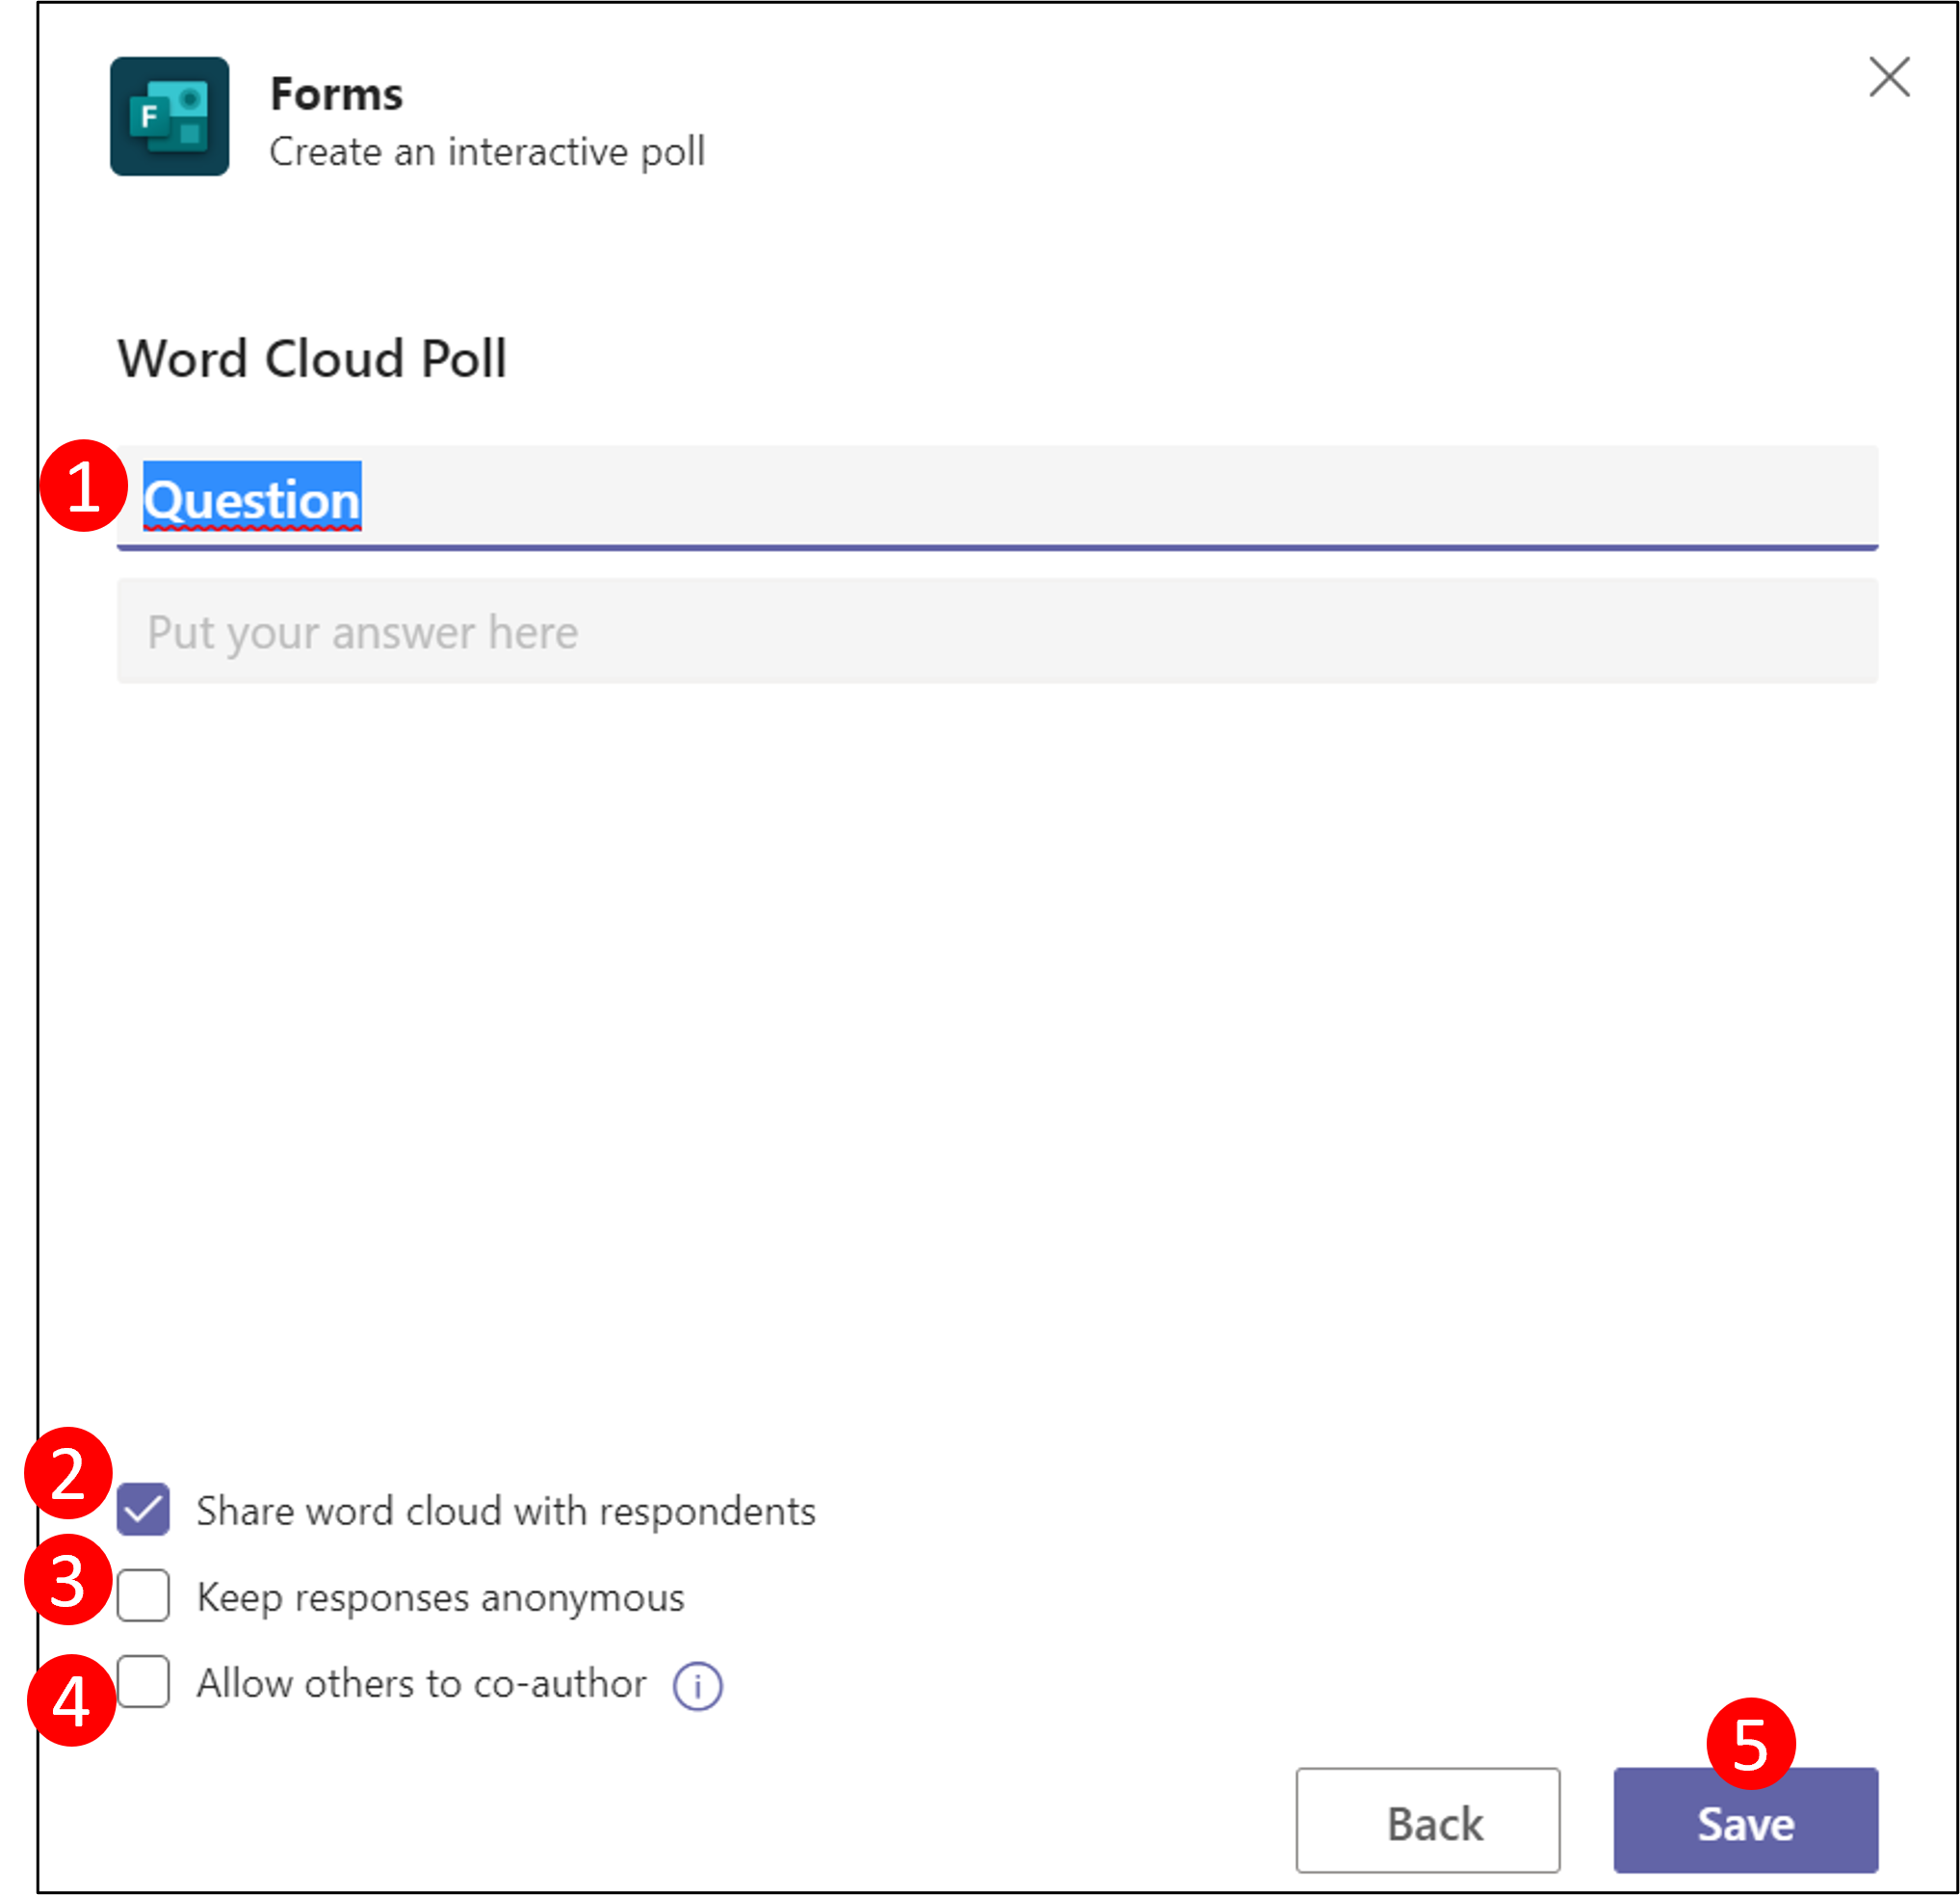
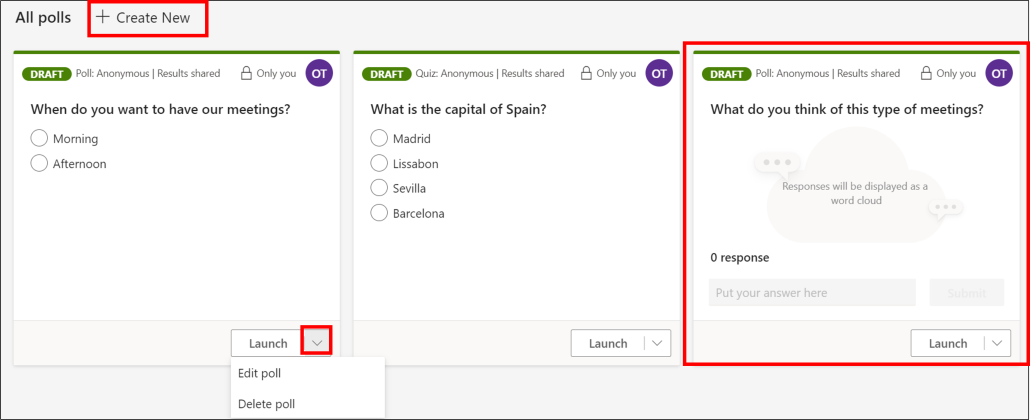
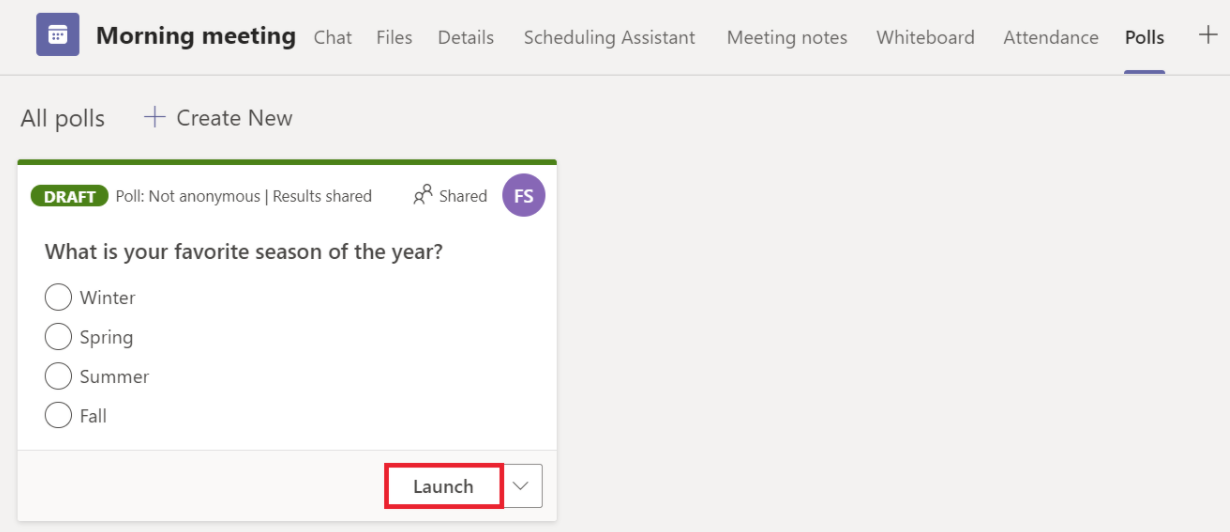
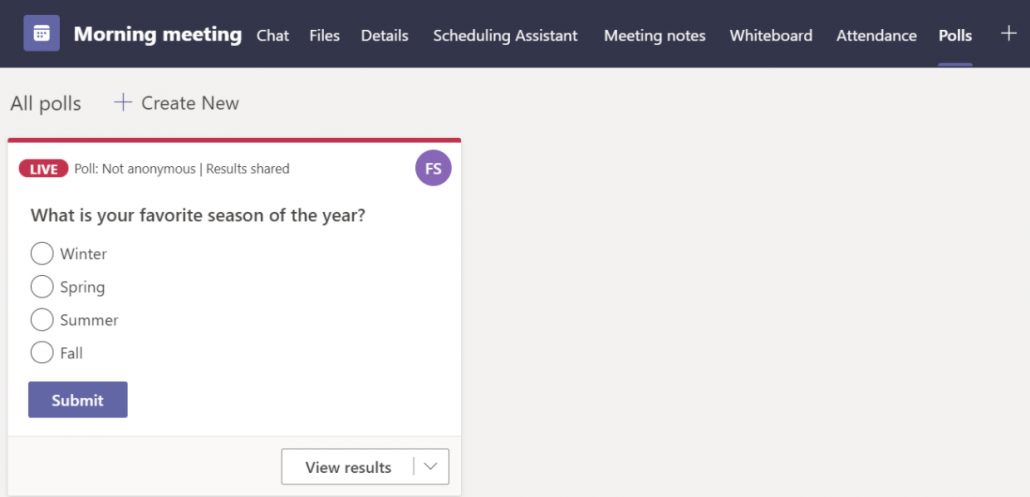
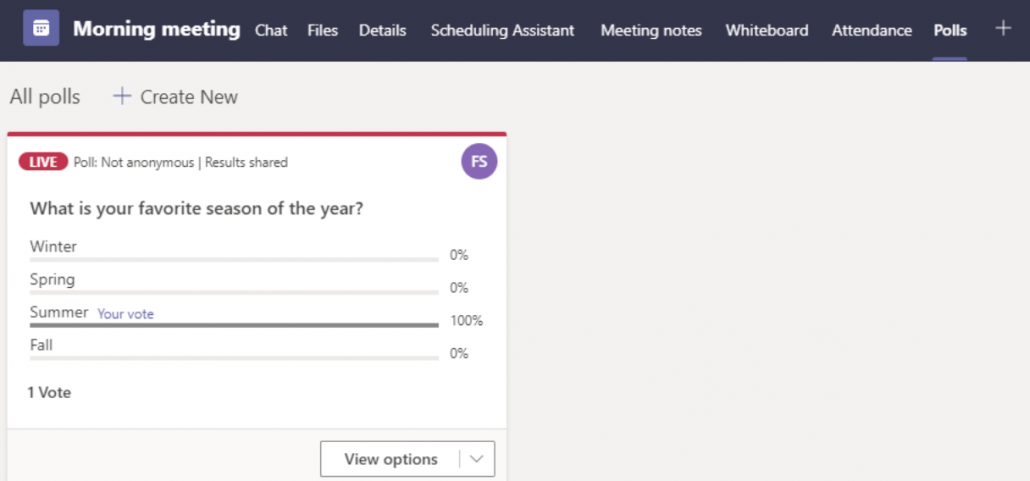
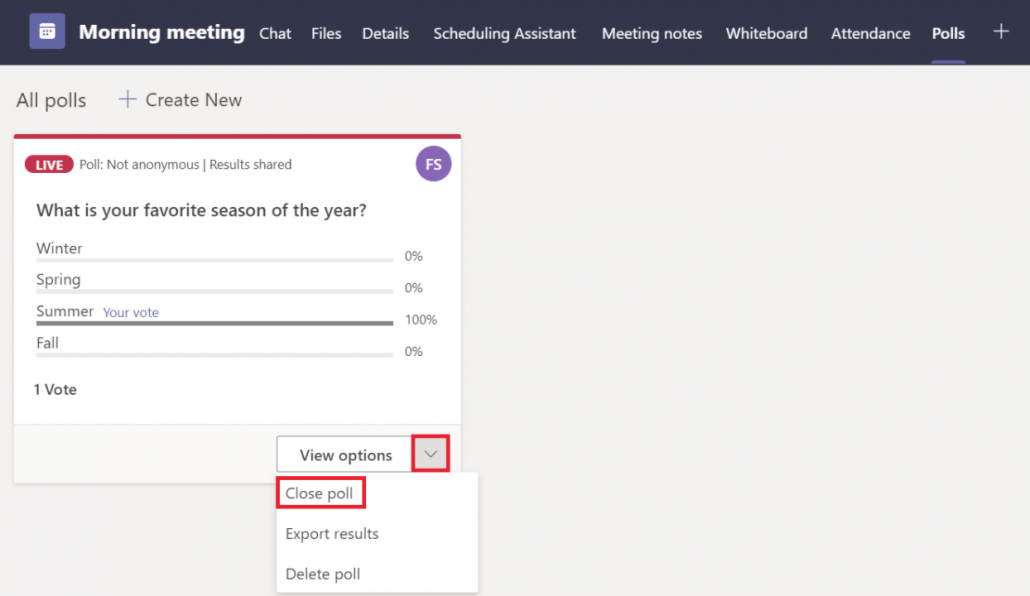
A poll consists of shorter questions that can be used before, during or after a Teams meeting (Link to “Make a planned poll in a Teams meeting” & “Make a spontaneous poll in a Teams meeting”) or in a channel in Teams (Link to “Make a poll in a channel in Teams”).

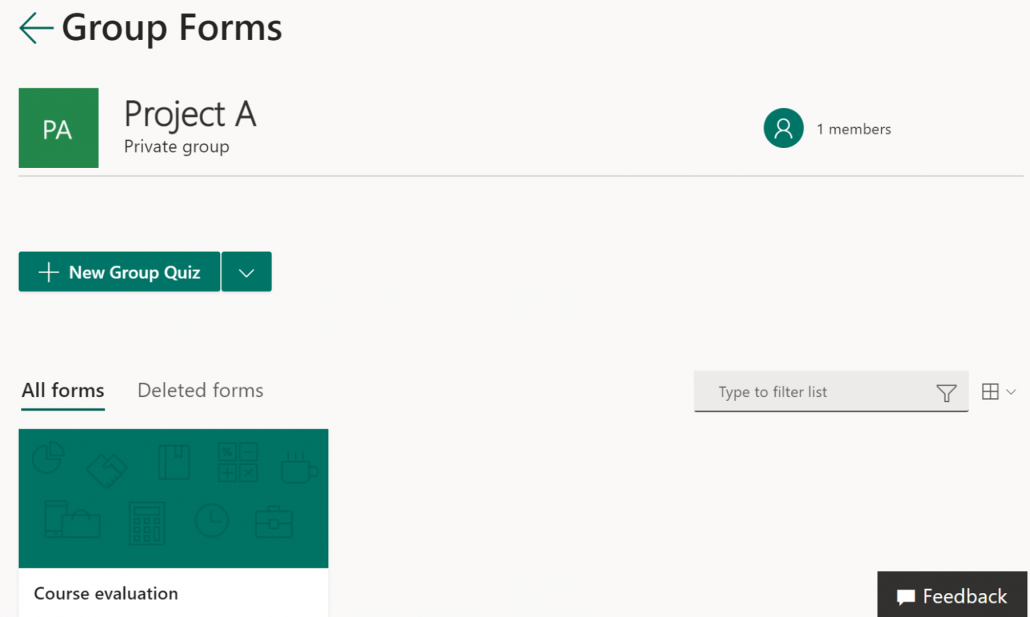
What is a group form?

A groupform is when a form is created within an already existing group (team) and is handled in the same way as if it was your own forms portal. This provides the possibility of easy editing and work within a group.
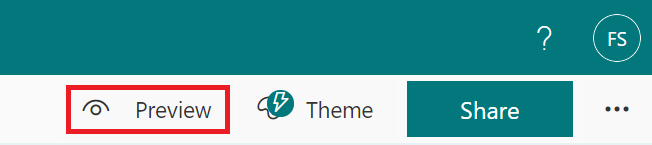
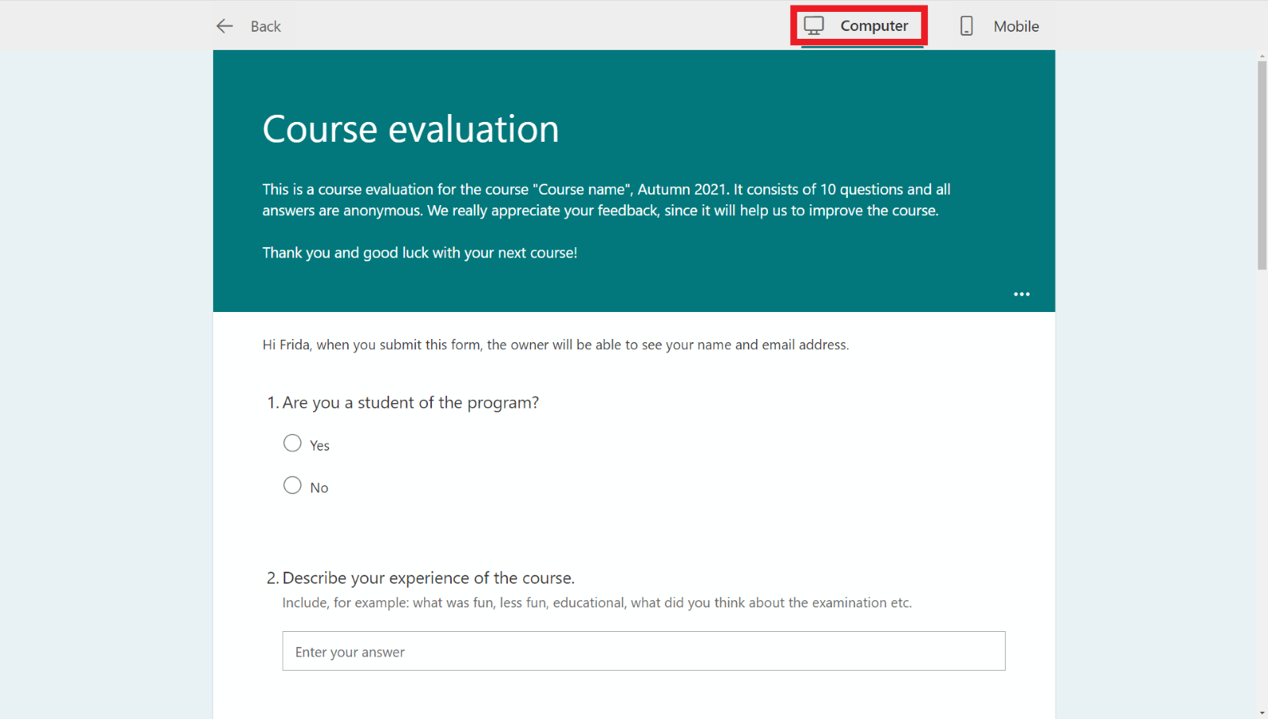
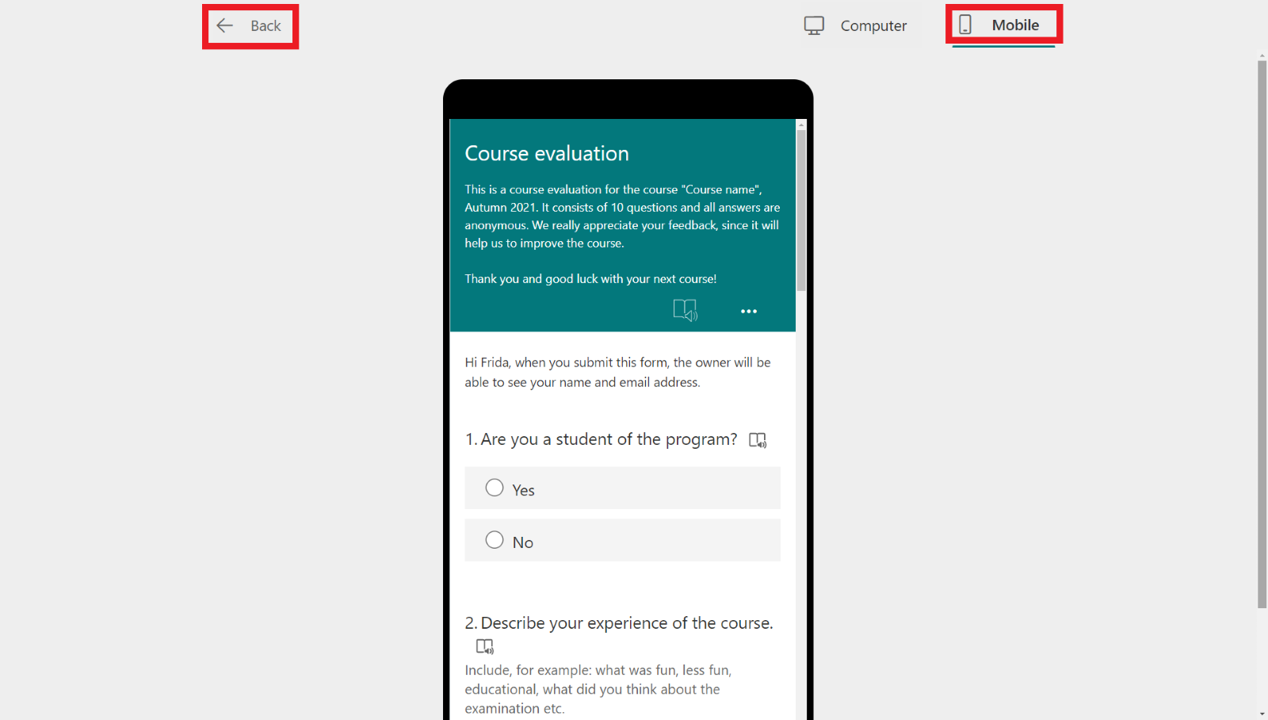
What is preview?

The purpose of a preview is to see what your form/quiz looks like before you share it. When previewing the form, you can try to fill it out to make sure it looks and works the way you want.

See manual: Preview and share a form

What is branching and how can I use it?

With branching you can add a subsequent dependency on the previous answer. If you were to branch question 1 in your form to question 3, it would mean that the respondents who answered question 1 would be moved to question 3. Question 2 will in turn be skipped.

You can add branching to all questions, but also to sections or options in a question.

What is a section?

Sections are used to group your questions in categories or themes such as work environment, equality, and safety. Sections are useful when you are creating a large form with many questions.

What questions can I use in a form or quiz?

There are 8 different types of questions:

  1. Choice is used to give the respondents predetermined answer options. You can use it for a yes or no question but also add over 100 options.
  2. Text is used to let respondents write an answer to the question.
  3. Rating is used to let respondents rate a statement. You can choose levels from 1-10.
  4. Date is used to let the respondents answer the question by choosing a date.
  5. Ranking is used to let the respondents evaluate answer options against each other and rank them in the order they want.
  6. Likert is used to measure attitudes and opinions from a predetermined scale.
  7. File upload is used to let the responded answer the question by uploading a file. The files will be gathered in a folder in your OneDrive. The accepted file types are Word, Excel, PPT, PDF, video, and audio.
  8. Net Promoter Score is an index that ranges from 1-10. It is most often used as a standard proxy by organizations to measure customers’ willingness to recommend their products or services to other. (Similar to rating).

See how to create questions in a form (survey) here: Create questions for a form in Forms

See how to create questions in a quiz/test here: Create questions for a quiz in Forms

Can I share a file in a question?

No, you can only share an image or a video. However, you can create question where the respondents upload a file to answer the question.

See how to create questions in a form (survey) here: Create questions for a form in Forms

See how to create questions in a quiz/test here: Create questions for a quiz in Forms

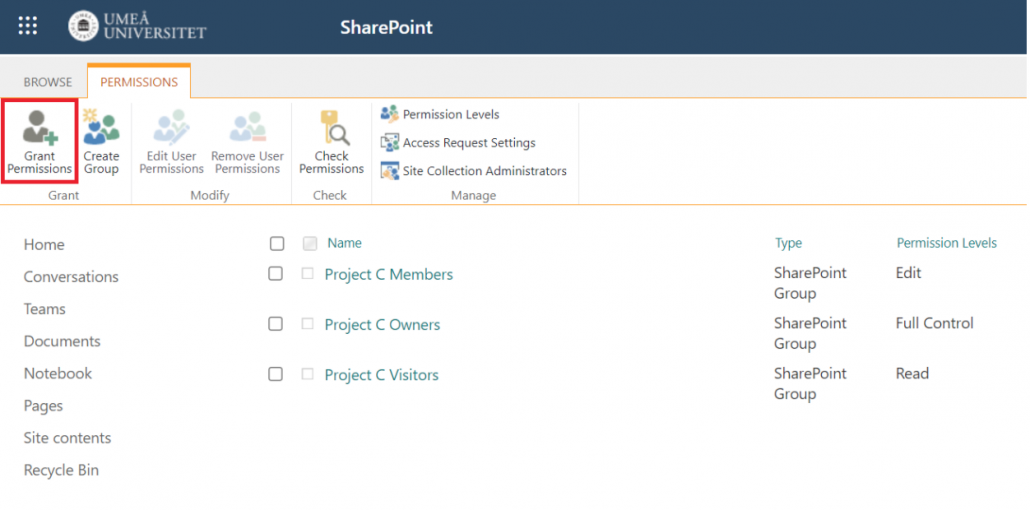
Can I share a form with a colleague?

Yes, you can share a form to collaborate on and as a template (copy).

See how to share a form to collaborate here: Share a form or quiz to collaborate in Forms

See how to share a form as a template here: Share a form as a template in Forms

Can my forms be answered in multiple languages?

Yes. By using the function multilingual, you can add multiple languages to allow the respondents to choose what language they want to read and answer your form in. However, you must translate the form on your own.

To translate the form, select the three dots in the main men and then multilingual. Add a language and then select the pencil to translate the form.

Can I copy an existing form?

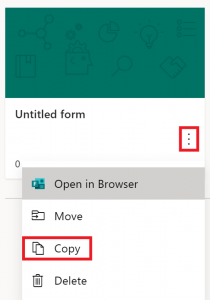
Yes, you can copy an existing form.

See how to copy a form here: Copy, delete or move a form or quiz in Forms

You can also share the form as a template (with yourself and others). In that way, you copy the form as a template and can continue working with a new version.

See how to share a form as a template here: Share a form as a template in Forms

Can I delete a form?

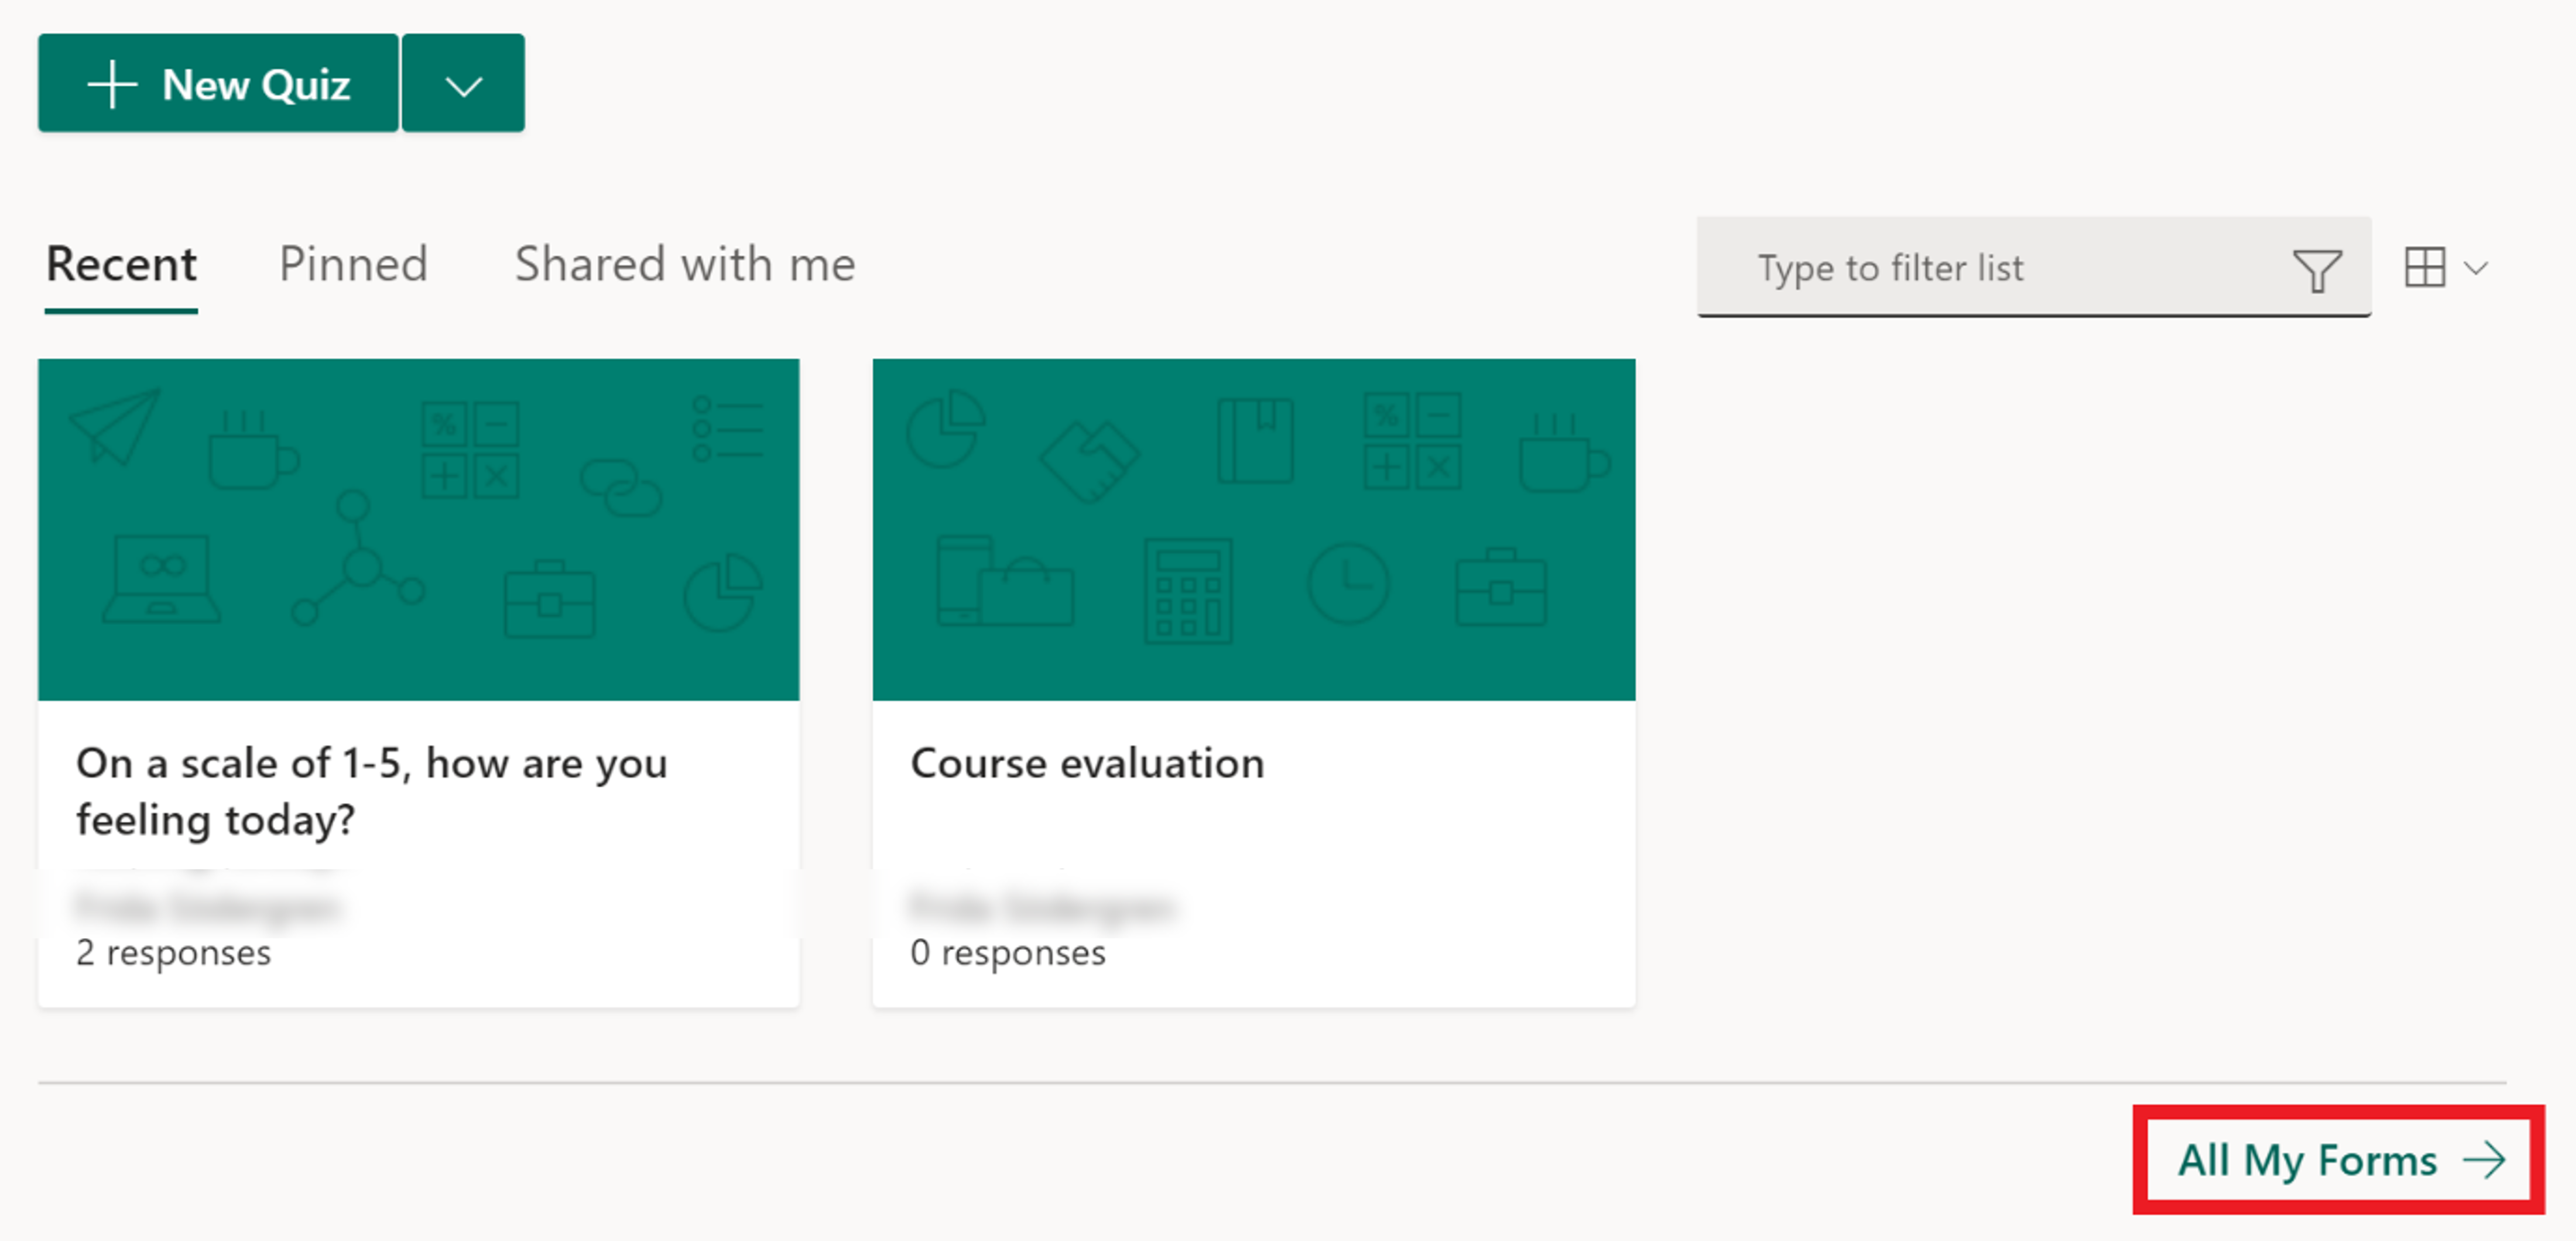
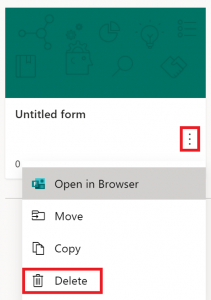
Yes, you can delete a form. Select all my forms and place the pointer on the form you want to delete. Select the three dots and then delete.

See how to delete a form here: Copy, delete or move a form or quiz in Forms

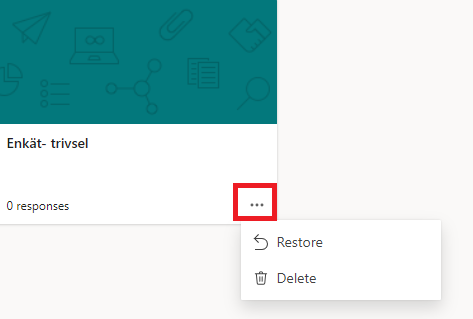
Can I restore a form?

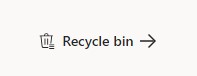
Yes, you can restore a form you have deleted. Select all my forms and then deleted forms. Place the pointer on the form you want to restore, select the three dots, and then restore.

See full decription on how to restore a form here: Copy, delete or move a form or quiz in Forms
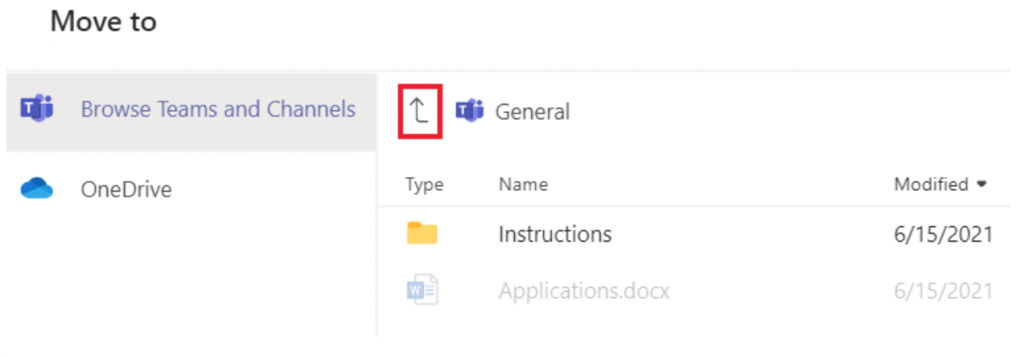
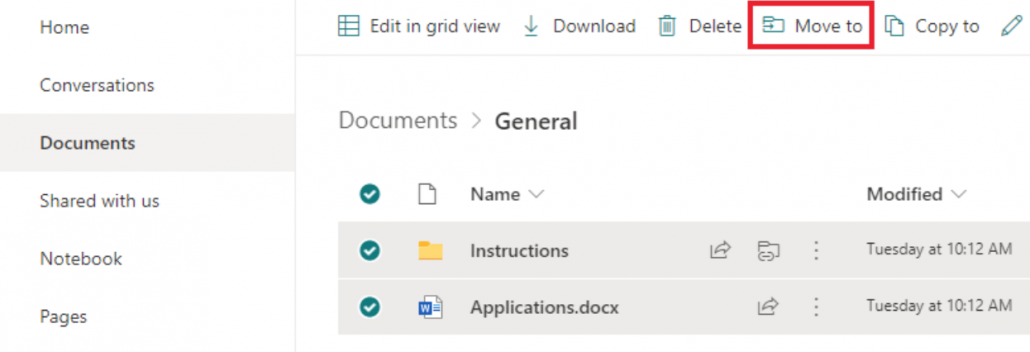
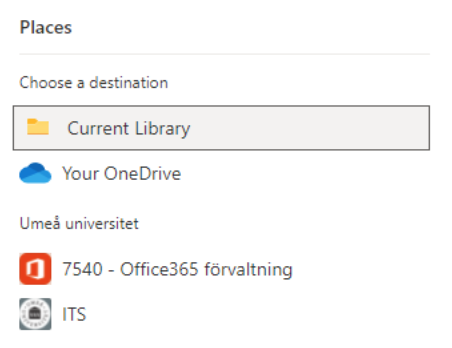
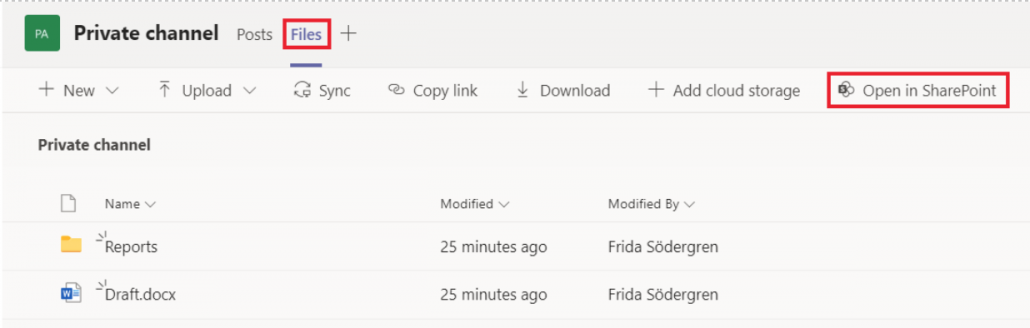
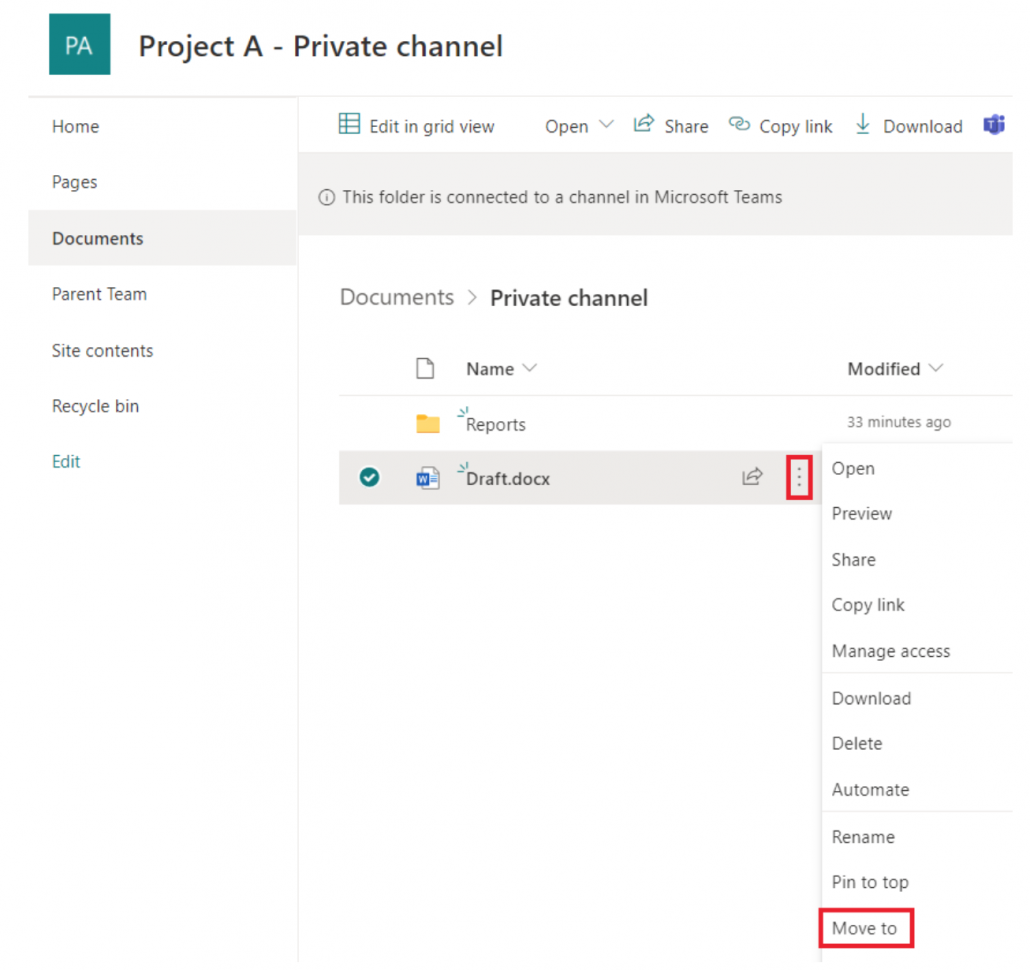
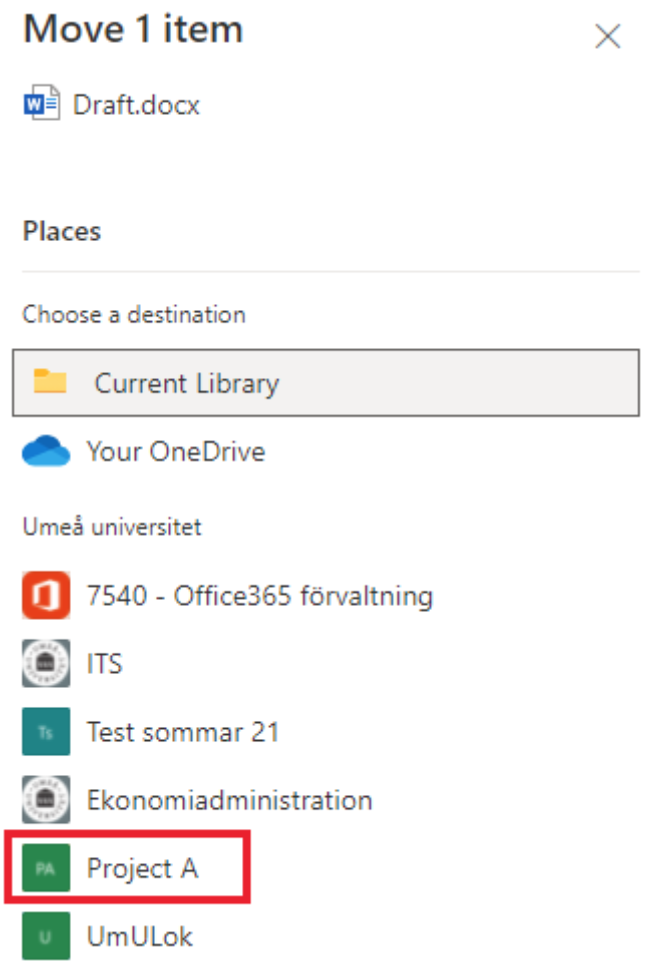
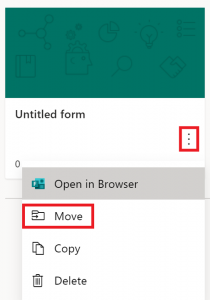
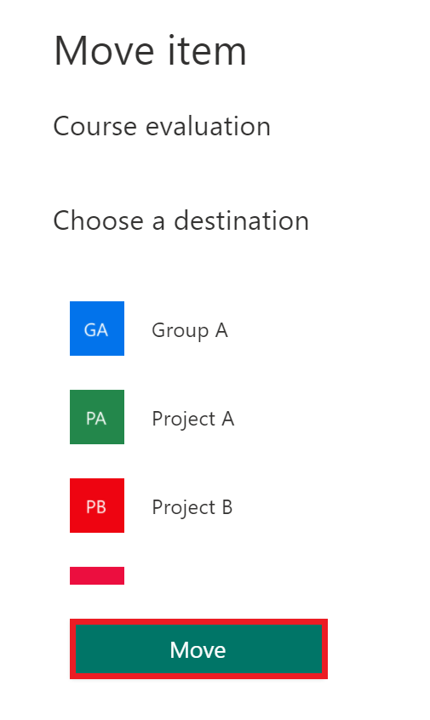
Can I move a form?

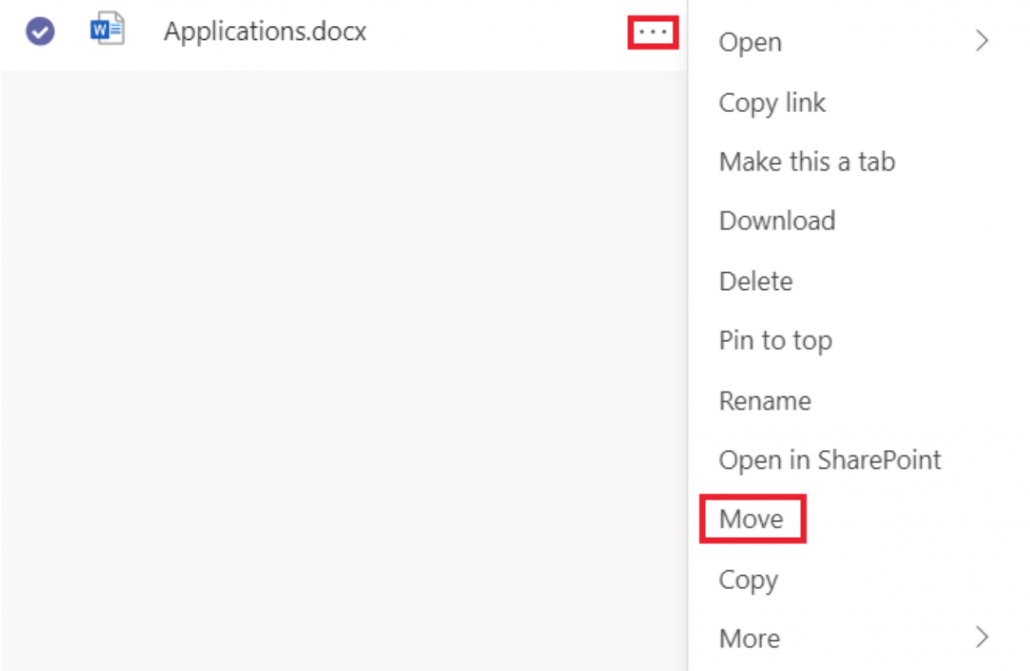
Yes, you can move forms to different Teams or SharePoint sites. Place the pointer on the form you want to move, select the three dots, and then move. You will then see a list where you can choose where to move your team.

See full decription on how to move a form here: Copy, delete or move a form or quiz in Forms

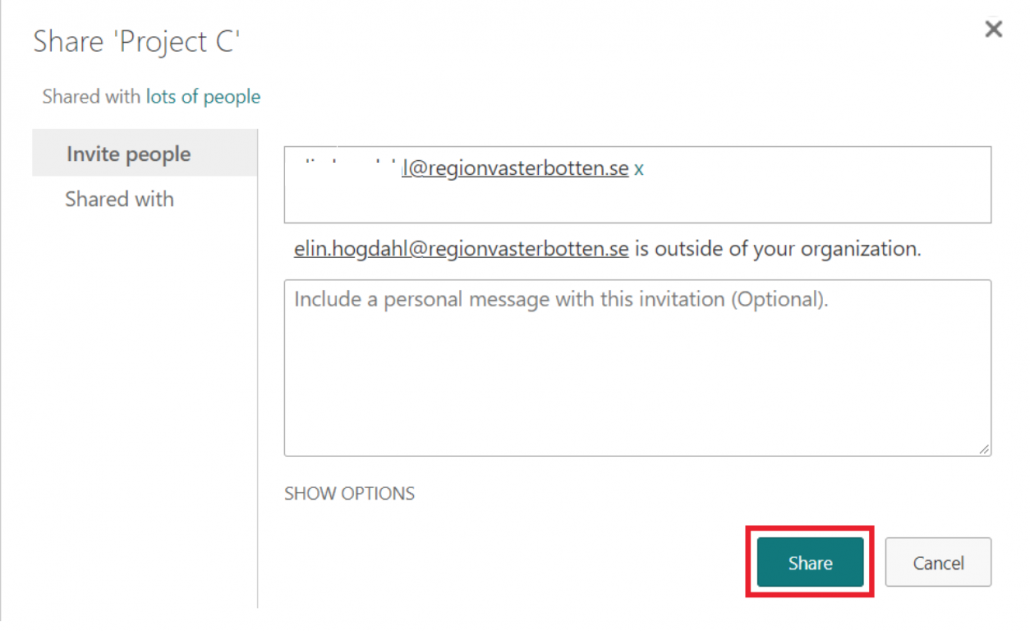
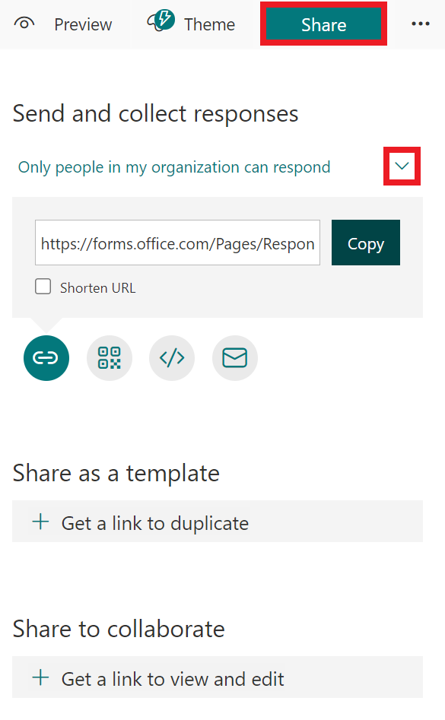
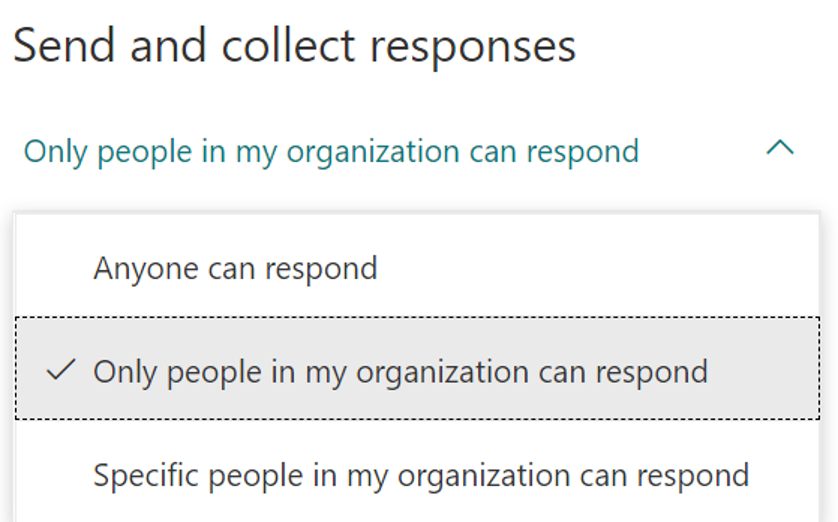
Can someone outside of Umeå University fill out my form?

Yes, you can share your form with anyone. They do not need a Microsoft account or an Umu-ID. To share your form with anyone, go to settings and select Anyone can respond.

See full decription of forms settings here: Adjust setting in Forms

Can I change the color of my form?

Yes, you can change color on or add a theme to your form. You can also upload an image. Go to the form you want to change color on. Klick on theme in the main menu between the share buttom.

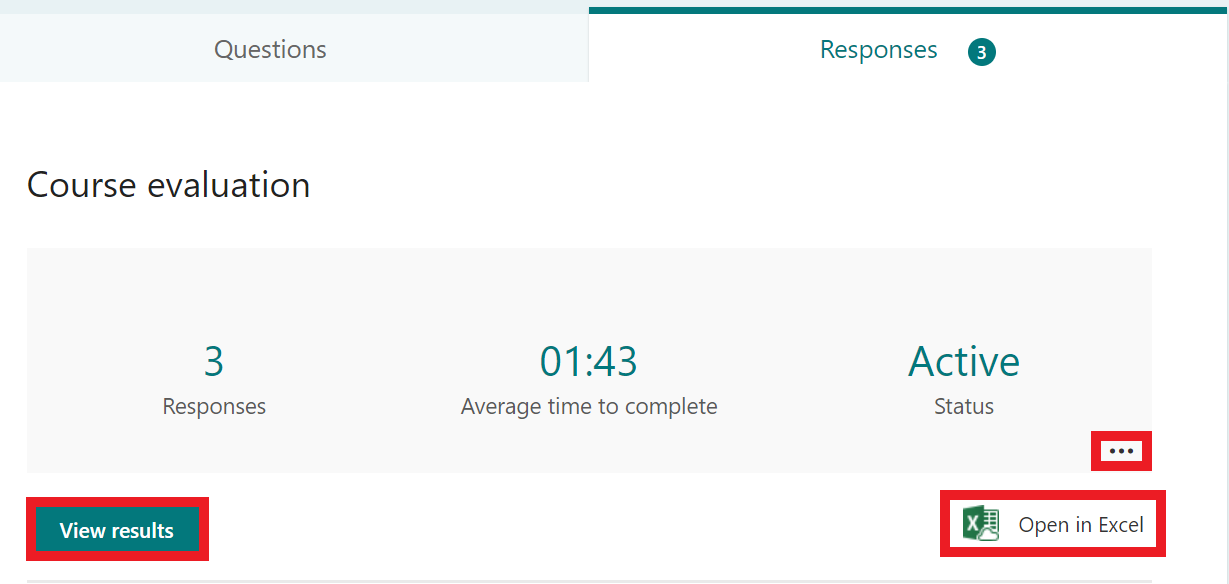
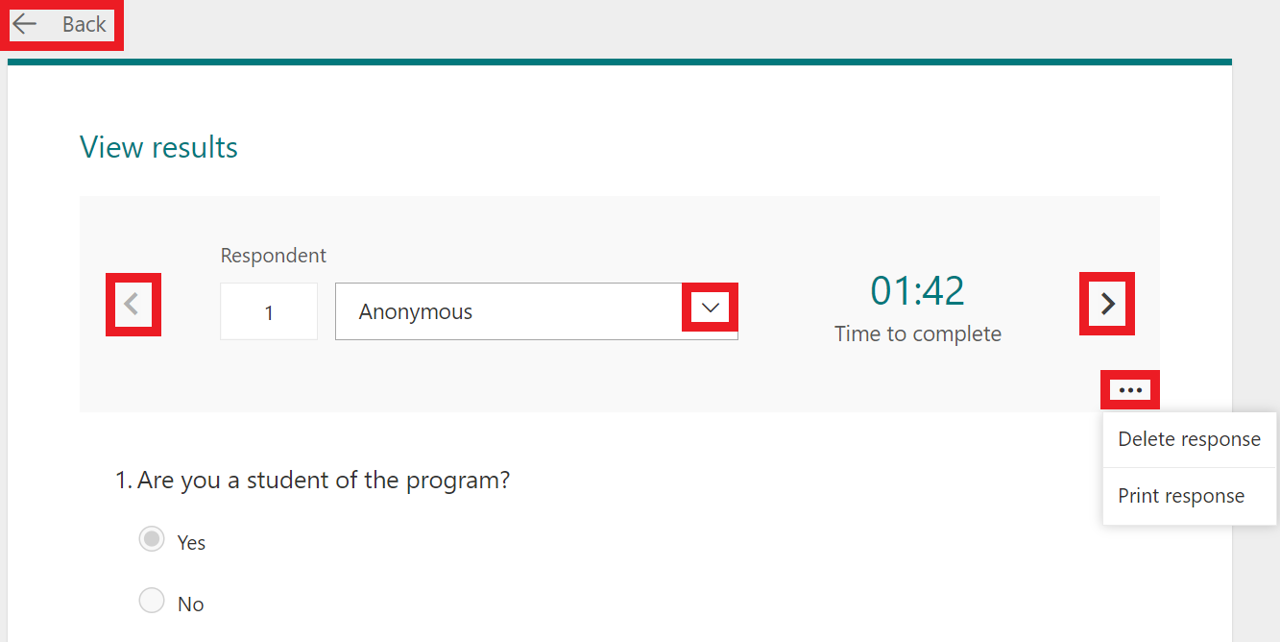
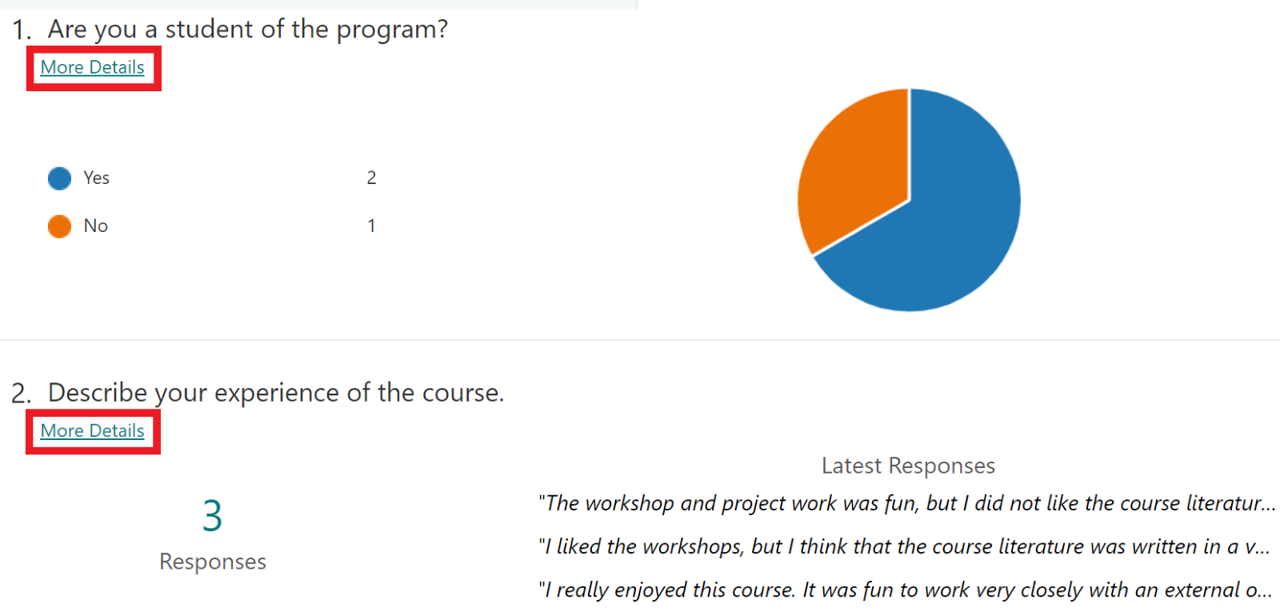
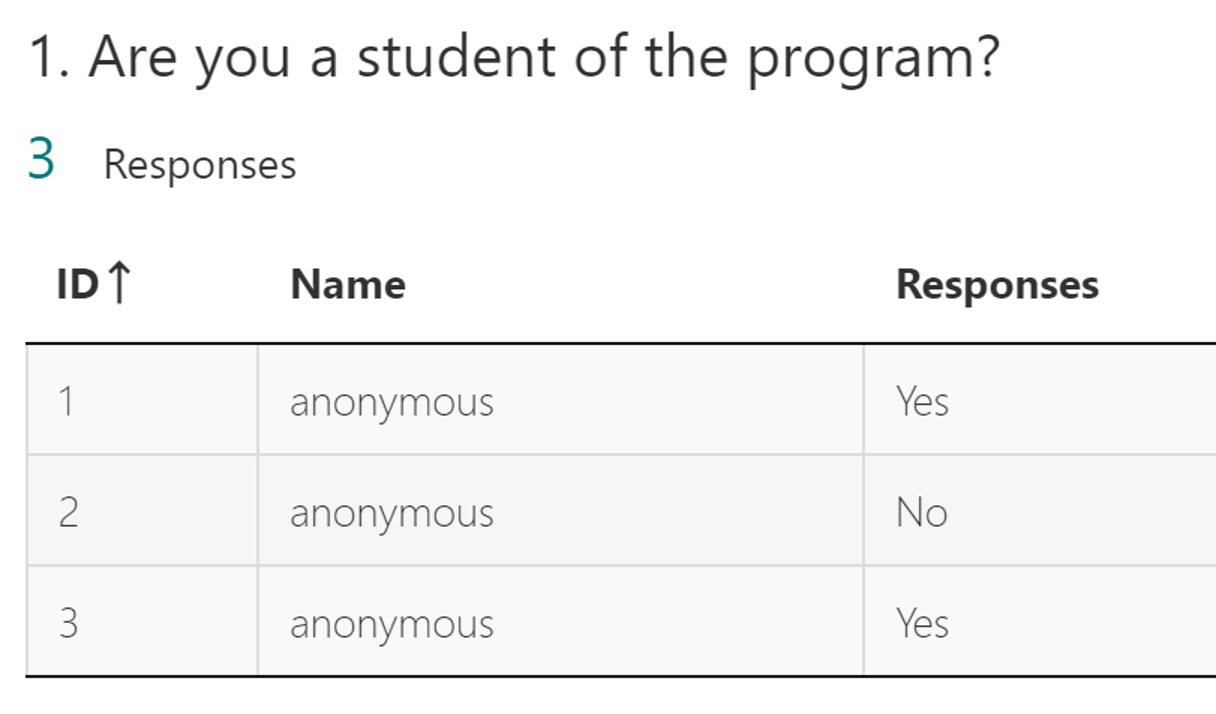
Can I use Forms for a course evaluation?

Yes, Forms is an excellent tool for creating course evaluations. Here are some benefits of using Forms:

Can I delete a question from my form?

Yes, you can delete a question by selecting the trash can. This option can be found on each question.

Can I copy a question?

Yes, you can copy a question by selecting this the copy icon between the trash can. This option can be found on each question.

Can I create mathematical questions?

Yes, you can create mathematical questions in a quiz.

  1. Create a quiz and select either the question type choice or text.
  2. Select the three dots.
  3. Then select Math.

Can I disable my form?

Yes, there are two ways to disable a form.

You can set up a start and end date to your form. This is done by selecting the three dots in the main menu. Select settings and then start date and end date.

You can end the form manually by opening settings and unchecking the box Accept answers. There you can also write a message that will be shown to those who try to open the form when it has ended.

See full decription here: Adjust setting in Forms

Add permission to external guests in SharePoint

In this manual we describe how to invite external users from other organizations to a SharePoint site.

If you already have a team connected to your Sharepoint site, you can invite a member to a team or channel.
If you don’t have a team connected to your SharePoint site, you can add a team to your SharePoint site.

  1.  Go to the homepage of the SharePoint site and select the settings icon in the upper right corner. Then select Site permission.
  2. Select Advanced permissions settings.
  3. You have now accessed the advanced permission interface. Here you can add external users from other organizations by selecting Grant permissions. Keep in mind that the external user will be able to access the entire SharePoint site.
  4. Enter the external users email address. You can also enter multiple email addresses.
  5. Select Share. The people you have invited will now receive an email with the link to the SharePoint site.

Review results in Forms

In this manual we show how to review results in Forms. We also show the difference between reviewing results from a form (survey) and questionnaire (test, quiz).

Review results from a Form (survey)

  1. Enter your Forms portal and select the form you want to view the results from.
  2. Select the Responses tab.
    review results in form - responses tab
  3. Select the three dots to delete all responses, print a summary, or create a summary link.
  4. Select Open in Excel to see the results in Excel. The questions will become columns and the responses will become rows.
    • Note that if you change anything in Excel, it will not change in Forms.
  5. Select View results to see each respondents’ answers.
    review results in forms - responses tab decriptions
  6. Select the arrows to view another respondent’s answers.
  7. Select the three dots and then Delete response to delete the respondents answers or Print response to print them out.
  8. Select Back to return to the responses tab.
    reveiw results from a form - reveiw tab decription
  9. There you can see all questions and a summary of the answers. Select More details below each question to see a list of all the answers to that specific question.
    review results from a form - more details
  10. The list shows the respondents ID, name and response. review results from a form - more details - specific question

Review results from a qestionnaire (test, quiz)

Here we will show the differences between reviewing a questionnaire and a form (survey).

  1. Click three dots to delete all answers, print a summary or create a summary link.
  2. Click Excel Icon to open results in Excel
    • In Excel, each question will become a column and each answer will be a row.
    • The columns show start / end times, names, questions and answers.
    • NOTE! If you change something in Excel, it is not reflected in Forms.
  3. Click Review Answers to review each person’s answers individually. (go to heading review answers)
  4. Click Post scores to select which results you want to publish. (go to the heading post scores).
    review results from a questionnare (test, quiz)
  5. Scroll down in the answer file to see all the questions and answers, in a graphical layout.
  6. Click on the link more details on each question, to see each person’s answers.
    review results in a questionnare - answer file
  7. A list of all participants’ answers to the selected question appears.
    review results from a questionnare - more details

Review results

  1. Click on questions to change the review mode from questions instead of person.
  2. Click on the arrows to change the person/question you want to check results on.
  3. Click on the chat bubble with question marks to give feedback (maximum 1000 characters) on the selected person/question.
  4. Click on the three dots and delete or print answers or publish results on the selected person / question answer.
  5. Click Back to return to the answer file.
    review results in a questionnare - induividual review

Post scores

You can only publish results if you have created a questionnaire (test, quiz).

  1. Select which person’s answer you want to publish by clicking in the checkbox.
  2. Click on preview to review the response you will send to that specific person.
  3. Click Publish scores to send the results to the person. Note: If you publish scores, respondents can view test feedback and results. The respondents can display the result with the same link that they use to start the test.
  4. Click Back to return to the answer file.
    Review results questionnare - grading

Preview and share a form

In this manual we decribe how you preview and share a form or a quiz. 

Preview a form or a quiz

We recommend that you preview your form or quiz before you share it.

  1. Open the form or quiz you want to preview.
  2. Select Preview in the top menu.
    Preview bottom
  3. Select Computer to view what the form will look like on a computer.
    Preview a form - computer
  4. Select Phone to view what the form will look like on a phone.
  5. Select Back to exit the preview.
    Preview a form - phone

Share form or quiz

  1. Open the form or quiz you want to share.
  2. Select Share in the upper right corner.
  3. A menu will open. Select the arrow below the headline Send and collect answers.
    Share a form
  4. Here you will decide who can fill out the form.
    • Choose Anyone can respond if you want anyone to be able to respond. This option guarantees anonymity for the respondents.
    • Choose Only people in my organization can respond if you want that only people with an Umu-ID will be able to respond. This option allows you to decide if the respondents will be anonymous.
    • Choose Specific people in my organization can respond if you want to choose who, with an Umu-ID, that will be able to respond. Then, you will have to enter their names, email addresses or a group.
      Share a form - send an collect responses
  5. Then you will choose how to share your form. You have four options: link, QR code, embed, or email.
  6. Select the chain to share via link.
  7. Select Copy to copy the link.
    Share a form - share with link
  8. Select the QR icon to share via QR code.
  9. Select Download to download a QR code as an image (PNG).
    Share a form - QR
  10. Select the embed icon to embed the form in a website (e.g., Canvas).
  11. Select Copy to copy the embed code.
    Share a form - embedd
  12. Select the mail icon to share via email.
  13. This will create a popup with the link in Outlook.
    Share a forms - mail

Copy, delete or move a form or quiz in Forms

In this manual we decribe how you copy, delete or move a form or quiz. 

  1. Go to www.m365.umu.se. Sign in with your Umu-ID.
  2. Select Forms in the left menu. If you cannot see it there, select All applications and then Forms.
  3. You have now entered your own Forms portal. Select All my forms below your recently opened forms.
    Copy, delete, or move a form - forms portal

Copy form

  1. Chose the form you want to copy, place the pointer on it, and select the three dots and then Copy.
  2. A copy of the form will be created among your saved forms. 
    copy form


Delete form

  1. Chose the form you want to delete, place the pointer on it, and select the three dots then Delete.
    delete form
  2. When you have deleted a form it will be moved to the recycle bin and can be found there.
    Image showing where to find the recycle bin in Forms
  3. In the recycle bin you can restore the form och delete it completely. Click on the three dots of the form you want to delete/restore to do this.
    Image showing how to restore och delete deleted forms

Move form

  1. Chose the form you want to move, place the pointer on it, and select the three dots and then Move.
    move form
  2. A menu will open, and you will see the groups (teams) you can move your form to. Choose a group and then Move.
    move form - select group
  3. You have now moved the form from your personal Forms portal to the group’s portal. A notification will tell you where the form has been moved to.
  4. Select the group name (in this case Project A) to enter the group’s Forms portal.
    Move form - notification
  5. Here you can see members of the group and all forms that are shared in the group.
    Moved form to group form example

For more information about group forms, see manual: Create and mange group forms